Wednesday, August 29, 2007

Who doesn't need a little photo holder for their desk that holds a reminder of why they do it all in the first place?? These little photo holders are created using 2" ceramic tiles from the hardware store and a medium sized clothes pin. I made a lot of these as well. Some are painted, some are stamped with permanent ink and others are layered with images. I trimmed the clothespins just a little and glued them to the back!

These will hold a photo or a card and are a nice little addition to a side table or mantle!!

So those are the new items I spent the best part of August creating!! It is fun to come up with new items and put a new spin on items that you have made before!!

Be aware that if you are creating items for sale you need to respect copyright!! Use copyright free art or items from companies that have liberal angel policies and give proper credit!! That applies to rubber stamps, clip art sheets, stickers, etc. Of course, consider creating with your own art and images for as much freedom as you want!!

Thanks for dropping by and Happy creating!!


Therese in Trenton
Mixed Media Market
http://groups.yahoo.com/group/mixedmediamarket/
Brag books are fun to make and can be customized for any occasion!! I made my first one earlier this year for Mina's pictures - my first grandchild!

I made several with different themes - baby, travel, etc!! This one uses the name badge holders from Staples and has a travel theme on the matt board cover!

The one Linda made uses the name badges from Walmart and is perfect for holding ATCs!! Would make a great table top book or for carrying your ATCs to your next trading session!!

Therese
Always have journals at my sales! I usually cover these with handmade paper and add a "faux leather" paper spine. Decided to be differently creative this year and painted the covers instead! I sanded the covers and painted on a layer in a light colour. Stamped on several images in permanent ink and then added several layers of paint over the top! Finished off with a bit of a metallic!! Very happy with the way they turned out!!

Therese
These so made me think of Harry Potter!!
I created them from plastics which I melted together and embossed with a stamp!! You just never know what you are going to get when you start creating these and that is what I love about the process!! Used some metallic paint to highlight the texture!! I embedded a hanger and added a cord to make a pendant. The center of this one is clear but some of the others have different coloured centers!! Very cool!!

Therese
I made made my little bottle caps with artitude into magnets!! I glued Lee Valley rare earth magnets to the back. I always use their quarter inch magnets because they are so strong - they hold up to 10 sheets of paper to a metal surface!! I also glued large paper clips to some of them for a little added interest and fun!! These easily hold a list or photo while looking pretty on your fridge!! The large paperclips are available at Staples and possibly at your local Dollarama store!!

Therese

Made a whack of these bottle cap magnets!! If you have never tried working with bottle caps I would encourage you to try! They are so versatile and in the end quite slim once they have been pounded!!

To pound the bottle caps: you need unused bottle caps. These can be purchases on line or locally at a beer making supply place. Place them crimped side up and whack with a hammer. The crimps will start to roll and soon will be rolled all the way around leaving a nice little depression that can be filled with art!!

Inspired by Sally Jean I created my own little collages for the center of my bottle caps! I used copyright free art and a layout program to create the little collages which I punched out with a 1" punch. They fit perfectly in the centers!!

Therese
I attended the Women's Art Festival in Kingston as a vendor last weekend!! It is a wonderful outdoor festival with music, children's activities and music - all by women!! I created a few new items for sale this year which you will find in the following posts!!

Created these cute little pins! They are based on the Big Blossom from Stampin UP which was a feature during Sellabration earlier this year and made from shrink plastic!! I paint and stamp then shrink them!! Added some glass beads in the centers for texture and interest!!

Sold quite a few!!

Therese
Handmade paper!! I had a few friends over last week to make paper!! So much fun!! I prepared the pulp and we spent the afternoon making sheets and visiting. Had some tea and goodies too!!

The ivory, blue and white are confetti papers.

To the ivory I added glittery bits of gold - curly ribbon, regular ribbon, foil, embroidery thread. It turned out very nice - I expect there will be Christmas cards made with this one!!

To the blue I added yet more glittery bits!! Iridescent blue green "basket straw", blue foil (Hershey Kisses), several blue curly ribbons, blue lame threads to add glitter and texture. I also added some primsmatic silver gift wrap cut into wee bits. I had a square left over which I blended and added!! Wonderful little glitteries!! These settled on the surface of the paper and most stayed in place once dry! I am thinking snowflakes would be perfect with this paper.

To the white pulp I added black fabric bits, silvery foil, silver curly ribbon bits, silver threads! Makes a nice classic paper which can be used for most anything. Maybe for very classy and simple Christmas cards with some silver accents.

To the pink pulp I added some lemon herbal tea (used) and some red geranium petals that had been dried. I love the look of naturals in handmade paper!!

In the end, everyone took home what they wanted and I dried what was left. I have a neat little stack of 8.5" x 5.5"papers I can reuse in my art!!

I would like to encourage all papercrafters to recycle their paper scraps into more paper sheets!! If papermaking is not your thing, consider passing off your scraps to a papermaker who will make good use of them For those of you who scrapbook, it is a wonderful way to recycle your acid free scraps into paper for your albums!!

I sell the moulds and deckles in four sizes - 3.5 x 4.5 for card fronts, 8.5 x 5.5 for cards, 8.5x 11 for larger projects and 12x12 for scrapbookers, if you are interested in giving it a try!!

Therese

Monday, August 27, 2007

Green ATCs for the August swap on ByHand!! I created these while I was visiting with my friend, Linda. You can check out her blog here! Thanks, Linda, for showing me how to add links to my posts. I stayed a few days and it was nice to have some time to play! Found this wonderful aqua and silver box and decided to use it as the base for my green ATCs. It is fun to create with found objects. I added a collage sheet image to the top one along with a stamped "believe" from her stash. Three eyelets and it was good to go!

The one on the left is also created from interesting coordinating elements gathered from her stash. The heart is a die cut with a ribbon bow glued to it.

On the right, I stamped the leaf on a piece of plastic which I layered onto a scrap of aqua handpainted paper that had a bit of script. The oval was part of the box - I just sanded the surface a little to remove some of the shine and distressed it a bit. I layered all of these together with four silver brads - one in each corner!

You can check out Linda's green ATCs on her blog by following the link above!

I hope you will be inspired to be creative!! Try to use the resources you have on hand for creating art. Check out adverstising and packaging to see if you can create something new with the patterns and designs you see!! More to come, later!!


Therese
Mixed Media Market
http://groups.yahoo.com/group/mixedmediamarket/

Anniversary card

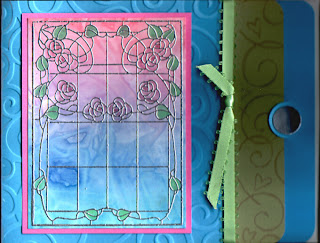
Have been playing with my Cuttlebug D'vine swirl embossing folder!! Just love this background. The tag is from Stampin UP and one of my favorites!! This one looks great in most any colour and you can find one I did earlier in one of my classes in Real Red. I created a light aqua one for a wedding card a week or so ago!! Done in light blue or pink they would make wonderful baby cards!!

There is a current swap on one of my groups featuring Cuttlebug embossed backgrounds! There are quite a few already and a new snowflake one that should make the production of Christmas cards faster this coming holiday season!!

Therese
Decided to do Friendship for my This and That mingle page this month!! I tried something new - colour printing on scrapbook paper! I downloaded a flourish font and colour printed it in blue on this harlequin background. It takes a little bit of organizing to get your flourishes where you want them but I thought it worked out pretty well. You have to test your papers - some are too shiny and the ink will bead on it as my sister discovered earlier working on a project. I added a picture of my friends in a vignette and encouraged the recipient to personalize the page by adding a picture of her friends!! I used the typewriter letters from my MMM site for the word FRIEND at the bottom of the front page. The back is stamped with the Stampendous Friends stamp. I added some fibers on the leading edge for interest and texture. Always enjoy creating these pages!!


Therese
Mixed Media Market
http://groups.yahoo.com/group/mixedmediamarket/
My Stamp Fest ATCs!! We are so fortunate to have a rubber stamping event within driving distance!! I created these for trading with others in attendance at Stamp Fest in Bancroft, ON. I used some of the cling wrap backgrounds I created for the contest as decorative layers for these. All the stamps are from Chapel Road . I added embellishments to some and others did not seem to need anything extra.

There were over a dozen vendors at Stamp Fest this year - more scrapbooking than there has been in the past but still a very good representation of stamps and stamping!! Lots of Make and Takes and demos in the booths, some show specials and discounted items. Lots of people pre order from the vendors to ensure they will get what they are looking for!!

It was a great day! Went up with friends, met friends there, put names to faces from our Ontario group and had a debrief at Tim Horton's before everyone headed home!!

Have a few left over I can trade with others later on!!

Therese
Two ATCs I made for a 2 for 2 exchange!! I always save my fortunes from the cookies whenever we have Chinese food. They are the perfect size for ATCs!! This one seemed to fit so well with this faux postage from Lisa Volrath's site earlier this year!! I made a little layered tag with two punched circles!! The top one has been distressed and is stamped with my Memories magnet alphabet set. I used walnut ink on the fortune so it would "fit" in with the rest of the layout.

The pear is a stamped image from A Stamp In the Hand that I stamped a long time ago using watercolours! I have a little file where I keep images that are left over after a project. They often come in handy!! The "pears" word is laser printed and coloured with watercolour.

Both bases for these ATCs were in my ATC box. I keep ATC materials in a small box - precut bases, small images, some embellishments, fortunes, credit tags, etc. It makes ATC creation faster and easier when supplies are readily available in one place.

Therese
My Canadian Card Exchange cards for August were these two rose collage cards! The rose on the lower left hand side is made of paper! I found it on one of my trips downtown and took it apart! The paper it is layered on is a white paper napkin I used to clean up a brush I was painting with and colours were so nice I decided to keep it. The large rose images are stickers I found at a $1 store that I thought would work perfectly with the paper roses and the coloured paper napkin.

The card base was stamped with a script stamp and then stippled with Memories ink. The old music sheet was stained with walnut ink and stippled with Memories through a scroll stencil. Collage is a process. It took a little while before all the elements worked together. I layered two punched flowers onto the paper roses and attached them to the card with an antique gold brad.

I am very happy with the way these two cards turned out!! I often keep an eye out for items that will work with others I have at home and try to buy only when I really like something or it "speaks" to me. I will often find items coming together that were not purchased together or even with either one of them in mind. It is best to be open to the creative process and let it lead you!!

Therese

Sunday, August 26, 2007

I used the pearlescent ink background on this card! I created the embellishment using punched shapes. I layered the small punched flower on punched circle (5/8") and then that onto another punched circle (1"). I glued them to a regular paperclip to so I could slide it onto the ribbon!! Worked out quite well, the paperclip is not visible but the whole embellishment does slide nicely!!

I have much more to add which I will get done over the next week or so. Check back later for more!!


Therese
Mixed Media Market
http://groups.yahoo.com/group/mixedmediamarket/


These two cards were created with the Kaliedacolour pad backgrounds!! Therese


I used the walnut ink background on this card. It was fun to play around with images and give this one a more vintage feel. I did a bit of masking to have the images appear in the text. I created a little wreath of pearl beads on a wire and then wired it to the brown velvet ribbon. The flower and fern are real pressed botanicals.
Therese

I used a tube watercolour background on this card! The vibrancy of the background works well with the more solid looking stamp.

Therese

I really like creating cards with these alcohol and ink backgrounds!! So much potential!!

The daisy card has an embellishment I created using a clipola and a short piece of a wood stirrer stick! I thought it worked well with the ribbon.

I used a self made background rubber stamp on the outside of the Dream card.
Apply cut offs from your SU stamps to a piece of wood. It creates a sort of random background stamp that goes well with the cling wrap backgrounds. Therese


Cling wrap backgrounds created using white glossy cardstock and Kaliedacolor spectrum stamp pads. I brayered the cardstock with a well inked brayer and then spritzed on some water to make it wet. The dye ink then lifted a bit and was manipulated by the crumpled cling wrap. On the right - Creole Spice and on the left - Royal Satin.

The cling wrap I used on the left background is the one I reused on the walnut ink background which gave me the red and blue in that background.

These rolled a little because of the water on the glossy cardstock and needed to be weighted down just slightly.

Therese

My Art - background

This background was created on matte cardstock using pearlescent acrylic inks!! Just applied the colours without mixing too much and laid the crumpled cling wrap over it. The scan does not capture the pearlescense of the paint but it does make a very effective background. You can use any acrylic medium to make these backgrounds. I would recommend thinning regular craft acrylic paints to a soupy consistency to get the best results. Consider adding a bit of metallics to your work for a little sparkle. One of greatest advantages in creating your own backgrounds is how unique they all are and how little they cost!!

Therese
This cling wrap background was created on matte cardstock using walnut ink. I placed a "used" piece of cling wrap that had some colour on it over it which introduced the new colours to the background. Gave an interesting effect! This is quite an unpredictable process but sometimes it yields the most interesting backgrounds.

Therese


These cling wrap backgrounds were created with rubbing alcohol and SU reinkers on white glossy cardstock!! These are really great!! Just create a regular alcohol background by pouncing your cardstock with a felt dabber loaded with alcohol and dye ink in three coordinating colours then while it is still wet add a crumpled piece of cling wrap to cover the surface and leave to dry. The lighter ones were created by just adding more alcohol to a used dabber. I like the dimensional aspect of these backgrounds!!

Therese
These cling wrap backgrounds were created with tube watercolour in yellow, red and blue on white matte cardstock (110 lb cover from Staples). I really love the transparent and vibrant colours!!
Therese

My Art - backgrounds

I am finally back to my blog after more than a month of working on several different art projects and taking a few days off here and there!! Unbelievably, the summer is drawing to a close and many will be heading back to school and most of us back to our regular routines after the summer break.

I made a whole pile of cling wrap backgrounds for a contest over at Wendy's site - Stamp and Scrap Canada . It is a very fun technique that can be used with a wide variety of media - watercolour, ink pads, alcohol inks, acrylic paints, etc.


These were made with some pan watercolours in a variety of reds and greens on matte cardstock!! I used quarter sheets of matte cardstock (110 lb from Staples) and just brushed on some watercolour. Crinkled up a sheet of cling wrap (cheap is fine) and then laid it onto my wet paint. The colour runs along the crinkled surfaces and creates a random pattern. Just leave to dry. It is a bit like Christmas when you take off the cling wrap to see the pattern that has been created! I will be posting some of the other paper I made in the same session.

Therese