Wednesday, October 20, 2010

Quick and easy embossed cards!

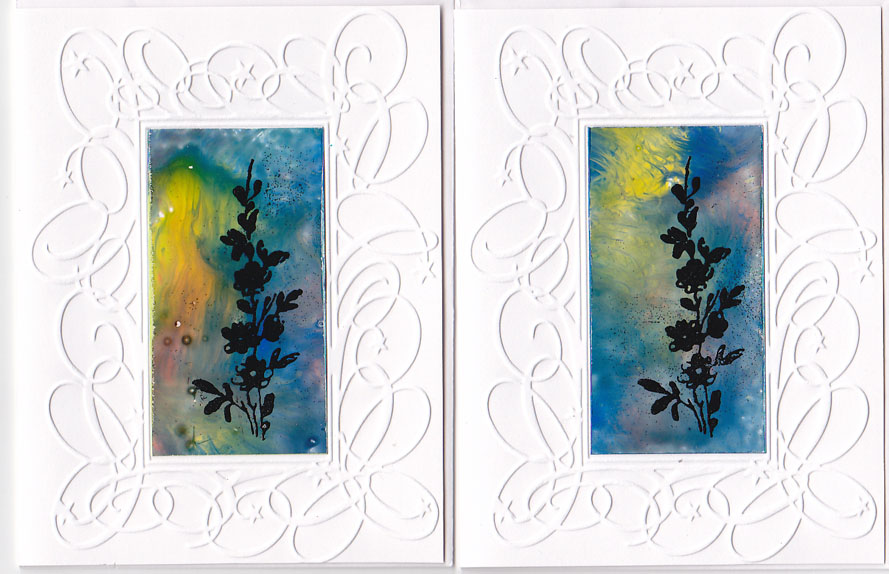
These are quick and easy!! The embossing folder is one that is so versatile, manufactured by Crafts-Too and sold locally at Ecstasy Crafts!! My head is spinning with the options but for tonight's class I just went digging into my stash for colourful papers that would best show off this beautiful swirly frame!! I cut the pieces of decorative paper just the size I needed to fit inside the embossed frame, stamped and/or embossed them in black and glued them in!!! That easy!!
So get creative and see how many ways you can use your embossing folders!!

Therese

Clear embossing powder resist


Another resist technique!! In this case, I used clear embossing powder as the resist. Stamped the image with Versamark on white coated paper and clear embossed. After some experimentation, I went with Distress inks on these backgrounds. I applied the ink in a circular manner with the pads directly to the paper, rubbed it lightly with a dampened paper towel which softened the inks very nicely and somewhat removed the ink from the clear embossed image. I did go back in with a barely damp paper towel and remove yet more ink from the embossing powder. I think classic dye inks might have worked better for this purpose but I was really liking the look of the distressed inks!!


Thrifty Tip: I did spritz the paper towels after I was done and wadded them up to disperse the inks which works so well with the distress inks. Colourful decorative papers to be used another time!!
I layered the birdie images with a white cardstock layer to which I attached, with double sided tape, a little piece of eyelet trim. Finished it off with a colour printed greeting attached with 3D foam taper. I created the greeting in a layout program (Corel Draw) so it could be punched with my large oval punch (SU). It is a great way to create custom greetings and gives you a wide variety of colour options especially useful when you have a limited amount of stamp pads!!

Therese

Glue resist technique

Here is a close up of the decorative paper I created using the glue resist technique described here!! I "printed" with the glue several times on this sheet and the areas blended very well and did not leave obvious edge marks.

So experiment with your embossing folders!! Be sure to scan the paper you create for use in your digital art!

Just another way to use what you already have!!

Therese

Glue resist and tag cards

These cards feature background papers created with a glue resist technique!! Yes, I was on a resist technique kick!! In this case, I used my embossing folders, again, to create the resist. I spread glue onto the "bumps" of my open embossing folder with a brayer (be sure to wash both before the glue dries), laid my mustard gold paper on it and rubbed the back to transfer the glue!! Repeat until your paper is covered. Worked very well!! Once the glue was dry I used washes of acrylic paint to add colour to the paper.

After experimenting with a few options I discovered that the easiest way to remove the colour from the glue was to place a sheet of bond paper over the wet one, rub the back of it and pull it off. If you keep using the same paper to remove the colour from the resist you get a bonus sheet of decorative paper you can use at some other time. It may have been the type of glue (wood glue) I used but I found it difficult to remove the acrylic wash from the resist areas once it was dry. I expect white glue would give better resist results. In the end, I am happy with the grungy look of this paper and it suited my colour scheme very well.
The paper is ripped in the middle to give some interest and texture to the background. I added an embossed tag that features a coloured image and attached the whole thing to the card front using 3D foam tape which adds dimension. I love the rick rack which adds a touch of country to these cards and really works with the colour scheme.

Therese

Wax resist backgrounds

Here is a sampling of the wax resist backgrounds I created for my class!!
I spent a few hours playing with this technique and finally settled on using coated paper as the substrate because it gave a nicely defined resist image. You can certainly use cardstock or even thinner paper for a different look. Experiment with what you have. You can read the instructions for this technique here!
I used clear wax but you could certainly use what you have for a different look - coloured wax crayons would add a very different dimension to the look of this technique.
I am very happy to have found yet another way to use my embossing folders!!

Therese

Wax resist and postage sticker cards

Another successful evening of cardmaking!! Lots of new people and a fairly large group but we managed to get out in good time!!
These cards feature wax resist backgrounds which I created using my embossing folders!! Check out this post for more information on how I did it.
The images are postage stamp stickers made by K&Company which I bought at Michaels when I was there last week. They are all the same size which works well for a class but a variety of designs which I find works well for me in my classes. I like to change up the element and cardstock so everyone willl have
different looking cards.
This is a fairly versatile sketch as the card can be landscape or portrait and the 3D element can also have either orientation which gives several options with the same supplies!!
So, the sticker is mounted on coordinating cardstock and trimmed. The ribbon is attached to the back of the decorative paper and then this element is glued to the card front. I used 3D foam tape to attach the sticker element to the card, overlapping the ribbon, because the decorative paper is a bit waxy!!

Therese

Tuesday, October 19, 2010

Birdie exchange card

I am meeting with my card making buddies tonight and this is the card I made for the exchange.
I have been playing with ways of doing resist for my class tomorrow night. Check out the background - it is one of the resists I came up with. A wax resist technique that uses an embossing folder and clear wax!! I placed my paper on the "bumps" of the open embossing folder, rubbed over it with clear wax crayon then added a watercolour wash!! Voila!! A great looking background!!
For this card I mounted my background on a white card front. The bird is also a resist technique - clear embossing powder on white cardstock - to which I added a watercolour wash. They compliment each other. Layered the bird on white and added a bit of lace below that and a colour printed greeting!!
Thrifty Tip: Where do you get clear wax crayons??? I am sure they exist but I created my own by cutting up a bar of paraffin into little bars with a hot knife and then rounding them on griddle surface covered with foil. Works very well. You could use a white wax crayon on white paper, or a yellow crayon on yellow paper, etc which would allow you to use the crayons you have on hand for this resist technique. On the other hand, a crayon of a different colour would give you a totally different look!! Will have to investigate that later!! I found that the rubbing was more defined on paper - I used coated laser printer paper - but you can use paper or cardstock. You can use anything with a textured surface for rubbing as well - fabric, lace, woven mats, screening, texture plates, etc, etc - but I was happy to find another use for my embossing folders.

So play a little today and see what you can do using this resist technique!!

Therese

Monday, October 18, 2010

Halloween contest card

Another Class Act contest card!! I received the mermaid as a prize in a previous contest and with this contest's theme being Halloween I decided to see if I could make a card with the mermaid!! I am happy with the card but I think it might need a greeting or something in the lower left hand side but, for the moment, I have left it without.
Stamped the mermaid in black, embossed her with black embossing powder, coloured her in with pearly watercolours in deep green and orange and trimmed her close! Printed off the scary house - internet find - and trimmed it close as well. Added a large punchie in orange - moon - behind the house and cut out a bat from glossy cardstock to add to the sky. Used some pearly gold cardstock for the water and a piece of torn grey cardstock for a rock for her to sit on!! I laid all of these onto a black background and then onto a bright orange card front!!
Halloween is a stretch for me artistically!! Keeping it simple helped me to create a piece I am happy with!!

Therese

Thursday, October 14, 2010

Transportation - Steampunk ATCs

Have been working on ATCs for the last day or so!! The theme is Transportation in the Steampunk style!! I first had to do some research to figure out what Steampunk was and then do some searching around on the internet for images!! I did find some free images that would suit the theme so I resized them and printed off my sheet and got busy!! The backgrounds I downloaded from Cemerony - Freebie 11 which is a colourful map of Paris that I thought would be appropriate. The gentleman I downloaded from this Flicker collage group from an artist - artbychristi. The train is a Dover clipart image. The car is just one from the internet somewhere. The lady's dress is from a paper doll image - thought it had credits on the page but, alas, no!! I will see if I can find it and link it when I do. The lady's head is from one of Kelly Burton's collage sheets - I just cut out the head and layered it onto the dress. The woman's face is also cut from somewhere ages ago and I do not know where I got the original.
For the left one I printed the background to which I had added the gentleman's face then using acrylic medium I glued the transparency with the car over it. I surrounded the woman's face with an open metal ring and added some clear acrylic medium to glue them to each other and give it a nice glossy look. The round letters are a set of typewriter letters I created for myself before there were fonts that would do the same thing. I just punch them out with a 1/2" punch. The word " journey" is printed on label using a Dymo font. I added an A inside a black cogged washer - no idea where it came from. You can find star washers - toothed lock washers - at a hardware store and colour them with alcohol inks or Sharpies that would give you the same look.
The one on the right has lots of layers. I coloured the dress and added the head and collar from another image. I trimmed the oval gentleman, glued him to the altered tag, added twill with a safety pin and a little gold heart charm. The train is trimmed close, coloured and glued to the bottom edge. I did add a bit of a book page behind the lady so she would stand out more from the busy background. The little metal disc - $1 store years ago - seems to just belong there!!
So now onto the rest of my day!!

Therese

Tuesday, October 12, 2010

Leafy card

Needed a large card - big enough to hold a CD!! I remembered I had purchased a set of the large card and envelopes at the craft store (M) a few years ago so I went searching and found them.
These stamped punchies from my stash worked perfectly for this card!! I layered the nine punchies on green and stamped a greeting which I attached with brads below them. Added some texture to the card front by stamping in light green with a script stamp and added the embellished rectangle to the card front.
Quick (not counting searching time) and easy!!

Therese

Thursday, October 07, 2010

Flower ATCs!

Flower ATCs!! I just received my envelope from a flower swap and got a cool little supply of handmade flowers!! Two of them were just what I needed to add to these two ATCs in a trade with Beth. She sent along some Japanese paper in trade for this little house ATC I made a while back!! She always makes great ATCs!!
ATCs are very cool because they are so small they don't take a lot of supplies to make and usually not too much time as well.
For the left hand one I added a black border on my pink ATC blank. Linda often adds these kinds of markered borders to her journal pages and I think they are so neat so I gave it a try. Added an embossed layer and then this layered punchie flower!! Added a black stem with a marker, cut out the colour printed words and glued under the flower!!
For the second one, I found the saying in my stash of goodies gleaned from items that are headed to the recycling bin. Glued my flower on the left of my mustard ATC blank and layered on my saying after I altered it with a bit of yellow ink to help it coordinate with my flower and background. Added a sticker to the lower right hand side and some piercing at the flower's edge. Stippled a bit of green over everything to help give it a cohesive look.

Therese

Glittery blue tags!

Worked on these glittery tags yesterday afternoon!! These are for a swap and I am not sure if they are appropriate so I will ponder that for today and see if something else comes to me!!
I started by die cutting the snowflakes (SU SX) from adhesive backed paper and adding fine blue glitter to the sticky surface!! I cut the scallops from mirror card and added Spirelli with blue glittery thread to the edges. I punched out a large snowflake (MS) from the center and backed it with foil (yogurt top) which contrasted nicely with the mirror finish then added the blue glittered snowflakes with a silver brad. For the other side I stamped a little saying in blue all over white and die cut my scallop circles from that. Glued my other two blue glittered snowflakes to these then glued both of the sets to either sides of a larger scallop cut from medium blue cardstock. The last thing I did was add blue Ice Stickles to the scallops on the white and blue layers and left them over night. I have scanned both sides for you to see.
These will be great for the silver challenge on the By Hand challenge blog for this week!!

Therese

Wednesday, October 06, 2010

Autumn Leaves Swap card

Got creative this morning!! Worked on a card for an Autumn Leaves swap on one of my groups!! I started with the background paper - it arrived in the mail this week - gorgeous leaves in red, burnt sienna and olive - on a flyer for a vehicle!! I added a black border on all the sides with a marker and all over stamped it with a script stamp in chocolate brown. Before I cleaned my stamp I rubbed the inked rubber on the edges of my green cardstock to just antique them a bit. I stamped three leaves in brown, watercoloured them and added some acrylic sealer to just give them a bit of a sheen. When I used my heat gun to dry them the sealer bubbled a bit and gave them a bit of texture - bonus!! I ripped apart the vellum quote, stippled the pieces with red, green, yellow and brown ink, wrapped them around the background paper and attached this layer to the card front. I added punched leaves which I had embellished with watercolour in an all over pattern and then glued down my large leaves with 3D foam tape in a pleasing arrangement.
Thrifty Tip: I always check my incoming mail for anything that would be good for including in my art - backgrounds, coloured glossy, letters to be cut out, text that can be over stamped, interesting images, etc. Worthwhile checking your recycle bin for items that can be reused - tissue boxes - great for making ATC blanks, clear plastic for die cutting shapes, foil tops from yogurt, etc that can be embossed, newspaper text to be used as backgrounds, boxes that can be used for chipboard, envelopes that can be ripped open and stamped or die cut, an old phone book that can be used as a gluing surface (glue and rip out when too gunky), magazines pages for making paper beads or faux cloisonne, etc.
The weather is cooling and leaves are changing colour!!

Therese

Thursday, September 30, 2010

Exchange cards - autumn flowers

The Canadian Card Exchange is back up and running thanks to MJ who has stepped in to handle the next six months!! It is a fun exchange and I enjoy sending and receiving the handmade cards!!
As a background I used printed photos which I received in one of my goodie packages this week in exchange for a little house ATC , added some coordinating ribbon on the bottom edge, a cut out flower embellishment and a distressed colour printed greeting!!
The flower embellishment features white core cardstock which has been embossed (SX) and then sanded.
I acquired some white core cardstock (CTMH) at a garage sale last week and am now going to see how many techniques I can come up with to highlight its unique white core. Did a bit of an internet search for techniques which yielded several ideas I had not yet thought of!! There are several other companies out there that create white cardstock - DCWV (Die Cuts With a View) is one of them and it is available at quite a few different locations including Michaels.

Therese

Wednesday, September 29, 2010

Another little house ATC!! I made this one for an "ABC - Anything but a card" challenge on one of my groups. I changed up my house - made it brick instead of wood siding and also created a new front door for it!! Colour washed the siding and the roof and added a little wreath and a new saying "From our house to yours!!" so it would be appropriate for sending as a Christmas card. For someone crafty you could send it ready to be assembled or you can send it as a folded ATC that they get to transform into a little house ornament for their tree!! Would be great to include a tag with the year on it!! So many possibilities!! If you are interested in trading for this little house check out my posting here for the details!!

Thanks to those who have already traded!! I hope you enjoy the little house and get creative with it!!

Therese

Saturday, September 25, 2010

Reindeer - Christmas card challenge

More Christmas cards!!
Karen's theme for September's Christmas card challenge is reindeer, so that is where I started. This 4.25" x 4.25" card will also satisfy the "anything but an A2 sized card" on Christmas Cards All Year Round, the "distressed " theme over at Sparkles blog, the ribbon and bows theme over at the Quietfire blog and the "bling" theme over at Crazy for Challenges!!
I used my distressing tool on both layers on the front and stippled the edges with brown ink for a soft distressed look. Layered the scallop circles and mounted it to the card front over the ivory ribbon.

Check out the close up of my "bling". I added some dots of iridescent glitter glue on each scallop and on the lower right hand side and sprinkled on yet more glitter for a very sparkly look!!

I made five of these tonight and have four more in the works which I will finish tomorrow!!

I am really enjoying making Christmas cards!!

Have a great day and thanks for dropping by!!

Therese

Star Cards - Christmas card challenge

I am finally getting to Christmas cards!!
I created these for Sylvia's Christmas card challenge - stars! To make the decorative paper for the stars I started with glossy paper - very shiny and did not work out well for polished stone - and my homemade acrylic stained glass paint. I just smooshed the paint on with a silicone brush (for basting) and mixed it up a bit. The paint is very transparent and glossy so the paper ended up being was very bright and vibrant. Once dry, I used black pigment ink to stamp it with my large scroll stamp and embossed it with black embossing powder!! Very nice!! I made a star pattern similar to the one Sylvia used, traced it on the back and cut the stars out with an exacto knife. The card is duplex paper so I embossed the front with the Swiss Dots (CB) embossing folder and sanded just a bit to give it a starry night sky look!! Added a printed vellum greeting and mounted my star with 3D foam tape.
Four more cards for Christmas!!
It is not too late to get started now and get your cards ready for the beginning of December!! For inspiration check the links on the right hand side of my blog for Christmas card challenge blogs and get started!!

Therese

Thursday, September 23, 2010

Domino Book

I created this cool little domino book for a swap on one of my groups. I am very happy with the way it worked out!!!
I created the 5 pages using a crescent tag die. I cut a tag from chipboard, put it back on the die with the square end on the crescent end and cut it again. A chipboard shape with two crescent ends!! I glued black handmade paper to the back and the front of both covers, trimmed & coloured the edges and punched the holes. I embellished two black wooden dominoes using gold mica powder

and spray lacquered them with gloss finish. Using Goop, I glued them to each other side by side, glued that combination to the front cover and glued E Beads in red and gold on each side. Did exactly the same to the back cover. Bound my book with red quarter inch ribbon and a handmade paper bead. Added lock and key charms to the binding and a tie to keep my book closed.
I glued red paper to both sides of my inside pages, embellished them with black script and edged them in gray Memories ink.

Laid out my words and text, colour printed and trimmed them to fit my pages. I die cut "U", "R" and a circle with a hole in the shape of a heart from black cardstock and backed them with gold foil paper. Glued them on the back of my pages, in the center. So reading this book from the front and from the back it says - you are love!! How cool is that!! Added the title on the inside front cover and my swap info the inside back cover with white gel pen .


It was so fun to create this little book!! I love creatively working out the size, the content, the embellishments, the binding and making it all work together.

Will be sending it on its way tomorrow!!

Therese

Dyed tissue paper!

One of the instructions I had read suggested that the silk could be dried by pressing between sheets of white tissue paper!! Too easy! I dug into my tissue paper box - mostly tissue paper that has already been used several times to wrap gifts - and dug out a few white sheets. I covered my ironing board with a towel to protect it, laid down several sheets of tissue paper before laying over it my wet piece of silk. Covered that with several sheets of tissue and ironed on low heat. Kept moving the tissue paper around so it would not get too wet and here is what I ended up with - about 8-9 sheets of dyed tissue paper that looks really cool and interesting!!! Not sure what I will be doing with them but did read on line this morning, on a blog, a tutorial for making paper fabric that used tissue paper. This tissue would make very interesting paper fabric. Will have to revisit the site and familiarize myself with the instructions and the supplies needed!! A total bonus - very inexpensive art supplies!!

Therese

Dyed silk

I played all morning at dyeing silk. One of my stamping friends taught our group to make silk scarves a few years ago and we all left with a few small pieces of dyed silk, a beautiful scarf, leftover supplies from our class and aspirations that we would be making our own at home. Finding several white silk scarves at a thrift store a few months ago piqued my interest in digging out those paints and being creative with them. I searched on line and read several tutorials then reread the first part of our class instructions and got started. Needless to say when the first piece was not properly dyed I went back to the instructions and redid it. For best results, it is important to read the instructions and follow them carefully. Better the second time round and then I was off to the races. I ended up with 9 large pieces of dyed silk in a large variety of colours!! I am loving them!! They are all so interesting and gorgeous!! I will be scanning them all, in pieces, to use in creating digital art. I am not sure exactly what I will be doing with the silk. Maybe fabric ATC s, mini quilts, book covers and some of it will end up in cards for sure!!

If you have a project or technique you have been wanting to try - make a date with yourself and get started!!

Therese