Friday, November 15, 2019

Slow Stitching - first yellow square

Here is my first square in my Slow Stitching project!!  I started with stitching down the strip on the left.  I did running stitch in the center to keep in place and added blanket stitch on one side and cross stitches on the other.  Next I added the blue square using small stitches all the way around and longer stitches to create a flower in the center.  I added the green triangle and did running stitch in both directions on it.  The little portion of a pansy on the upper right was stitched down with running and seed stitches.  It has been positioned away from the edge to allow a quarter seam allowance when it is incorporated into a project.  The other scrap was stitched down with running stitch and finally I created the heart shaped element.  I started by drawing a shape using a pencil because I noticed that I am not easily able to make straight lines with my stitching and I did want my heart to look like a heart once I was done.  I started by stitching the end of my little fabric strip to my fabric in the dip of my heart.  I used green floss to couch my strip onto the line that I had draw which worked quite well.  To finish it off I cut my strip and stitched down the end over the end where I started.  I think it will be sturdy enough to stay in place.  I made a real effort to not pull my stitches too tightly in order to not shrink my fabric square.  Once it was ironed it still measured 4" square!!!  I have backed this square with some white fabric because the yellow was so thin I was not sure it would be able to carry the weight of the stitching.  I am learning as I go!!  So far so good!!!  Therese

Slow stitching - a new project!!

 I have decided to start a new hand stitching project and will be modeling it after "slow stitching" which Liz Kettle promotes as stitch meditations.  After some health issues she wanted to find a meditation practice she would do every day and developed this process for herself.  I have tweaked the process in that I have decided to start with 4" squares in rainbow colours which I hope will yield squares which I can later use in sewing projects. I have cut 5 sets of six squares (yellow, orange, red, purple, blue and green) to begin with using up scraps and finding the colours I needed in my stash.  I have decided to use a sort of collage technique on my first set using small scraps to execute a heart theme.  I dug through and sorted my small scraps drawer into colours so I could easily pick pieces to coordinate with my coloured squares.  I have collected a few scraps for each square and for hand cut hearts.  I will be creating hearts by couching a strip of fabric for the others.  I have decided to forgo any embellishments in case the squares end up in quilts where they will be handled and washed regularly.  If they end up in other sorts of project I will consider adding embellishments once they are part of a project. 


Here is my first set of squares ready to go!  

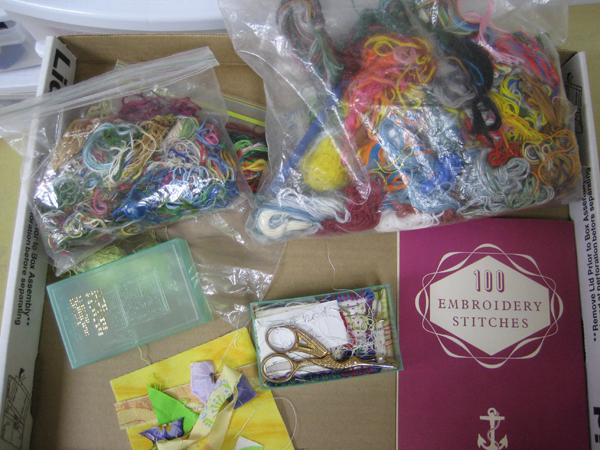
I have collected my stitching supplies in a box lid - thread, needles, pins, scissors and my small book of embroidery stitches.  My little book will be a good reference as I am not familiar with many stitches.  I will be putting my scraps down with raw edges and would like to use wide stitches to properly secure the raw edges as I am stitching them into place.
I started on Tuesday morning with the yellow square and I will be sharing it in my next post!!
I do enjoy hand stitching and it is very peaceful to do a bit of stitching first thing in the morning!!  Therese

A birthday card that features fold over rectangles to create an opening filled with a little flower

This card kit was featured at my Special Card Class in May   It features double sided cardstock with the back design being revealed when the middle section corners are folded up.  I cut four rectangles and scored the corner and then mounted them to a green card front.  It middle element was created by layering  an embossed flower shape over a 1.75" circle punchie and finishing it off with a 1/2" circle in the center of the flower.  I adhered it in the center.  I added the stamped greeting below with 3D foam tape.

Therese