Showing posts with label template. Show all posts

Sunday, September 20, 2015

OSW - 6x6 - 3 cards - #5 - Sympathy, birthday and Christmas!


I worked out another One Sheet Wonder template that allows you to create three cards from one sheet of 6"x 6" decorative paper and three sheets of cardstock - one neutral and two coordinating colours which in this case was green and maroon.
I was in need of another sympathy card when I designed this template to create three cards.  At the same time I created a Christmas and birthday card because that worked pretty well with my decorative paper.  I used digital images from Beccy's Place and added greetings in Corel Draw before I laser printed them on the sheet of neutral cardstock.  I cut all three sheets of cardstock in half and folded one of each colour in half to create my three card fronts.  I trimmed the decorative paper according to the cutting template. cut my greeting/images apart being careful to ensure that I could fit all the pieces I needed in before cutting anything.  I cut three cut maroon layers (1 7/8" x 3") for my images and then cut the other pieces I would need from my scraps.   I used four of the 1" x 3" decorative paper pieces on this card gluing them equidistant from each other and the edges on the ivory/neutral card front.  I sponged the ivory strip with maroon ink after I punched it with the scallop border punch so it would better show up on my card.  I added the green strip and then glued this element over the bottom edge of my decorative paper strips.  I watercoloured my image and adhered it to a maroon layer then glued it to my card front.  I added clear dots of Dimensional Magic to the scallops and let it dry over night.  It adds some subtle dimension to my sympathy card.
Next, I worked on my Christmas one.  I glued the 3" x 3" and one of the 1" x 3" strips to a 3.25" x 4.5" layer of ivory/neutral cardstock leaving a gap in between.  I cut a piece of green cardstock 3/4" x 3.25", embossed it with a wordy Christmas embossing folder and glued it in place over the gap.  I glued this whole element to the maroon card front.  I watercoloured my image, glued it to a maroon layer and mounted it on my card front overlapping the green strip using 3D foam tape.
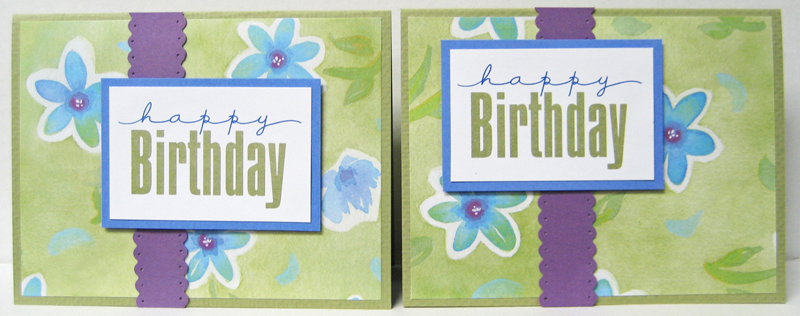
For the birthday card, I glued the last four strips of decorative paper to my card front (see the sketch) leaving very small margins between the edges and the pieces.  I watercoloured my image, layered it onto a maroon rectangle and mounted it to the center of my green card front.  I added some small rectangles into the remaining spaces, added faux stitching with a marker and used watercolour and my stipple stamp to add a bit of texture to them.
Really happy with how these cards worked out.  There are other variations that can be created using these elements.  If you decide to play with this template I would love to see how you created your cards!!  Leave me a link to your creations in the comments below.

Enjoy!!!!!!!!!
Therese


Friday, September 11, 2015

OSW template - 3 cards using a 6"x 6" piece of decorative paper

 I have been playing with One Sheet Wonders in a effort to have a template I like for preparing kits for a cardmaking session I am teaching later this month.  Here is the latest one I have been working on.  With this template you can create three different cards using a 6" x 6" piece of decorative paper and three sheets of cardstock - one neutral and two different colours that coordinate with the decorative paper.
I printed my images (Digital Two for Tuesday) and my greetings onto my white cardstock before I cut it apart to create my cards.  I cut off the bottom to create one card front and then trimmed my images (2.25" x 3.5") and finally punched out my greetings using an oval punch (SU).  I trimmed my decorative paper into three strips of 2" x 6". Then I cut the other two sheets of cardstock in half ( one green, one deep purple) and used one of each to create my other two card fronts.
For my first card, I watercoloured the lily image and cut a layer for it from the other half sheet of green cardstock.  I punched a scalloped oval (SU) from the middle of it to layer under my greeting before gluing them to each other.  I watercoloured my greeting and glued it to my scalloped oval.  I glued my strip (2" x 5.5") of decorative paper near the left hand side of the purple card, added a strip of white cardstock which I cut from the white scraps, trimmed with decorative scissors and then pierced with a push pin to the right of my decorative paper strip.  I added my layered image overlapping the decorative edge and glued it into place.  I glued my layered punchie greeting below it.
The card went to the family of a neighbour who passed away last week.

For my second card I trimmed my 2" x 6" strip in half crosswise which gave me two identical pieces (2" x 3").  I glued one to the lower left hand corner and the other to the top right corner of my green card front.  I watercoloured my image and cut a layer for it from the other half sheet of purple cardstock.  Again, I punched a scalloped oval from the center of it before I glued my image to it.  I watercoloured my greeting and layered onto the purple oval.  I glued my layered image offset enough to the left to allow enough room for my layered greeting on the right hand side.

For my third card, I watercoloured my image and greeting and layered them as I had the previous one using purple cardstock scraps.  I positioned my decorative paper allowing enough room to add two strips of green cardstock which I cut from scraps.  I trimmed both of them using decorative scissors and glued them above and below my strip of decorative paper (2" x 5.5").  I added dots in the scallops using a white gel pen. I glued my layered image to the left hand side and added the layered greeting on the right centered on the lower strip of green.
Very happy with how these all turned out!!  I have more sketches floating around in my brain for this OSW template.

I have provided the cutting template for the decorative paper, the three card sketches, a supply list and some basic instructions.

This One Sheet Wonder template only uses one 6" x 6" piece of decorative paper and three sheets of cardstock to create 3 handmade cards!!   You can easily buy just what you need at your local scrap booking store and have your three cards made in a couple of hours.  If you have a stash of paper and cardstock,  you can shop at home!!

Good luck with creating some cards with this template and I welcome you to leave me a comment with a link to your creations!!

Therese


Wednesday, June 03, 2015

One Sheet Wonder for 12 x 12 to make 6 cards

 Needed a few cards for the next few weeks and decided to work on another One Sheet Wonder.  In this case, I have decided to work with a piece of  12" x 12" decorative paper and to make six cards with it.  I have cut my paper into six pieces that measure 4" x 5.25" which will give each card a full background.  I have cut three sheets of green coordinating cardstock in half to give me six card fronts and trimmed some purple scraps into strips  - one for each card.
 I created the greeting using a couple of fonts in two different colours in Corel Draw.  I laid them out for a half sheet (4.25" x 11"),  printed them on white cardstock and trimmed them to 1 7/8" x 2 7/8" using my cutter.  I cut six layers (2 1/8" x 3 1/8") for them from coordinating blue cardstock.
To assemble my cards I started by gluing my decorative papers to the card fronts.  I trimmed both long edges of my strips using scallop decorative scissors and then used
a pushpin to pierce each scallop.  I glued my greetings to their blue layers and then played with laying them out on my card fronts.  I was aiming at leaving as many flowers showing as possible.
As you can see there are lots of lay out possibilities.  You can use either portrait or landscape for the card fronts, the accent strips and the greetings!!!  So none of the cards are exactly alike.  I have also created one of the greetings to be a sympathy one but of course those could have also been all different and all the cards would have been unique.  Really enjoying this process and I am sure you will find this a quick way to make up six cards!!  Enjoy!!

Therese

*********************************************************************************
OSW 12x12 June 2015

Supplies for making six cards:
1 - 12" x 12" Decorative paper
3 - 8.5" x 11" coordinating cardstock (cards)
1 - 8.5" x 5.5" coordinating cardstock
                        (2 1/8" x 3 1/8" layers)
1 - 8.5"x 5.5"  coordinating cardstock (.75 strips)
6 - 1 7/8" x 2 7/8" greetings on neutral cardstock

-Follow this cutting diagram to cut your decorative paper into six.
- Cut large cardstock in half to make six cards.
- Greetings can be stamped or printed.
- Cut one smaller cardstock into 6 pieces of (2 1/8" x 3 1/8" to create the layers.
- Cut other smaller cardstock (or scraps)  into .75 strips.

*********************************************************************************


Tuesday, May 26, 2015

One Sheet Wonder - 6" x 6" template makes four cards

My sister was visiting last week and she has been working on One Sheet Wonder cards. She is working on ones for a 6" x 6" piece of decorative paper.  She has developed one or two which create 3 cards and was currently working on one that creates four cards. I decide to challenge myself and see what I could design.

Here is what I came up with.  I am happy with the results of this effort.  Below is the template I used to cut my decorative paper, the supply list for four cards and the instructions on cutting the rest of the supplies for creating the cards.
Wanting to add a bit of interest to my card fronts I stamped them with a background stamp (SU -Worn) in coordinating ink before I started assembling my cards.  I colour printed my greetings (SU) on white cardstock,  cut them apart to be 2" x 3" and layered them to their layers.  Each card gets one half inch strip of accent cardstock.  The layouts are quite easy and can be modified as you wish.

#1 - glued the three 1.5" decorative pieces across the bottom of my stamped green card front, added two short pieces of .5" red accent strips just above them and used 3D foam tape to adhere my greeting over them.
#2 - Glued my two pieces of decorative paper (3" x 1.5") to diagonally opposite corners of my brown stamped card front, added two short strips of .5 red accent cardstock across the middle and added my layered greeting over them using 3D foam tape.
#3 - Glued my 3" x 4.5 inch piece of decorative paper to my stamped green card front, added two short pieces of .5 red accent cardstock to the top and bottom and adhered my layered greeting overlapping it using 3D foam tape.
#4 - Glued a long strip of .5" red accent cardstock to the left hand side of my stamped brown card front, glued my 1.5" x 4.5" piece of decorative paper next to it and adhered my layered greeting over it using 3D foam tape.

All of my greetings were HAPPY BIRTHDAY but of course you could print or stamp whatever greetings suit you when you are preparing your cards.  Consider as well that all of the pieces do not need to be cut up.  You could leave the long side whole and just trim off the half inch instead of cutting it in half like I did.  The same with the last 1.5" x 4.5" piece - you could use it whole or cut it differently which can also be said for any of the other pieces.  I think I will play with the pieces the next time I work with this template and see what I can come up with.  You can also consider adding images instead of large greetings to change up the look.

One Sheet Wonders are great for getting cards made fast!!  They are also wonderful for making cards for gifts because the four cards coordinate and look pretty as a set.  So for both reasons it is worth considering using a One Sheet Wonder template for your next cardmaking session.   Have fun!!

Therese
******************************************************************************
OSW 6x6 May 2015

Supplies for making 4 cards:
6" x 6" decorative paper
2 - 8.5" x 11" coordinating cardstock
1 - 8.5" x 5.5" different coordinating cardstock
4 - 2" x 3" greetings on neutral cardstock
Glue
3Dfoam tape (optional)

- Follow this cutting diagram to get your decorative pieces ready.
- Cut both large cardstock in two to make 4 cards
- Greetings can be stamped or colour printed
- Cut smaller cardstock into four 2.25" x 3.25" pieces for layering and the rest will be trimmed into .5 strips.


*******************************************************************************

Wednesday, November 27, 2013

One Sheet Wonder Christmas cards!

Here are the seven sets of Christmas cards I created using the One Sheet Wonder technique
- a total of 35 cards in all!!
I have blogged the details here, here and here.  
I thought you would like to see all the cards together 
that were created using the same OSW paper.  
You can check the bottom of this posting to find the One Sheet Wonder cutting 
template I used for these cards.  

Therese


Friday, June 08, 2012

Pop up Twirl card

Joined a card swap where I had to create a pop up twirl card.  Unfortunately the swap was cancelled so I contacted one of the girls who had signed up and we are swapping One for One!!
You can check out the tutorial on Splitcoast Stampers.  It is not really complicated but does require precise cutting to get the mechanics to work.  It is really fun because the inside element pops and twirls!!  Check out the video at the bottom of the tutorial to see how cool it looks!!
You do need to use sturdy cardstock and the two full layers just  like the tutorial indicates because there is a fair amount of torque on the cardstock when the twirling is happening!!  Be sure to glue them together well.   I used strips of paper instead of buttons on the bamboo stick - just made a paper bead on the stick.  Saw this idea somewhere else on the internet and thought it would be a better option for a card that is going to be mailed.  My twirling element stuck out of my card so I added two border punched strips which worked out really well but it does
mean I will  have to mail it in a larger envelope.
I embossed the whole card front.  I have a  piece of cutting pad for my Big Shot which is the result of having broken a plate, which I use for embossing only parts of an embossing folder.  In this case, I embossed three quarters of the front using the embossing folder and then moved it over aligning the dots so I could emboss the remaining quarter.  Had I used a full plate one row of dots would have been squished by the flat edge of the embossing folder.  Instead I used my partial cutting plate and placed it on the embossing folder so it did not impact the edge of the embossing folder.  Magically, no flattened spots in the middle of my embossed card front.  So hang on to the pieces of your next broken cutting plate for using this way.  I added an embossed TH Ornmental Label die cut with white seambinding and a simulated bow.  I created the sunflower using this template and triangles created by cutting  1 3/4" squares diagonally.  I curled the ends with my scissors for a bit of dimension and added a bit of watercolour in the center.  The center is a brown scalloped circle (NS) embossed with dots and features a little lady bug I created using a red 1/2" punchie for the body and a black 1/4" black punchie for the head.  I added the spots with a black Sharpie marker and added clear dimensional paint for dimension and shine.  I hand cut the stem and leaves and watercoloured them a bit after I embossed them.
I am making one more of these to see if I can keep my twirling element inside the card!!

Therese

Thursday, May 03, 2012

Cards packaged for giving!

Here is how I have packaged the four fabric flower cards I made earlier today!  I made this card holder from heavyweight decorative paper and used my slot corner punch to make a slot for the ribbon which will help keep it with the holder once the package is opened.  It can be reused by the recipient to package cards or other items for giving.
If you would like the template for creating this card holder just follow this link or click card holder in my LABELS listing on the lower right side of this blog!!
I have added my best wishes inside a little Zentangle card which I have neatly tucked into the flap.
Therese

Monday, January 23, 2012

Steampunk Doll

A steampunk doll!!  I created her for a swap on AFTCM.  We had free rein to create a doll that fit our imagination of what a steampunk doll was, so I did a bit of internet research, downloaded a few images and a template and started a bit of list of items I thought would be neat to include.
I started with a paper doll template from The Enchanted Gallery which I printed on white cardstock.  I rough cut all the pieces, glued them to thin chipboard (back of a writing pad) and then cut them out properly.  I chose to use the articulated arms and was happy I did when I was dressing her.  I printed another set, cut them out and glued them on the back so she would be the same colour on the front as the back.  I used a push pin to make holes and assembled my doll using black mini brads.
I downloaded a page of clipart from Aisling.net and printed one of the faces large enough to fit on the head.  I had originally started with a moveable head but when I was getting ready to glue on the face I decided to remove the brad and glued the head to the body and the face to the head.  I drew a bodice on her torso, coloured it in and added some sparkle.  I drew her some stockings as well and coloured them in.  I had taken a picture of her with just her undies but alas my camera did not have a memory card in it at the time, so, no picture!!  I coloured the rest of her in with a mix of chalk and pencil crayon and drew her some boots which I glued in place.
The hat was on a victorian woman I downloaded from the Vintage Feed Sacks  blog.  I isolated the hat and sized it to fit on my doll.  I coloured it, added some bling and then traced it onto cardstock and cut another one which I glued to the back of her hat just at the top which makes it removable!!
I created a necklace for her using chain and a little pendant to which I added a rhinestone.  It nicely covered the transition from the neck (clipart) to the body (template).  I also created a blouse for her.  I laid her out on my fabric and marked out the T top I thought would be a good size and cut it out.  I hemmed the sleeves and then put right sides together and stitched the back to the front.  I did cut a small slit for the head before I sewed them together which I had to enlarge just a little to get the top on her.  I was really glad she could fold her arms when I was fitting this top.  I added a horizontal cut at the top of my slit which created the back of the neckline and folded the extra flaps from the front slit inside and sewed them in place by hand which finished the front quite nicely. You can see just a bit of her bodice peeking out of her V neckline.  I did sew in a bit of a bauble at the bottom of the V and added a butterfly brooch once I was finished.

I sewed a straight black skirt for her.  The selvage was all fringed so I used that instead of hemming it and created a cool metal embellishment to highlight the waist.  I sewed on the embellishment and then ran a basting stitch from each side to the back leaving ends which I used to tie up the skirt once it was on her.  Keeps everything nicely in place and gives a bit of a bustle look in the back. I added more metal embellishments  - a few I sewed on, the others I added to the waist embellishment.   I took the photo before adding the final embellishments.
It was fun digging through my stash to create embellishments.  The waist one was created using an old earring back in the middle with a double heart stud earring attached in the center.  I used modified shepherd hooks on either side.
I created a purse for her using a graphic I downloaded from Arthur's clip art.of an Astrolab.  I isolated one of the circles, printed two of them, added colour and sandwiched a piece of chipboard between them.  I added a black fiber ring all the way around to cover the chipboard's edge.  I punched a hole in the top section and inserted my hardware (back of a clip on earring) and held it in place on the front using a glue dot.  I love that it has a heart on it!!  I punched a hole on each side and added a length of chain with jump rings.

It was fun to be dressing up a paper doll and creating metal embellishments from odds and ends I have saved from other projects!

Therese

Monday, April 04, 2011

Card Holder and template

Created this cool little holder that fits 4 cards!!
Needed a bit of a gift for a woman who has been gracious and so I made up this holder so I could present her with a few cards to express my appreciation!! The design is based on the Create-a-lope way of making envelopes. I bought the template many years ago and have created digital files based on the original concept several times for different projects.
I printed my file on the back of the cardstock, scored and folded the lines, trimmed the corners and added a few glue dots to keep the holder together. Added four cards and tied it closed with a length of ribbon (26"or so)!

Great way to package a set of cards for gift giving!!

Therese

Angel policy: You can download and make holders with this template. Please send your friends to this post on my blog to download their own copy for their use.

You do not have permission to copy and distribute this file in any manner and/or claim it as your own when submitting cards for publication!!

Thursday, November 18, 2010

Mitten card template!!

If you would like to make your own mitten Christmas cards here is the template I used to create mine. Click on image and download to your computer and print on a 8.5"x 11" sheet of cardstock!! Enjoy!

Angel policy: you can make cards for sale with this template. Please send your friends to this post on my blog to download their own copy for their use.

You do not have permission to copy and distribute this file in any manner and/or claim it as your own when submitting cards for publication!!

Therese

Friday, December 04, 2009

My Art - Magazine rack card holder


I have modified the "magazine rack" card holder I created earlier this year to make it more sturdy and to ease the process of putting it together. It requires a 12 x 12 piece of cardstock and holds A2 sized cards with envelopes. You mark and score the lines, make a few cuts and fold it on all the lines. A few pieces of double sided tape in the right spots and it comes together quite easily. I just decorated it with a piece of decorative paper and added a book plate but you could decorate it with whatever your little heart desires!!


These are great for putting on your book shelf to hold any extra cards you have made for future occasions. They could also store any cards you have kept to provide inspiration!! Might also be a wonderful way to package cards for gift giving!!
Enjoy!!


Therese


Thursday, September 17, 2009

My Art - card holder

I created the template for this little card holder a while back and thought I had already uploaded it to my blog but checked last night and alas I had not!! So here it is!!
I created the template and printed it on the back of scrapbooking cardstock. Once printed, it is just a matter of scoring all the lines, folding them, making four cuts and applying two pieces of double sided tape and assembling the little box!! There is enough space at the top to accomodate a variety of closures. On this one I just punched the two top pieces with oval punch (SU) and added a ribbon to keep it closed. You could punch two smaller holes and thread in ribbon, twine or fibers. You could cut one shorter and fold the other one over it and add a magnet or velcro as the closure, All sorts of options!!
It holds 4 (or more) standard A2 sized cards with their envelopes and makes a wonderful presentation for anyone wanting to gift cards as gifts!! With Christmas on the horizon consider making your office coworkers, neighbours, girl friends, elderly family members, etc some handmade cards as gifts! You will have a great time making them and they will be proud to be sending them to their friends!!

Therese

Wednesday, August 26, 2009

Mini mag holder template/diagram

This is the diagram I created for the mini mag card holder. I scored all the lines to begin with and then cut on the solid lines and folded on the dashed lines. It takes advantage of a full 12x12 piece of cardstock and makes a holder that is 4.5" deep, 6" high and almost 3" wide.

I modified a pattern I found on Blythe's blog!!

Would make a perfect holder to present a "gift of cards"!! Great for teachers gifts for the upcoming holiday season!! It is coming!!

Therese