

Monday, July 28, 2025
All occasion card featuring a watercoloured daisy, embossed strip and decorative paper background

Thursday, July 24, 2025
Another attempt at fire starters

With a bit of experimenting in the fire pit I have come up with a plan. The wrapping paper needs to be not wrapped too tight so I think just overlapping with a staple in each end should work fine. The inside needs to have a space for the air to travel in so I have made up some waxed rectangles of corrugated cardboard t
that just fit on the inside in the middle. I will stuff a little bit of newspaper in the other side. With both ends lit up the air can quickly start going through and will keep the flames burning until the kindling has started burning. I will post photos of the finished fire starters once I have a few made up. Therese
Tuesday, July 22, 2025
All occasion card featuring inchies, decorative paper strips and faux stitching

Tuesday, July 08, 2025
A new line of prayer flags are now up!!

As previous I left about 5 feet at the leading edge at the house and then overlapped the top edge over the paracord and stitched each one into place with a wavy line leaving about 6" between them. I used line green polyester embroidery thread. The ones from 2021 were still well attached at the top though the covering on the paracord was completely gone leaving only the strands inside. They were still holding very well.


We set out the new set, undid the old set at the house and I climbed the neighbour's tree (I did get permission) and cut down the old set. I was surprised that the tree had started growing over part of the cord in the four years since we put up the last set. After cutting the cord I removed as much as I could so the tree could go on growing as it needed to. So this time we secured the new set using a tie down straps with grommets on both ends instead of tying it directly to the tree. That will allow the tree to grow and still secure the flags sufficiently!!
The final adjustment was made on the house end setting the flags high enough not to be in the way and still with some slack so they would move nicely with the wind.
Love them!!! Therese


Wednesday, July 02, 2025
All occasion card featuring washi tape, ribbon, brad and embossed feather

Wednesday, June 25, 2025
All occasion card featuring a fun pennant background, embossed vellum and two watercoloured hearts

I started with a large envelope and trimmed a green card to fit. I added the pennant background. I trimmed the bottom off the piece and turned it over to reveal the orange which works really well. I tore a piece of vellum and embossed it with a burst (TH) and then I added the two hearts using a brad. The hearts were die cut from hand decorated watercolour paper which I made up a while back. They have been textured by the old cutting plate I used which gives them a lot of texture. I mounted this focal element to my card front using 3D foam tape. Another special occasion!! Therese
Friday, June 20, 2025
Crafting - repackaged the little fire starters

I have decided to repackage the little pine cone fire starters I made a while back!! They are harder to handle and store when they have wax on the outside of them so I tore some rectangles of brown paper (box stuffing from online purchases) and wrapped each one and tied the ends with thin cording. This way they store easily without transferring wax to any surface and are still easily used to start a fire. I am working on reimagining fire starters that do not have any exposed wax. I used bags from when I purchased bananas at the grocery store. So many reuses in this project!!! Therese
Sewing - little flannel handwarmers filled with white rice

They are two 4" squares of flannel stitched all they way around leaving an opening. Trim the corners and turn inside out, press and fill with a slight quarter cup of white rice and then stitched all they way around again which seals the opening as well as strengthened the integrity of the unit. I added a tag that indicates that they need 20 seconds in the microwave when used as a handwarmer. On the other side of the tag I put instructions for use as a cold pack - 3-4 hours in the freezer. As you can imagine they have many other uses. For example, they can be tossed into a container as a "Corn Hole" game or they can be placed in a saucer or small container and used as a pin cushion as well. It was a very good use of the flannel scraps!! Remember to store them in the pockets of your winter jacket and you will find them when you need them. Therese


Monday, June 16, 2025
Event - Gramma Link Africa "Everything Rhubarb" Tea on Saturday, June 21st

You are all invited to come and join us for tea and some rhubarb pie. There will be LOTS of rhubarb on the bake table as well so shop for supper and put some in the freezer!! We have some very accomplished bakers and always have a great variety of wonderful baking, jams, etc. We will have our merchandise for sale as well so a lot of handmade items - aprons, potholders, bowl cozies, etc. Lots to choose from as well as small quilts!!! Therese
Sunday, June 15, 2025
All occasion card featuring a sunflower over a sunflower background embellished with a bit of ribbon
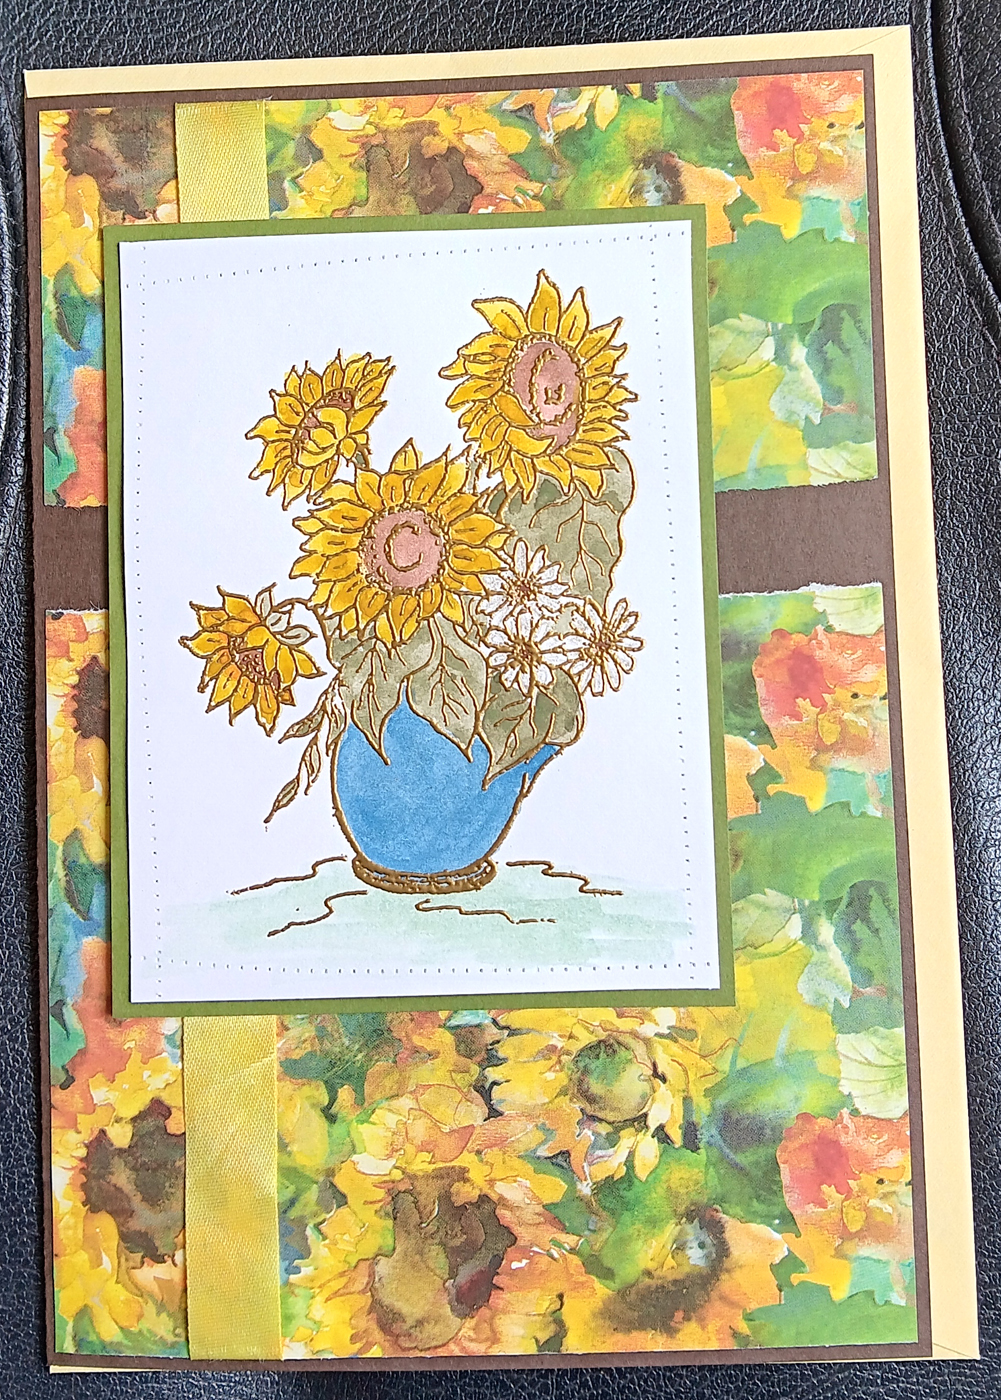
Therese
Saturday, June 14, 2025
All occasion card featuring a cup of coffee over a hand decorated background embellished with flags and eyelets with string

All occasion cards featuring collaged backgrounds, embossed strips and layered lighthouses

Wednesday, June 04, 2025
Graduation card featuring a graduation cap, some ribbon and a colourful yet significant background

Our oldest grandchild is graduating from high school this year!!!!!!!!! They are headed to university in the fall and have jobs lined up during the summer so life is going along as it does!!! I found a similar greeting on a card on line and loved the message so I worked it up for the greeting on this card. I laser printed it and trimmed it down to fit on my large card. I chose this specific background because it was bright and colourful and also illustrates how life goes - no straight lines, some wide some not so much, lots of overlapping but if you follow your heart you will stay on track no matter how wiggly life is and whether you are up or down compared to everyone else. I added some ribbon flags on the side and paper piercing on both pieces. Therese
All occasion card featuring a collage background, die cut trees and a large yellow moon

For this card I started with a brown card and trimmed the brown collage to make a background that fit. I added paper piercing and then die cut two sets of trees to use for my focal element. I had to cut the die (TH) twice to get the width I needed. I cut one from a piece of brown water damaged cardstock which had colour variations in it. The other layer I cut from a lighter beige cardstock in the same way I cut the first one. I layered them, adhered them to each other and then embossed the bottom edge. I then tore off the bottom of this large element and then trimmed it to the same size as my background. After adhering it to my card I coloured a 1 3/4" round punchie with yellow and shimmery gold paint to make my moon. Once it was dry I added some glue and slipped in behind the trees!! Perfect!! Therese
Tuesday, June 03, 2025
All occasion card featuring rose collage background, ribbon and a rose topiary

Therese
Sunday, June 01, 2025
All occasion card featuring a bright collage background, a stamped image and some colour and paper piercing

This card also started with a dark green card!! I trimmed the bright collage to size, added some lines of paper piercing with my pattern tracing wheel and adhered it to my card front. I stamped a bridge (SU) in brown on ivory cardstock, watercoloured it and then added paper piercing after it was dry. I layered it to a piece of orange cardstock and as a final touch I added several small leaf punchies. Therese
Saturday, May 31, 2025
All occasion card featuring a collage background, stitching, embossed tag and a little chicakee

A few more cards to go!!
Therese
Wednesday, May 28, 2025
All occasion card featuring a hand decorated background with an embossed vellum strip layered with fun hearts

Therese
Cardmaking - Card #3 - torn decorative paper background, dry embossed image and coordinating cardstock layer

This quick and easy card was our third!! I cut the decorative paper 4.75" instead of the usual 5.25" which allowed us to tear it into two across the short side and have a swath of colour below our focal image. The focal image combined a dry embossed image ( gift, flowers, cup and elephant) with a coordinating background of colour coordinating cardstock. We simply added our two pieces of torn background to the card front, adhered the two elements of the focal element to each other and then added the focal element to the card front using 3D foam tape. I added a little clear glitter with a glitter pen to the images. I had packed the glitter pen but totally forgot to mention it when we made up the cards!! Dah!!! As you can see these were easily assembled as either landscape or portrait cards and with the various focal elements were appropriate for a variety of occasions!! A wonderful way to finish off our cardmaking evening!!!
Therese


Cardmaking - Card #2 - decorative paper background combined with a custom tag featuring a circle punchie, brad and fiber


Image credits: Butterflies, Tulip and bees, and Popsicles - Melonheadz,
Books - Pixabay
Acorns and Ferns - CLKER
Candles - Black Berry Jelly
Leaf Swag - Anne's "Cards 4 You "
Parrot - Clipart Library
Heart Flowers - ???
Therese


Subscribe to:
Posts (Atom)