Therese
http://groups.yahoo.com/group/mixedmediamarket/
My art blog:
http://www.tmalakart.blogspot.com/


It has been a while since I posted so I will start with my April Art Lottery submission. I decided to treat the winner with some round tags this month so I created another one of these cards with the decorative paper using the colour blocking technique. The decorative paper is one that I created with direct to paper technique when I was repairing my Colourbox pads. I really like the vibrancy and the depth of colour of this piece!! The round tags were colour printed and then punched with the SU 1.25" punch and the layer was created with the 1 3/8" punch!! Quick and easy!!
Another simple card with a bit of a twist. I cut a rectangle off the front of this card and then applied decorative paper to the flap that was left. I stamped the image added a layer and glued it to the front. I added a small square on the inside of the card for writing my message!! I just love this image!! It was one of the images in the Hostess set I earned at my SU party.
I loved this little design that I found several different places!! I just made a rectangular card and cut off a triangle off of each side. Several of the girls were going to add a little handle to their pink cards to make a cute little girl's card that looks like a purse!! This one could truly be embellished several different ways for so many different looks!! Consider creating an apron, coveralls, brick of gold, etc. with this design.
A triangular fold card!! I had downloaded an image of a similar card somewhere along the way and worked up my design from that image. Several of the girls at the class mentioned that Splitcoast had a tutorial posted to their site last week with all the instructions and samples. So if you are interested in more information you can check
For this month's cardmaking session I was exploring folds and shapes!! This card is a variation of the one we made at my SU party. It has a triangular base instead of a rectangular one!! In the process of designing this one I had to come up with a solution to keeping the pop up part of the card - popped up!! In the rectangular based one the paper on both sides of the slit grabs the pop up and keeps it from sliding back into the base. With the triangular base there is less pressure so I ended up adding a staple at the place I wanted the pop up to stay. The back catches the staple's little bumps and the front hides the front of the staple! It was so effective and the group enjoyed the different option for the base! I just love this Terrific Tulip set (retired) from SU. Made these cards in a lot of different colours. They are a great way to herald in the spring or to celebrate Easter!!


This is a very quick and easy faux leather technique. It requires a heat gun, a stamp, a dye ink pad and some fun foam. The fun foam softens very nicely when you heat it with a heat gun and will take the impression of a stamp. I used a feather stamp for this card and a black ink pad. It is not necessary to use ink on the stamp unless you really want to highlight the image. You could easily create a textured background instead of an accent for your card by using a large background stamp instead. Lots of possibilities with this technique! I highly recommend giving it a try. If you are not happy with the result simply reheat and redo.
Enjoy!
Therese


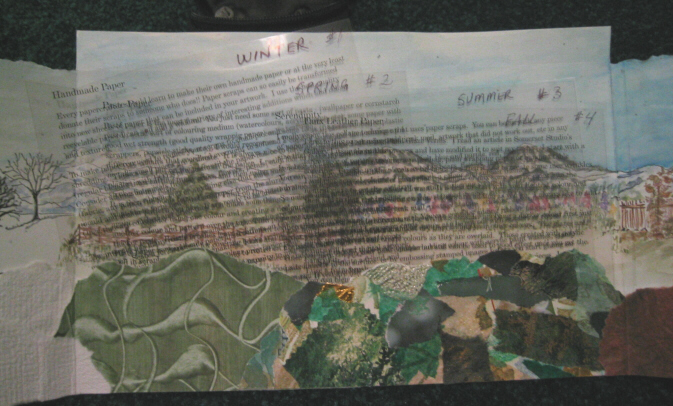
This is a double sided page for an Art Idea Journal - a round robin on one of my groups!! I created different layouts in each journal using the same four subjects - handmade paper, faux leather paper, paste paper and serendipity. I included the paper and instructions in each layout so the person receiving it would have samples and information for making their own. It has be so much fun to come up with a different layout for each journal. This is the final journal in the round robin. It has taken two years instead of the anticipated 6 months to get this one finished but the journals have been fabulous and well worth waiting for. Mine is all home and now just needs to be bound!! Here I created pockets with the specific paper and then printed off instuctions. I topped the instruction sheets with another paper , folded it up to fit and added it to the pocket. I also added a variety of samples of each technique to each pocket. That should supply some inspiration and some pieces to play with. I stamped each technique name with a round alphabet in a coordinating colour, punched them out with a 1" hole punch (michaels), added a hole at the top and strung them onto fiber. I made two holes at each end of the pockets and strung the little round tag titles between them and tied them taught. I used the same holes for the fiber on each side of the page.
Very happy with how this one has worked out!!
Enjoy!! Have a creative day!!
Therse


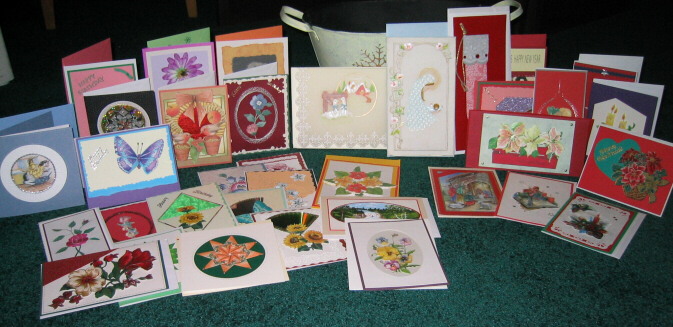
A new set of cards I created with my donated envelopes!! It was a challenge to use a different format. Two of the cards use stamped images (tulip and butterfly) but the others use images recycled from old greeting cards. One of the girls that came to my SU party likes to use old greeting cards to create her cards so I went through the bagful I received last fall and put together a package for her. While I was in the process, I decided to give it a try being as I had never recycled a card in that way before. It worked out well though it took some time to pick out images that would suit the rectangular format I was using for these cards.
I was careful not to pass on any cards that had personal information or writing from the ones that had been donated to me.
So another source of card creating fun - all the cards that others (who have not been converted to making their own) send you!!
Have a creative day!!
Therese


The background on this card was created using the granite spray paint that was popular some years back. The can was destined for the garbage so I took it outside along with some large sheets of paper and a large piece of cardboard. I just sprayed until the can was empty. Made 5-6 large sheets of this wonderfully textured black, white and gray paper. 


Led a cardmaking class last night featuring handpainted backgrounds. I really like making these acrylic paint backgrounds - I just slosh on paint until I am happy with it. I usually start with leftover paint from my palette after a project and water it down to make a wash and apply it to a sheet of paper or several depending on how much paint I have. The next time I am painting I add more colour washes and repeat the process until I like the look of it. I designed and colour printed the round tag and punched it out. I really like the colour of this one.
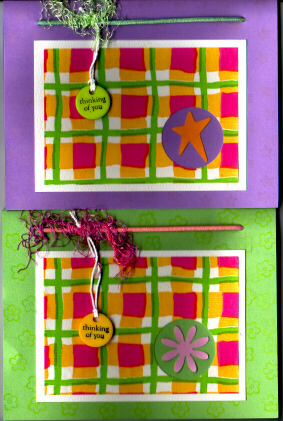
These are for a card exchange I participate in monthly. I stretched myself and used bright colours. I started with a piece of checkered tissue paper that I received in a swap a long time ago. Was able to find cardstock that matched pretty close but found that the tissue paper looked better when layered on white so I added a white cardstock layer. I used my SU 1.25" punch to punch a hole in the lower right corner and punched some coordinating shapes to go inside. I stamped all around the card front before I layered on the tissue paper/CS piece. I cut hair elastics that were the right colours for the top and tied on a little plastic tag which I stamped with StazOn ink. Added a little fiber to give it just a little softness. Very happy with my little stretch!!
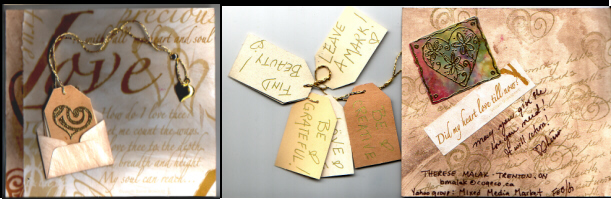
This is a fat book page I created today for a mingle. These are really fun. The mingle has been running monthly for a year so we have 12 pages for our book. The far left is the front of the page and the right is the back of the page. The tags in the middle fit into the envelope on the front and are strung together. The background paper is gift wrap I bought at Michaels. Very awesome!! I gave it a wash of burnt sienna and did the back of the page as well. The heart on the back is gold EP on alcohol ink background. The mingle is ongoing and we are expanding the theme to include more than holidays to give some variety.
This is an interactive birthday card!! It is a little accordion book that is held closed by an elastic. I put a little heart shaker on the front and on each of the pages I put a title about favorite things: food, friends, games, etc and made a little envelope to hold "important" things. I like to make kids cards that are a little more than just a card. Hopefully it will be written in, enjoyed and saved for a while. We all need to remember what our favorite things were when we were kids.
Therese
Three more cards to add to my stash!!Will be needing some masculine cards so worked up the one with the watch. There is a gold ribbon that matches the veining in the background paper that runs the length of the card but I was not able to get it to show up when I scanned it.


Have been busy with some technique art journals this week. This is a round robin project started over a year ago. I have created layouts in all the journals that present four different techniques - handmade paper, serendipity, paste paper and faux leather!! It has been fun to come up with different ways to present these different papers! Here I stamped and gold embossed a gate on each kind of paper and added the description and basic instructions in a folded sort of booklet underneath. Added hearts and some inspirational quotes to finish off the layout!! I have truly enjoyed this project because of the diversity of art that has been presented in all the journals that went by and on all the pages of my journal!!


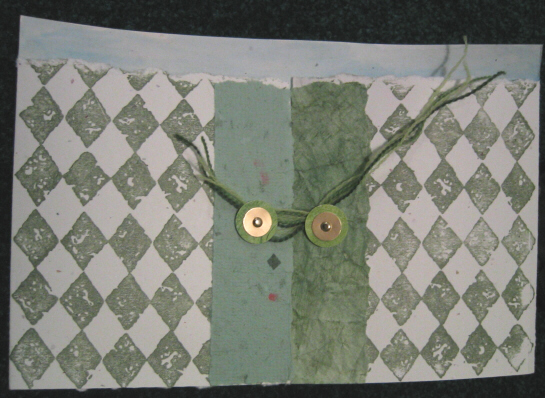
e in her Christmas gifts for her family members. The first one has a harlequin background with a coordinating greeting. This harlequin paper is a roll of gift wrap I bought at Michaels before Christmas with a coupon. Nice rich colours and the roll will make LOTS of backgrounds!! The second is created with an image from a Page-a-day calendar!! I added a ribbon and a tag to embellish it! Both of these are good for creating quick and easy cards.