Tuesday, October 13, 2020

Sympathy card featuring velvet ribbon, a layered butterfly and greeting

This sympathy card is going to a member of our congregation who suddenly lost her husband recently.  They are no doubt grieving the loss immensely.  

I started with a large envelope and made an ivory card to fit inside.  I added a layer of hand decorated paper and then a coordinating blue velvet ribbon on the left hand side.  I cut the butterfly wings from the scraps of the decorative paper, the solid butterfly (SX) from a coordinating cardstock which I watercoloured to give it texture and the body from silver foil cardstock.  I glued the body in place on the solid butterfly and then added the wings gluing them only next to the body so they would be free.  I adhered the butterfly to my card front using 3D foam tape overlapping its wing over the ribbon.  I punched a coordinating laser printed greeting, a larger oval and then a scalloped oval (SU) from blue and layered them after sponging their edges.  I adhered it to my card using 3D foam tape.  

I hope they find solace in each other and peace as they grieve their loss.  Never easy!!   Therese


Friday, September 25, 2020

Anniversary card featuring a layered heart and greeting with beautiful red ribbon

Our son has been married for a year!!  Time flies!!  I started with a red card and added an embossed (heart embossing folder - CB) which I rubbed with a gold pigment pad and then added gold embossing powder.  It was too thick so I used a brush to lighten it up before I heated it.  I like the way it turned out.  I added a red ribbon and then mounted it to my red card.  I added a layered heart - gold die cut (SU) and a red heart punchie (SU) which I embellished with dots around the edges using a gold gel pen.  I mounted it over the ribbon using 3D foam tape.  I used gold embossing powder on the oval greeting as well before mounting it to a red scalloped punchie (SU).  I embellished the scallops with the gold gel pen as well.  I mounted the greeting just tucked under the heart. To finish off my card I tied a short length of the ribbon using a single knot to the one on my card to simulate a bow.    Therese

Tuesday, September 22, 2020

Thinking of you featuring a silver embossed flower and greeting with butterfly sticker and some ribbon

My friend has surgery last week and she is home recovering!!  I wanted her to know I am thinking of her as she heals her body and gets back up to speed with her regular life.  I stamped the little flower image and embossed it with silver embossing powder.  I added the little butterfly sticker and the little dots too! I watercoloured the flowers to coordinate.  I trimmed the white, flagged the end and added a piece of orange ribbon to the top.  I mounted this layer to an orange piece and trimmed it to even around the white one.  I cut an orange card to fit in an envelope from my stash and then added the paste paper background that coordinated perfectly with the butterfly.  Love it when it works out so well!!  To finish off I tied a little bit of orange thread to my ribbon to echo the colour of the flowers.  It is off in tomorrow's mail!!

Therese


Monday, September 21, 2020

Birthday card featuring a watercoloured laser printed digital landscrap, a paper collage background and a little font greeting


For this birthday card I created a green card to fit inside a large envelope from my stash.  I created another scrap paper collage background with blue paper scraps to create my water and sky.  I added a bit of water colour to my sky to soften the floral pattern.  I added a strip of green to lower the horizon line of my focal element - a canoe on a lake (CLKER).  The image is a digital one which I laser printed and trimmed to size.  I stamped some trees after placing a paper mask to protect the water and canoe area.  Next, I  watercoloured the image, layered it with a black cardstock rectangle and mounted it to my card using 3D foam tape. I flagged and layered my little font greeting and then mounted it to my card front using 3D foam tape on one end and double sided on the other.  

Therese

Birthday card featuring letter scrapbook paper, ribbon and a greeting with a paper button


My youngest granddaugther is so looking forward to school so I added bold letters to her birthday card!!  I decided to try the slimline card style using a #8 envelope which are common and available locally.  I created a yellow card to fit inside.  The scrapbook paper was a strip of letters so I cut it in two and stacked them.  I added a yellow ribbon over where they join and secured the ends to the back before adding it to my yellow card front.  I found a coordinating greeting in my stash, sponged its edges and added a little brown paper button (CB die cut) with gold string tied to it.  I mounted the greeting over the ribbon and then tied a short piece of ribbon to the one on the card to simulate a bow.  

Saturday, September 19, 2020

Slow Stitching - my next project

Here are the pieces to my next slow stitching project.  We are expecting another grandchild and this slow stitching project will be creating a little panel that will be part of the baby quilt I am making for its arrival.  The little oval shapes were hand cut around plastic templates - one a little larger than the other. I will reveal what they are once I get started!!  It is a busy time with harvesting of my garden so it may take a day or two to get started!!

Therese
 

Friday, September 18, 2020

Slow Stitching - completed house panel


 This is the completed house panel.  I am still deciding if I would like to add trees, shrubs or flowers before I call it done.  So it will sit for a bit until I decide.  In the meantime, I have another slow stitching panel that I will be starting on soon!!  More details coming!

Therese

Wednesday, September 16, 2020

Sewing projects - a cute pencil case and another small quilt

I have a little girl with a birthday coming up so I made her a pencil case with glittery butterfly fabric!  I combined it with black fabric and added a black zipper on the front.  It is the first time that I successfully added tabs on the end of my zipper which makes a neater finish.  I added some new pencils and some funky pencil crayons that have multi coloured leads!  She is going to school this year and taking the bus with her siblings.  She has been waiting a long time for this year!!  
I finished another small quilt top which I worked on more than a month ago.  I added a polyester blanket for batting and a dark green polyester cotton backer which I also used to create the binding.  I like using this technique because it is fool proof!!  I managed my corners better this time around as well so I am improving!!  It measures 35" x 46".  It will be headed to the Linus Project when they are accepting quilts again.  

Therese

Slow Stitching - last buildings on my house panel

This is the last structure on my house panel.  I chose two different blocks of fabric and stitched them up to look like apartment buildings.  It worked very well that they had squares on them.  I have three roofs which indicates that there is a building hiding behind the two that you can see in the fore ground.  All the roofs were done with running stitch each with a bit of a different pattern and texture.  I added Xs in the outer edges of the red building, outlined the windows in navy and then added french knots in between the windows as ornamentation on the building.  I stitched the door as a double door and later went in and added white stitching to some of the vertical and horizontal lines of the building.  I added a little peak in the roof line with white thread and added a little french knot in navy to repeat the ornamentation I had added to the building.  

For the brown building I stitched all the way around then added the little triangles just below the roof line in beige.  I added the four pane windows in navy along with the french knots as ornamentation also in navy.  The door's perimeter was stitched in navy and I used off white thread to add the line in the center to make it a double door.  I also added off white thread to several of the vertical and horizontal lines in the building to add texture and properly secure the pieces to the background.  

A totally fun project and it is good to have a large panel to build a quilt around.   Love how the background looks so much like clouds in the sky.  

Therese


Tuesday, September 15, 2020

Christmas cards featuring embossed backgrounds, a decorative paper strip and watercoloured ornament with ribbon flags


Two more cards featuring embossed snowflake backgrounds!!  I mounted them to red card fronts and added the trimmed strips of decorative paper featuring little gifts I cut from the 12" x 12" sheets I have been using for the last while to make cards.  The ornament images are from Get Drawing.com.  I laser printed the digital images, trimmed them to size, watercoloured and embellished the ornaments with clear glitter, added faux stitching with a black permanent marker and ribbon flags before mounting them to my card fronts using 3D foam tape.  I have manged to get 15 cards made with those two sheets of decorative paper and  have only little tiny scraps left over!!  It has been fun making these cards!!  

Therese

Monday, September 14, 2020

Slow Stitching - fifth little house on my panel


 After a few more searches on line I decided to make a house with interesting perspective - you can see both the side and front of the house.  It was a bit tricky to get all the layers laying down properly so they all met up and did not create jogs in the wrong places. I tacked everything down with small pieces of fusible web once I was happy with how they all were placed.  It sure made it easier to do the stitching because everything stayed where it was positioned.  I ran stitching all the way around the roof and then did one row of running stitch on the inside perimeter.  For the front peak I started on the outside and kept going all the way around until I finished off in the middle.  For the front I added french knots on each polka dot in navy thread.  LOTS of texture there though it does now show very much.  I stitched the door in blue and added a handle and windows in yellow.  I stitched a diamond window above the door in navy and then framed it in yellow.  On the side of the house I added running stitches between all the dots so this piece has a lot of texture as well.  I gave the wide window three panels using brown thread and then added highlights in yellow. The chimney was done in rows of running stitch from the top to the bottom.  It was done first so I was able to add a couple rows below the roof line which will help keep everything secure.  

Therese

Saturday, September 12, 2020

Christmas cards featuring decorative paper with stripes, watercoloured Santa image with ribbon flags and faux stitching


 A couple more cards that feature decorative paper from two 12" x 12" sheets I have used for making cards in the last little while.  The backgrounds were trimmed from the sheets and mounted to coordinating  red card fronts. These ones feature cute little Santas from Get Drawing.com.  I laser printed the digital images, watercoloured them, added faux stitching with a black permanent marker along with some ribbon flags and then mounted them my card fronts using 3D foam tape.    Therese

Friday, September 11, 2020

Slow Stitching - fourth little house on my panel

For my fourth house I ended up overlapping two plaid pieces to form the body of the house.  I tried a different roof line and like how that worked.  I ran three rows of running stitch around the perimeter of the roof and body of the house. I used black thread on the roof and red & yellow on the house.  I stitched the outer borders of the windows and then added mullions as well.  I stitched the door in red and added a black handle.  I added a few more rows of yellow on the rows of the plaid and a row of black just under the eaves.  I like how this one is situated into the landscape.  

Therese


Thursday, September 10, 2020

Thank you card featuring a sanded collaged white core cardstock background, ribbon and a large layered font greeting


We spent almost a week camping up north with my sister and her husband.  They are long time campers and we are just newbies.  It was great to get a chance to visit around the camp fire after supper.  We all made our own food and ate together with social distancing.  I was there to pick blueberries so we spent two afternoons picking and I managed to get the two pails I needed for the winter.  I cleaned my berries and put them in the freezer in the trailer - so nice!!  I came home with a box of crabapples too!! It was our first time of camping together and I wanted her to know how great it was to be there with them.  I started with an envelope from my stash and made a green card to fit inside.  I created a pieced background from white core scraps which I embossed and sanded. Love how it turned out!!  I added a green ribbon across and tied on a little piece of pink gros grain.  I found the round greeting (1.75" punchie SU) and was lucky enough to find a scalloped circle (Nestibilities) in my stash that worked perfectly.  I used a push pin to pierce each scallop and sponged the greeting with green ink before layering them.  I mounted the greeting with 3D foam tape and added one little rhinestone to finish off my card.  

Therese

Christmas cards featuring embossed backgrounds, a decorative paper strip and a watercoloured bird image with ribbon flags


 A couple more cards featuring a strip of decorative paper I trimmed off the 12" x 12" sheets I have been using in the last while to make Christmas cards.  I embossed green cardstock for my backgrounds using a snowflake embossing folder and mounted them to red card fronts.  I added the trimmed strips of little trees and then mounted my images using 3D foam tape.  These cute birds are by MelJens Designs.  After watercolouring the laser printed images I ran my pattern tracing wheel around the edges and added some ribbon flags.  Therese

Tuesday, September 08, 2020

Thank you card featuring a polka dot background, a little bear (digital) and some bling

My grandchildren sent along some of their creations in a long envelope a few weeks ago. I was so pleased to receive their little gifts that I sent them a thank you card!!!  

I started with a #8 envelope and created a pink card to fit inside.  I pieced the red polka dot paper with a strip of coordinating pink floral to create my background.  I found the little bear (Crea8tive Hands - digital) in my image stash. I watercoloured it to coordinate with my background, distressed its edges and mounted it with 3D foam tape to the top portion of my card.  I found the greeting in my stash, trimmed it to size and then added two little rhinestone blings once it was adhered to my card.  

I have put their art up in the kitchen/dining room so I will see it everyday!!

Therese


Slow Stitching - third little house on my panel

I have been slowly working on my Slow Stitching project featuring little houses.  I finished the second house in May and the project has been off and on for the last four months.  I have really enjoyed the process of getting the little houses done.  I stitched along the lines in the roof.  The stitches barely show but it worked well to securely attach it to the background.  I added stitching to the rest of the house using thread that coordinated with the colour of the part and in the end stitched the windows with orange thread which stands out a bit.  I really like how bright the windows and the door are.  It was fun to make a wonky door and add windows to it with thread.  

Therese
 

Christmas cards featuring a decorative paper with strips of images, a large greeting and some faux stitching


I made six cards using these large greetings from Mom Junction. I laser printed the greetings, trimmed them to size and then watercoloured them.  Once they were dry I added glitter using a clear glitter gel pen on several parts of the image and used a black permanent marker to add faux stitching to the edges.   The backgrounds were trimmed from one sheet of 12"x 12" which my sister donated to me during her downsizing.  I mounted the background to a coordinating card front and added the greetings using 3D foam tape to finish off my cards.  I added single panel inserts with appropriate greeting inside.

Therese


Monday, September 07, 2020

A birthday card featuring a paper collage background, sunflower embellishments, a digital greeting and a small butterfly


For this birthday card I created a brown card base to fit in one of the large envelopes from my stash.  I created a collage background using paper scraps and regular tape trimming it to fit on my card before adhering it in place.  I created five sunflower embellishments using two paper flowers in yellow and brown, large copper sequins and a gold brad in the center to hold all the elements together.  I added silk flower leaves to the back using double sided tape.  I used a corner rounder on my greeting (digital from Desert Diva), sponged it with green and brown ink and placed it on my card front.  I auditioned my embellishments until I was happy with them and then glued them down with 3D foam tape.  To finish off my card I added a little butterfly element to my greeting.  Perfect!!!!!!!

Therese

Sunday, September 06, 2020

Christmas cards featuring decorative paper with stripes of images, a laser printed greeting and a little snowflake embellishment


I have made another batch of Christmas cards!!  I am on track for getting all my cards done in time to be sent in early December.  I started with two 12" x 12" pages of decorative paper which featured strips of Christmas images which my sister donated to me as she was downsizing her collection of decorative paper.  I worked out the most efficient way to cut the paper to have backgrounds with out having to cut into the strips.  These ones are pieced strips of decorative paper.  I covered over the second row from the top with one I cut off the top of the sheets which had words I did not want on my cards.  I added a strip of dark red with a border punched bottom edge (new to me MS punch) and assembled the pieces using regular tape on the back.  I found these greetings in my stash.  I trimmed them to size, sponges their edges with green ink and mounted them over the dark red strip.  I added little snowflake embellishments which I created using mini snowflake diecuts, sequins and tiny brads.  I added them to my card fronts using 3D foam tape.   It was good to be back in my craft room creating cards.  We are starting into the harvesting season so there are more demands on my time.  
Therese

Anniversary card featuring a lacy heart die cut, a paper collaged background, layered font greeting and some rhinestones


Have been having fun creating paper collage backgrounds with scraps! I simply adhere the scraps to each other using regular tape on the back and then trim to fit on my card.  For this card I started with a large envelope and created a large yellow card to fit inside.  I created a paper collage background and adhered it to my card front.  I die cut the lacy heart in brown, adhered it to a gold piece of cardstock and then fussy cut all the way around.  I adhered it to my card front and then added a little layered font greeting which I flagged at both ends and layered on orange.  To finish it off I added little brown rhinestones to each heart using white glue in a fine tip applicator then set it aside to dry before pressing.  

Therese

Friday, September 04, 2020

Anniversary card featuring a paper collage background, a lacy heart die cut, some embossing and a stamped greeting


For this card I started with a large envelope from my stash and made a brown card to fit inside.  I created a paper collage for my background using paper scraps and regular tape on the back to hold them together.  I trimmed the collage to fit on my card before adhering it in place.  I die cut a lacy heart using one of my new dies - works really well with a thin shim.  I used the next die - a stitched heart - to cut an opening in a piece of brown cardstock and then embossed it with a flourish embossing folder.  I used white glue in a fine tip applicator to adhere the lacy heart to frame the opening.  I layered this focal element over my background and adhered it in place with 3D foam tape.  I stamped the greeting on ivory cardstock, trimmed it to size, flagged the end, layered it onto red cardstock and then ran my tracing wheel over both long edges to add a bit more texture.  I used 3D foam tape to secure it to my card front.  To finish my card I added some red rhinestones to my heart using little dots of white glue.  Works so well to have the glue in a fine tip applicator.  I left it to dry completely before pressing my card.  

Therese

Thursday, September 03, 2020

A birthday card featuring layered stamped floral elements, a paper collage background and a digital greeting


For this birthday card I started by creating a white card to fit in a large envelope from my stash.  I created a paper collage using paper scraps and regular tape trimming it to size before adhering it to my card front.  I found these little stamped floral elements in my stash (SU) and watercoloured them to coordinate with my background.  I layered them onto pink squares once they were dry.  I trimmed the laser printed greeting (Desert Diva digital) to the same size as the floral elements, watercoloured it and mounted it to a pink square of cardstock as well.  I played with the layout of all the elements until I was happy and adhered them to my card front using 3D foam tape.  To finish off my card I added five little clear rhinestones to the greeting.  Done!! Love the colours!!

Therese


Tuesday, September 01, 2020

Exchange card featuring a black upcycled denim feather, black lace and a layered greeting


For my second exchange card I decided to use a black upcycled denim feather which I recently created.  You can check here for more information.   I trimmed a blue green card to fit in my envelope.  I added the decorative paper in two pieces and created a layer to cover where they join.  I started my layer with a strip of bright yellow cardstock and added a length of black lace securing the ends to the back with double sided tape.  I stitched on a length of yellow ribbon before mounting the strip to my card front.  I created a swirl at the top of my feather, placed it over my ribbon and tied a single knot to secure it to my card front.  I added a layered greeting to finish off my card.  My greeting consists of a yellow scalloped circle (Nestibilities), a black circle punchie (SU), a stamped circle greeting all held together with a gold star brad.  I mounted the greeting to my card using 3D foam tape.     Therese

Exchange card featuring a black denim feather, a little birthday greeting tag and washi tape


 This is one of my exchange cards for this month.  It is another I have created using an upcycled denim feather which I created recently.  I am really enjoying making cards with my little fabric feathers!!

For this card I combined a strip of pink cardstock to a piece of blue green using pink and black washi tape.  I burnished it really well so it would hold the two together well.  I trimmed the piece to fit inside an envelope I found in my stash.  I stamped a feather on the pink portion and a harlequin pattern on the bottom section in two different colours and then a worn pattern over that in black to help the card work with my feather.  I created a little tag for my greeting by layering a little oval font greeting punchie sponged with pink to a larger scalloped oval punchie in black.  I punched a small hole, added a gold knotted cord.  I added a swirl to the top of my feather and looked for a way to add them to my card.  I decided on a black ribbon which I attached to my card using a small glue dot.  I pressed the middle of my piece of ribbon to the glue dot and pressed firmly.  I threaded the tag onto one side and then tied the ribbon around the top of my feather.  Done!!  Love these little feathers!!    Therese

Monday, August 31, 2020

All occasion card featuring a wood grain and embossed background, ribbon and a butterfly

 My favorite colour combination is pink and green so I made one of my wood grain backgrounds using those colours.  I embossed it with this rose embossing folder (SU) and then highlighted the raised areas with dark green.  I added a coordinating ribbon and then a little butterfly punchie which I embellished with three little rhinestones.  I am really liking how varied you can get in the colours when creating wood grain backgrounds.  Pretty much anything goes!!!  


Therese

Saturday, August 29, 2020

An all occasion card featuring a wood grain and embossed background, ribbon and three die cut leaves

I found the plain die cut leaves in my stash and decided to embellish them a bit before adding them to my card.   They are the Tim Holtz Tattered leaves and I embossed them all with the coordinating embossing folder.  The navy I left as it was, highlighted the brown one with a bit of brown ink to emphasize the texture and the last one was white core cardstock so I sanded it a bit which really brought out the embossing.  It was really nice to have them all look a little different in that they were all the same die cut.  I added a length of white ribbon near the top and then played with the leaves until I was happy with the lay out.  I used white glue in a fine tip applicator to adhere them to my background.  I added a tiny white brad on the stem of the sanded leaf and tied a short piece of kraft cording to it before pressing it all the way down which captured it very nicely.  I mounted my large element to a navy card front to finish off my card.  

Therese

Friday, August 28, 2020

All occasion card featuring a wood grain & embossed leaf background, ribbon and some embossed leaves

 I created this background using a wood grain technique using green and brown inks and then embossed it with a leaf embossing folder.  I highlighted the raised areas with dark green, red and some brown ink.  I added a deep red ribbon and then mounted three leaf punchies over it.  The punchies have been embossed with a portion of an embossing folder.  I like it!!  I mounted my background to a brown card front to finish off my card.  

Therese 

Birthday card featuring a stamped scrapbook paper background, an embossed layer, floral digital image (mine) and an epoxy greeting


For this card I started with a large rust coloured card which I created for a large envelope from my stash.  I trimmed a piece of scrapbook paper with words on it.  Wanting to give it a bit of interest I decided to stamp it with a floral stamp (SU) using generational stamping - inking once and stamping several times.  Stamped a little quote about kindness (SU) on the bottom right corner as well.   I found the scrap of embossed and inked cardstock in my stash.  The floral image is one that I doodled a while back and have sized and laser printed.  I watercoloured it, distressed its edges and then stamped it with a stipple stamp for a bit of texture.  The birthday greeting tag was created using a bit of scrapbook paper on which I stamped the greeting (SU), applied the epoxy tag and then trimmed around neatly.  I tied on some orange fiber.  I adhered all my element to my card once I found a layout I liked.  To finish off my card I added five little butterfly punchies.  Fun!!!!!  

Therese

Thursday, August 27, 2020

All occasion cards featuring washi tape, embossing and butterfly diecuts


I have a little stash of washi tape - both handmade and purchased and after seeing several cards featuring it I thought I would give it a go.  

I placed several strips of coordinating washi tape onto a 4" x 5.25" white cardstock layer, embossed them and then used them to make cards.  

My first card features blue and green washi tape and I embossed the layer using circles to echo the dotted green/blue tape.  I mounted this background onto a green card front.  I found this little butterfly in my stash.  I sponged its edges, embossed it and then die cut a black body for it with a die from a different set.  I glued the body to the butterfly and then mounted it to my card front using 3D foam tape.  

My second card is pretty much the same procedure.  I used pink, gray and black washi tape, embossed the layer with a swirl embossing folder and then mounted a large black butterfly die cut over the background using 3D foam tape.  Lots of room on these ones for greetings when the time comes to use them!!         Therese
 

Wednesday, August 26, 2020

An all occasion card featuring a collage background and an uncycled fabric feather


 I have been using up the pieces of a paper pack which I opened up a while back.  It is really unbelievable how many cards I have made with these papers and there are still several whole sheets to go!!    For this card I pieced several of the aqua pieces that were sitting on my desk along with a section of the words sheet.  I just adhered them to each other using regular tape on the back and then trimmed this collaged piece to fit on my dark gray card front.  I positioned my little fabric feather in order to be able to read most of the little sayings.  I used a push pin to make a hole in my background, added a swirl to the top of my feather, captured the wire between the tangs of a brown brad and mounted the feather to the background. To finish off my card I mounted the background to my card.  These little feathers make me happy!!  

Therese

All occasion card featuring a wood grain with a debossed flowers, ribbon and a little dragonfly

 Another blue background I created.  This one has a debossed design.  I like how it worked out but I was expecting it to be the other way around.  I had the folder flipped over.  I added a ribbon and tied on a short piece with a single knot to simulate a bow.  I added a little dragonfly punchie.  It was punched from a glossy yellow background scrap and I used a black permanent marker to colour its body.  I like the contrast!!  I adhered this large element to a navy card front.  


Therese

Tuesday, August 25, 2020

All occasion card featuring a drapery fold, ribbon and decorative paper


 Happy with my first drapery fold card I decided to make another one!!  I changed the orientation to portrait and put the start of the fold on the right hand side.  It was mostly all assembled when I realized that I had not sponged any areas but it was too late to make any changes.  
I used a kraft card front and trimmed a teal/brown paper for my background.  I created my drapery fold from coordinating paper.  My error in this piece was that I switched the long side so I should have folded it the other way for the drapery folds to show on the front.  I am happy with the way it looks!  I adhered my drapery fold to my background, added a piece of dark brown ribbon securing the ends to the back before adhering this large element to my card front.  The little globe came with the paper pack.  I cut two circles - oatmeal and dark brown.  I embossed the oatmeal one using a Tim Holtz embossing folder selectively so I could get the checkered pattern in the center and the distressed areas on the outside of the circle.  After embossing it, I sponged the edges which really helped.  I added the globe with double sided tape then glued the oatmeal circle to the dark brown one.  I mounted this focal element to my card front using 3D foam tape.  It was fun to experiment with the drapery fold and I will use it again now that I have figured out how to use single sided papers effectively.  Therese

Monday, August 24, 2020

All occasion card featuring a wood grain & embossed background, ribbon and a little bird

 Another background I created which has green wood grain technique and an embossed leaf design which I highlighted with dark green ink.  I added a length of ribbon across the bottom portion and tied on a shorter piece using a single knot to create a bow.  I stamped my little bird and punched him out (SU), added some detail to his beak and a tiny brad for his eye.  Punched a dark brown wing and embossed it with a swirl before adding it with double sided tape.  I used double sided tape to mount my little bird just tucked a bit under the ribbon.  


Therese

All occasion card featuring a drapery fold, silk flower and ribbon


I have often looked at the cards on the Splitcoast Stampers gallery that feature the drapery fold and thought I would very much like to give it a go but I have very little double sided paper!!  So I did!!  This technique works better with double sided paper but in the end I sponged the back folds to coordinate with my paper which worked just as well.  Beccy has a tutorial on her blog if you would like to know how make this fold.  I started with a black card, added a background of yellow decorative paper and then cut the piece I needed for the fold from a coordinating paper.  I scored and then folded my paper and trimmed just a little bit off the end so it would fit on my background.  I identified the areas of my folded piece that showed on the front, turned over the whole piece and added several layers of colour until I was happy with how it looked.  I glued my folds at the top and then adhered it over my background.  I added a length of black ribbon securing the ends to the inside with double sided tape.  I found some silk flowers that I combined to create this one and sponged the layers with yellow to get it to coordinate more closely.  I layered the flower pieces, added a black sequin and secured them all together using a yellow brad.  I used 3D foam tape to adhere my silk flower to my card front.  Very happy with how this one turned out!!         Therese


Sunday, August 23, 2020

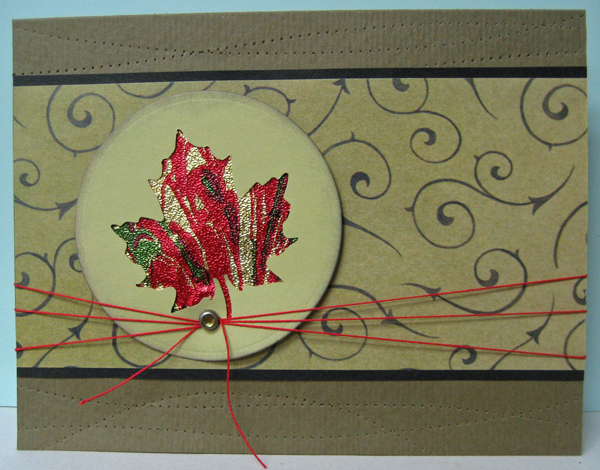
All occasion card featuring a punched leaf, decorative paper and thread


I gave another go at making a leaf card.  I punched the leaf from a green circle and backed it with multicoloured foil which really looked great!!  I layered a strip of green decorative paper with narrow strips of black before mounting this element to a dark green card front.  I ran my pattern tracing wheel above and below the strip to add texture.  I added a green brad to my leaf element, adhered it to my card using 3D foam tape and then ran some red crochet thread several times around my card and tied the ends around the brad.  I really like the punch of colour that the leaf provides this card!!  Therese


Saturday, August 22, 2020

All occasion card featuring a wood grain embossed background, a velvet ribbon and a butterfly embellishment

 I had a great time making backgrounds inspired by the carved wood grain technique by Gina K even though I was not able to reproduce a background quite a well executed as hers.  

This one is wood grain in blues on white cardstock  and then an embossed design which I highlighted with ink.  Most of the inks were Distress ones.  I created a border punched layer (SU) in white cardstock on which to lay my beautiful blue velvet ribbon!!  I mounted the ribbon to the border and then adhered this element to my background.  I added my silver butterfly die cut using a tiny black brad because the texture of the velvet was very raised making 3D foam tape ineffective.  I added 5 clear rhinestones to complete the rest of its body.  Once I added that bling I decided I needed a bit on my border too so I added dots of clear glitter with a gel pen.  I mounted this large element to a royal blue card front to finish off my card!   Therese

All occasion card featuring wood grain decorative paper, ribbon and a punched leaf


 As I was digging through my paper stash the other day and I found this weathered wood colour printed paper which I have never used.  I decided to see if I could incorporate it in my next card and this is what I came up with.  
I started with a red circle and I punched a leaf from it.  Next, I cut a red card base and mounted my trimmed background to it.  I trimmed out a strip of black cardstock, punched it with my scallop border punch and pierced the scallops with a push pin.  I found  some ribbon in my stash that worked perfectly so I mounted a piece of that to my strip securing the ends to the back.  I ran my pattern tracing wheel on both sides of the ribbon to add some texture.  The red circle seemed to not have quite enough presence on its own so I cut a scalloped circle (Nestibilities) from black cardstock to layer behind it.  I did cut a circle from the middle of it so the leaf would highlight the wood grain.  I layered these two together and then mounted this focal element to my card front using 3D foam tape.  I decided to add a bit of bling - three silver brads to the strip over the ribbon before mounting it with double sided tape to the front of my card below my leaf element.     Therese 

Friday, August 21, 2020

All occasion card featuring embossed background, ribbon and a watercoloured flower


 I used pretty much the same supplies as my last card but changed up the sketch!!  I used some fairly opaque vellum for my background and embossed it a circle embossing folder.  I adhered it to my blue card front using glue stick and there was no evidence of it on the front.  I took a piece of  purple decorative paper and added a strip of green to echo the green in it which I embossed with Swiss Dot before attaching it with regular tape.  I layered this piece onto a dark pink layer and then added a length of purple organza ribbon securing the ends to the back.  I mounted this to my card front over the embossed background.   I watercoloured the embossed flower to coordinate and mounted it to my card front using 3D foam tape.  


Therese

Thursday, August 20, 2020

Carved wood technique for backgrounds

 I tried the carved wood technique by Gina K after seeing a few examples on Splitcoast Stampers in the past few days.  I did not have all the supplies she used so I assembled what I had and got started.  Making the plain wood grain pattern was pretty cool and so effective with so little time and supplies!  I had not tried it before but I will be doing it again.  It took a few tries to get the look she got.  My best one is the top right hand one.  I realized that she created a dark wood grain and after debossing with the vine embossing folder used a light colour pigment ink which left a dark coloured debossed pattern which in her example really looks like carved wood.  Mine a little less because with my pad I could not get the contrast she did with her colours.  So I just decided to make some woodgrain embossed backgrounds and have fun!!  I will certainly give it another go at another time!!  I made quite a few more than these ones but I got into making cards and just realized I should make a blog post about the backgrounds before I blog the cards!!

Therese

All occasion card featuring watercoloured and embossed flower, decorative paper and ribbon


 As I move ahead with getting some all occasion cards made for my stash I am experimenting with new sketches and using supplies and tools that have been sitting for a while. 

For this card, I am using a flower (SU) as my focal element that has not seen much use as of late.  I decided to stamp and emboss it with silver embossing powder on white cardstock.  I stamped several more while I was at it and have added them to my image stash.  I created my background using some white embossed pieces, a yellow strip and a strip of bright purple decorative paper.  I layered the purple strip over the yellow one and trimmed the edges to leave a bit of on each long end and even on the short ends.  I trimmed the white embossed layer and added some on each side of my accent piece then trimmed it to fit on my pink card base.  I added a purple organza ribbon around my background overlapping the purple decorative paper, secured the ends to the back with double sided tape and then tied on a short piece with a single knot to simulate a bow before adhering it to my card base.  I watercoloured the flower to coordinate and mounted it to my card front using 3D foam tape.  Lots of white with some punches of colour!! Perfect!!          Therese

An all occasion card featuring a black and red upcycled denim feather, decorative paper and thread


 For my second card featuring an upcycled denim feather I used one of the black ones I had created!!  I started with a black card front and added some red and white paper from the same Asian paper pack I used last time.  I trimmed out a piece for my background and added a torn length of vellum, folding the ends to the back and securing with regular tape.  I adhered this  large layer to my card front.  I added a swirl to the top of my feather and tied the thread to the top of it  just below the swirl and then wrapped it around my card front and tied the two ends on the front at the top of my feather.  I used a small punch to create a hole on the spine to pass my thread through.  I used a small piece of double sided tape on the back of my feather to help support it on my card front.  

Really happy with this one too!!

Therese

Tuesday, August 18, 2020

A few more upcycled fabric feathers


Curious as to the effect that could be gained from using different fabrics for making feathers I dug through my stash and found several heavy weight fabrics with printed designs to see what the results would be.  I am pleased with my experiment.  I used silver wire on these.  It worked as well as the gold.   Though, I have to recommend that choosing very tightly woven fabric will lengthen the time required to pull the surplus threads.  The green feather was made from such a fabric and took a LONG while to create.  I chose to use gray thread to create the shaft as it was featured in the original design of the fabric but I see that little remains on the feather though having a printed design does give the feathers more texture and interest and will allow a greater breath in the possibilities for cards.  The fabric I used for the pink feather would be appropriate weight for a book bag and worked very well though its loose weave does give the feather less substance.  It was an educational experience and I am encouraged that almost any heavy weight fabric can be used to make feather so have fun making feathers with what you have on hand!!          Therese

Exchange cards featuring floral die cuts, coordinating papers and canvas frames


These cards are my two exchange cards for August.  I decided to use a paper pack I received a while back that had two canvas frames.  
For my first card, I cut a dark teal card to fit in a large envelope from my stash.  I trimmed several sheets from the pack to create my background - the main portion features little hearts, the top a leaf pattern and the lower piece from a piece that relates very much to the pattern on the frame before adhering it to my card front.  From a different sheet, I trimmed a small strip, punched it with my eyelet punch (SU) and then scored a line with my score tool before adhering it to the back of my frame.  I layered the frame onto my background using double side tape.  I created my focal element using a large flower die cut (SX) which I watercoloured and then embossed.  I added a yellow circle punchie and then a coordinating stamped punchie.  I punched two leaves, embossed them and then assembled my flower by gluing the layers to each other starting from the front.  I added the large flower to my card front inside the frame using 3D foam tape.  I chose to not add a greeting which makes it more versatile and during this time when we are not meeting each other face to face as much it makes sense to send a card to let people know you are thinking of them!!
 For my second card, I started with a large envelope and I trimmed a neutral gray card to fit inside.  I trimmed a piece of paper with words from one sheet and added two pieces of the leaf pattern paper on each side to create my background before adhering it to my card front.  I positioned the frame to highlight the words and adhered it to my background using double sided tape leaving the release paper on the ones on the bottom section so I could add my flowers.  I die cut four flowers (TH - Wildflowers) from the variegated sheet which I cut the border from for my first card, added dots of white glue using a fine tip applicator and then tucked them inside the bottom of the frame.  After they dried for a bit I lifted the release paper from the bottom edge of the frame and pressed it into place.  I found a round font greeting in my stash and punched a scalloped circle in a coordinating colour then sponged coordinating colours onto both of their edges.  I adhered the greeting to the scalloped circle (SU) and used a push pin to pierce each scallop which adds texture to this element.  I used 3D foam tape to adhere the greeting to my card to the left of the flowers and overlapping the bottom edge of my frame.  Really happy with how these cards turned out and they will be headed to my partners in this weeks mail.
Therese

An all occasion card featuring an upcycled denim feather, an embossed layer, decorative paper and thread


 I experimented with the creation of upcycled denim feathers recently with the idea of adding them to my handmade cards.  This is my first card but I am sure it will not be my last!!
I started with a card base similar in colour to my feather.  I found a pack of Asian decorative paper in my stash and I really like the  navy blue and yellow so I trimmed out a 4" x 5.25" layer for my card and adhered it in place as my background.  To coordinate with my paper I chose a strip of navy cardstock which I embossed and trimmed to size and then a bright yellow strip which I trimmed on the right hand size with my deckle decorative scissors.  I trimmed it to be just a bit wider than my cardstock and the same length.  I adhered the navy strip to the yellow and then added a row of paper piercing using my tracing wheel.  I added a loop  and swirl to the top of my feather and then added it to my card by tying it to my navy/yellow strip using white thread wrapped several times around and tied with a double knot.  Really happy with how this one turned out and I am looking forward to make several more!!
Therese

All occasion card featuring decorative paper, ribbon and die cut butterflies


 For this all occasion card I started with the floral image which was trimmed from a sheet of scrapbook paper.  I added a layer of the same paper below to get the height I needed and to cover where they join I added a strip of green cardstock which I had run my tracing wheel over several times and tied on a length of pink ribbon using one knot.  I adhered my large layer onto a dark green card front and added four little butterfly die cuts (SU) using white glue in a fine tip applicator placing a line down the middle on the back and simply placing them.  I let the glue dry before pressing my card.  This one will go into my stash and may get a greeting when I use it!!

Therese