Friday, September 17, 2021

All occasion card featuring decorative paper background, ribbon and a leather leaf die cut

I have been working on and off on all occasion cards for my stash.   This one is going to a member of our faith community who is moving to another city.  We most appreciate all he has given to us over the years and are wishing him every good thing as he goes on another adventure.  

This card started with a white card base.  I adhered two pieces of coordinating paper to each other and then a ribbon to create my background.  I tied a little piece of kraft twine to the stem of a leather leaf die cut and then mounted it to my card front using double side tape.  I used a wood burning tool to add details to the leaf.  I added my little stamped greeting which was punched with the Word Window punch (SU) and then sponged on the edges with 3D foam tape to finish off my card.  

Therese
 

All occasion card featuring die cut leaf (TH), embossed layer and twine

A friend of mine asked for a few cards so I decided to get started on making a few.  This one uses a dark brown panel from which I had die cut a leaf (TH).  In my little stash I had several different coloured die cut leaves so I chose a green one to off set from the opening in the panel.  I trimmed a yellow background, distressed its edges and mounted it to a dark brown card.  I like the way the yellow background shows through the opening of my panel.  I adhered my green leaf to the side a bit and then tied on a piece of twine at the stems.  I mounted my panel to the front of my card a little bit offset.  I am leaving all my card without greetings so she can choose the occasion she will use them for.  There is room for a greeting if she decides she needs one!!


Therese

Thursday, September 16, 2021

Thank you cards featuring embossed greetings, decorative paper and ribbon


 I needed a couple of thank you cards so I went to my craft room to see what I could come up with!!  I have recently been reminded about this stamp and thought it would be perfect for the cards I needed.  I stamped it twice on a scrap of white cardstock and embossed them with silver embossign powder.  I cut two white cards to fit in my envelopes and then trimmed two pieces of decorative paper from my stash of pink scraps. I added a length of pink ribbon to each tucking the ends to the back and securing with double sided tape then mounted them to my cards.  After fussy cutting the greetings I watercoloured them both to coordinate with my backgrounds and mounted them to my cards using 3D foam tape.  

Therese

Wednesday, September 15, 2021

Birthday card featuring some fun pink flags, washi tape and a little greeting


For this card I started with a decorative paper with pink diamonds and added five little pink flagged strips of  paper which I kept in place with a length of pink and black polka dot washi tape.  I found the greeting (Desert Diva)  in my stash, watercoloured it to coordinate, added some paper piercing with my pattern tracing wheel and then mounted it to a layer of black cardstock.  I mounted it to my card front using 3D foam tape.  Just to finish it off nicely, I added a little pink butterfly punchie!!  I am enjoying playing with my tools and using up some of my scraps!!  Therese
 

Tuesday, September 14, 2021

Thank you card featuring a fancy greeting, washi tape and a black silhouette of a wild flower (TH)

I combined two pieces of scrapbook paper by joining them with handmade coordinating washi tape to create a background which I mounted to my white card base.  I found the greeting in my stash.  I created this image from an oval frame which I filled with a font greeting before laser printing and punching out the shapes (SU).  I watercoloured it to coordinate.  I found the black silhouette wild flower in my stash and thought it went very well with my greeting so I adhered it to my card using white glue in a fine tip applicator.  Once it was dry, I added my little greeting using 3D foam tape.  


Therese
 

Monday, September 13, 2021

Birthday card featuring blue decorative paper, washi tape and butterfly punchies

For this card I started with a white card base and added the background I created by combining two scraps of decorative paper.  I used a length of coordinating washi tape to cover over where they join and then trimmed the tape to the edges of the card.  The birthday greeting (Desert Diva) is from my stash.  I embellished it with paper piercing uisng my pattern tracing wheel and mounted it to my card front with 3D foam tape after mounting it to a bright blue piece of cardstock.  Searching my stash I found a little flight of butterflies in coordinating blues which I mounted to my card front using double sided tape.  Finished off my card very nicely!!

Therese


All occasion card with a stamped coffee cup, a black strip and a geometric background


I am still making cards for my stash!!  This one features a white card base and for the background I reused a fun geometric card back with some wonderful colours.  I added a strip of black cardstock and then added a layered focal element.  I started with a stamped coffee cup which I fussy cut to have a bit of an uneven edge.  I layered it onto a coordinating piece of green cardstock which I distressed on its edges.  Once adhered to each other I mounted this element to my card front using 3D foam tape.  I did run a fine tipped black permanent marker around the edges of the coffee cup to reinforce it edges and help it echo the black strip I added.  Therese

Sunday, September 12, 2021

A star card with a fun greeting, a paper pieced backgrond embellished with washi tape and a large gold star

For this card I started with a white card base and then used green decorative paper scraps to create a fun background which I held together using washi tape.  Have not used those in a while!!  I adhered it to my card, added two layered flagged strips to my background and then my embellished greeting (Desert Diva).  It has several tracks made by my pattern tracing wheel and is embellsihed with a little gold confetti star.  I adhered the large gold star with 3D foam tape.  It nicely unifies my design and creates a wonderful focal element for this great little digital greeting.  Therese
 

Friday, September 10, 2021

All occasion card featuring stitched flowers, embossed panel and some ribbon

This card started with the panel from a card I had refurbished a while back.  There were these wonderful stitched flowers which were embellished with glitter and done in shimmery thread.  I trimmed the piece to fit on my card, punched on side with a scalloped border punch and then embossed a line with my score tool.  I embossed the other side with a birdie embossing folder (CB) and then added a piece of coordinating satin ribbon over where the embossing stopped.  I added this embellished layer to the front of a lilac card.  

Therese


Wednesday, September 08, 2021

All occasion card featuring a little cactus, an embossed strip and some paste paper for my backround

Another card for my stash!!  I started with a white card and trimmed a piece of beautiful paste paper to fit with a small border.  I found a strip of coordinating cardstock in my stash, embossed it a dotted embossing folder (SU) and then flagged the end.  I mounted the strip over the background and then found this cute little cactus image that I thought would work really well.  I water oloured it to coordinate with my card and then cut a piece of dark pink cardstock to back it with to echo the colour of its little flower.  I used a border punch on the one side and after adhering them together I mounted this focal element to my card front.  Therese
 

Tuesday, September 07, 2021

Thank you card featuring decorative paper, layered punchies with bling and a small font greeting


 I have been working on cards for my stash on and off for several weeks now.  I am just now getting to blogging some of them.  I used a white card base and added the green and pink decorative paper background.  I found the coordiating pink and white punchies in my stash so I layered them and added little deep pink rhinestones to the centers.  Added the little flag ended greeting using 3D foam tape.  It is fun to create with what you have at hand and the discover yet more fun stuff when you go searching for embellishments!!  Therese

Wednesday, September 01, 2021

Tunnel card featuring an embossed label, some ribbon and a die cut image

This eighth tunnel card completes my special occasion cards for my family for the month of September. You can check out my first one here.  It has been really good to strech creatively and try something new.  It has enticed me to use the "special" paper and that has been fun too.  I have more than I will probably ever be able to use so it is time to use the peices I like and pass the others off to bless others!!  For this card I used a soft peach floral for the card and a soft peach for the tunnel.  I used a label die (SX) to cut the opening in the center of my tunnel.  I stamped and embossed the greeting and the flower (Magenta) and embossed them in copper embossing folder.  I used the same copper pigment ink to stamp the flowers onto the tunnel but did not emboss them. I trimmed the flaps with scallop decorative scissors.  I added the tunnel to the inside of my card by adhering the two flaps to the card.  I used the label die cut from the tunnel to decorate the front of my card.  I die cut a smaller label from the middle of it and turned it over and used regular tape to put it back in the opening.  It gives a really nice contrast and coordinated nicely with the copper on the inside.  I embossed it with the Swiss Dot embossing folder (CB).  I die cut a little image for inside and added it with 3D foam tape.  I used double sided tape to add two lengths of green ribbon to the front in a diagonal pattern trimming the ends to the edge of my card.  After I was finished I adhered my large focal element to my card front.  Thinking it still needed a "bit of something" I added seven copper sequins to the front.  That was better!!   Therese


Tuesday, August 31, 2021

Tunnel card featuing glittery dragonfly stickers, white silk flowers adhered with brads and an embossed and glittered label

For my seventh tunnel card I used this nice floral pink sheet that was a coordinating plain pink on the other side.  I chose a diamond pattern in light pink for the tunnel.  You can check out my first card here. I did not have an oval die big enough to cut an opening for my tunnel so I traced my largest Nestibilities and cut it out by hand.  I stamped the greeting on the inside and embossed it with silver embossing powder.  I did the same with a simple daisy and a flourish (Sugarloaf). I chalked the daisies in blue which turned them a bit of a purple which was just perfect to coordinate with the butterfly stitckers I had chosen.   I adhered the flaps of my tunnel to the inside of my card and added the butterfly stickers.  These stickers have been around for a while and required a bit of double sided tape to get them to stay in place.   For the front of my card I die cut a label from dark pink cardstock and embossed it with the D'Vine swirl embossing folder (CB) and then added embossing ink and clear embossing powder with glitter in it to give it some sparkle.  I die cut a new oval from the one I trimmed from the tunnel so it would fit inside my embossed label.  I glittered its edges as well then adhered another dragofly to the center of it.  I found this pink paper in my stash, trimmed it to size, added silk flowers in all four corner using silver brads and then adhered it at a bit of an angle on my card front.  I mounted my label focal element to it using 3D foam tape to finish off my card.  I see that I could have echoed the yellow from my dragonflies in my layout - maybe a layer of yellow behind the pink would have been sufficient.  Next time!!  Therese


Monday, August 30, 2021

Tunnel card featuring a large greeting on a tag, some ribbon and an embossed circle

For my sixth card I went with this wonderful brown paper that has rust on the back and dark brown for my tunnel.  You can check out my first card here.  Once I trimmed my card and tunnel I cut a large circle opening on the center fold of my tunnel to echo the circles and dots on the front.  I stamped my greeting (SU) on the inside of my card in black and then found a dotted circle frame (SU) which I stamped generationally on both the inside of my card and the outside of my tunnel.  I embossed the circle I had cut from the tunnel with a birthday embossing folder (CB) then cut it in half.  I decided on this large greeting from my stash (Desert Diva).  I toned down the white with an ivory stamp pad, added two little gold corners and then mounted it to a layer of embossed brown cardstock (Scripty - SU) which I had torn across the bottom.  The ivory tag is from my desk from when I was making these school bus cards).  I stamped it with some little circles in two different brown inks, added a bit of water to get the colours to bleed and then used the pads on the edges as well.  I mounted my greeting to the tag using 3D foam tape and then added a glittery brad which I toned down in colour using a dark brown Sharpie marker.  I added a length of ivory gros grain ribbon to the left hand side of my card using double sided tape.  I mounted the embossed half circles to the tag then mounted this large element to my card front so the brad would overlap the ribbon.  Worked out very well!!       Therese


Sunday, August 29, 2021

Tunnel card featuring musical paper and an embossed birthday cake

For my fifth tunnel card I used this wonderful musical decorative paper!!!  I used an orangy paper on the inside for the tunnel which contrasted very nicely with the cards patterned inside.  You can check out my first card here.  I drew a birthday cake on the center fold of my tunnel and cut it out by hand.  I stamped my greeting (SU) on the inside of my card in black and then traced the shape of the cake on the patterned inside and watercoloured the flowers in yellow and oranges.  I could have used a larger bolder greeting considering the busy pattern I was stamping it onto.  I stamped a dotted circle (SU) in orange around my candle flame and then some flourishes (Sugarloaf) on the layers of the cake.  I used the cake to decorate the front of my card. Iembossed it with a musical embossing folder (CB) then cut off the candle and replaced it with an embossed (CB) blue cardstock one and then glued the paper candle to the back of it.  I used glitter gel pens to add colour and detail to the flame.  I added a blue strip to the bottom of the cake which I had trimmed with scallop decorative scissors.  I found this wonderful marbled paper that coordinated and used that as my background for the cake!!  I added the cake using 3D foam tape and then adhered this large element to my card front.   I used the same glittery gel pens to add some glow to my candle.  Really happy with how this one turned out.  I cannot make lots of card exactly the same hence the heart and the cake as openings for these last two cards.  It is really nice to use the "special" papers!!         Therese


Saturday, August 28, 2021

Tunnel card featuring a large heart, an embossed strip and a little fussy cut heart

For my fourth tunnel card I started with some cool decorative paper in red and ivory.  You can check out my first card here. I trimmed the card and then the tunnel from a diamond patterned paper that coordinated nicely.  I hand drew a heart on the fold of the tunnel and cut it out my hand.  I stamped the greeting (SU) in red on the inside of the card and watercoloured it to coordinate.  I stamped some little flourishes (Sugarloaf) all around it. I adhered the flaps of my tunnel to the inside.  To decorate the outside I used the heart I had cut from the tunnel.  I folded it in half and cut another heart out of it.  I embossed (CB) a pink piece of cardstock and long strip of red cardstock (SX) then assembled my large element.  I ran the strip from the back to the front through the large heart and then captured it with the pink embossed layer.  I trimmed a fish tail on one end of the strip and then adhered this element to my card front then trimming the other end of the strip to the edge of my card.  I fussy cut a little heart with a bow (digital - Melonheadz), watercoloured the bow in pinks and the heart with a shimmery champagne colour.  I mounted this little heart to my card front using 3D foam tape.  Therese
hffh


Friday, August 27, 2021

Tunnel card featuring decorative paper, doily, label die cut and a layered heart with ribbon bow

My third tunnel card is an anniversary one.  You can check out my first one here.  I trimmed my card and tunnel, folded them and then I die cut a label (SX) opening from the center of the tunnel.  I stamped my greeting (SU) on the inside in red and then added some stamped hearts all around it (Magenta).  I adhered the flaps of the tunnel to the inside of my card and then added some coordinating heart punchies (SU) to them. For the front of my card I added a large white paper doily and then adhered the label I cut from the tunnel to it.  I die cut a small oval from pink vellum, embossed it with the Swiss Dots (CB) embossing folder and adhered it to my label.  I found a coordinating heart in my stash which I adhered tot he vellum and then added a little pink bow.  I did add some faux stitching to the label because it still needed a "bit of something".  That was better!!       Therese


Thursday, August 26, 2021

Tunnel card featuring decorative paper, seam binding, die cuts and layered hearts

For this tunnel card I used a nice floral heavy weight paper for the card and a coordinating light weight paper for the tunnel.  You can see my first tunnel card here. After folding the tunnel I die cut the label opening and then used an eyelet border punch (SU) on the flaps.  I created an inner greeting layer the width of the space inside the card between the two flaps using a tag from Calico Collage with a font greeting and laser printed it.  Trimmed it to size, folded it in half and adhered it on the fold inside my card.  Next, I adhered my tunnel to the inside.  I used the label die cut from the tunnel on the front of my card.  I embossed it wih a distress embossing folder and sponged the edges with green.  I added two lengths of lace adhering the ends to the back with double sided tape.  I layered four hearts ( punchies and die cuts) from my stash for my focal element and added a small red confetti heart.  I mounted it to my card front using 3D foam tape. Thinking it still needed a "bit of something" I added two lengths of red seambinding (MS) to the corners.  That really was much better.  I tucked the one end inside under the tunnel edge and the other is simply adhered to the back with double sided tape.  FUN!  Therese


Tuesday, August 24, 2021

Tunnel card featuring decorative paper, label die cut, coffee vellum, fiber and a layered coffee cup

For my September family special occasion cards I decided to make tunnel cards.  I checked out several tutorials and decided to use heavy weight decorative paper (12" x12") for the outside and light weight decorative paper (12"x12") for the inside tunnel.  I made them all large cards to fit in envelopes from my stash.  

For this card I started by trimming my heavy weight paper to 11" x 8.25" or so.  The light weight paper was trimmed to 8" x 8".  The scraps will make A2 background very nicely.  I folded the inside in half and then scored 1.5" from each edge to create the tunnel.  I die cut a label shaped (SX) opening in the center fold which allows the recipient to see the greeting on the inside of the card.  I stamped the greeting on the inside of the card and watercoloured all around it in coordinating colours.  Once dry, I stamped several flowers around the greeting to be visible through the tunnel.  I stamped several extra on scrap paper to add to the tunnel edges.  I glued the two 1.5" flaps to the inside of my card laying it flat and lining up the center fold of the tunnel with the center fold of the card.  I fussy cut the extra flowers I had stamped and added them to the side flaps of the tunnel.  I used the piece I had cut from the inside to decorate the front of my card.   I cut a smaller opening in my label and then stamped it with dark brown ink to distress it.  I crumpled some coffee vellum and tore its edges to be just a bit larger than my label die cut.  I tied a coordinating piece of fiber to the die cut and glued it to my vellum and then glued this large element to my card front placing the double sided tape behind the die cut.  I watercoloured a small coffee cup (CLKER) in coordinating colours, punched it with a circle punch (SU) and then added a brown circle behind it.  I added this small element to the opening in my label using 3D foam tape.  

It was fun to do something different and my other cards will show up over the next few days as I get to blogging them.  I really enjoyed using some of the "special" papers that I have been setting aside for special cards!!             Therese
 

Slow Stitching - Houses quilt top

I have finally finished the quilt top around my Slow Stitching - Houses.  I had set aside the fabric for this quilt top a while back and was pleased to find that when I took out the little pile of fabric it made sense.  I had quite a few strips of fabric - 42" in there and also quite a few that needed to be pieced.  I started by stitching together all the strips that needed stitching including the two with little strips, the long strips, the blue blocks and the triangles.  Once I had the strips finished I worked on the layout.  I framed the houses with six strips of the same fabrics above and below.  I really like how the sky pops against the black strip.  I was fortunate to have enough long strips to be able to place one in between all of the stitched strips.  The stitching of the strips went well and I was very happy to have everything line up reasonably.  I did add two strips to either side of my houses to make sure I did not lose too much when I did the binding.  After the stitching I trimmed it to size - 41.5" x 64".  I will be adding a batting, backing and binding for finish it off.  The fabric for this quilt all came from a grab bag of fabric I purchased from a quilter who was liquidating her scraps.  I sorted them all by colour which allowed me to choose all similar colours for this quilt top.  Some of the stiching had already been done - the little strips were stitched four together and the larger strips were two together and a longer piece which I cut into three and added other strips in between.  It is so nice to have this slow stitched piece in a quilt top.  

Therese

Sunday, August 15, 2021

Quilt - Red and blue crumb squares sashed with yellow fabric along with some hand stitched daisies

I have been working on this quilt (48.5" x 59.5") for a while off and on between other activities.  I started by adding yellow sashing between the 12 dark red and blue crumb squares which I made a while back.  I added a large yellow border in the same fabric as the sashing, added a thin cotton batting and a dark blue backer which I wrapped around the edge and used to bind the quilt as well.  I added a row of green stitching between the two red ones on the large border and hand stitched red flowers onto the line.  I had to be careful not to go to deep with my stitches because I added the flowers after the quilt was finished.  I am really happy with how it turned out and how well the little stitched flowers finish it off!!  Therese


Christmas cards with fun school bus tags on varied backgrounds

Another set of cards for my sister with school buses on them.  These are all Christmas cards and were created with the same sketch but with a variety of different papers and card bases.  These are large cards - 5.5" x 8.5" because she has a supply of this size of envelopes.  I colour printed three different images of festively decorated buses and started creating!!  I created them one at a time  - a card base, then a background that was appropriate for the image and then a die cut tag which I embellished with coordinating layers and the images.  There is some embossing, tearing, texture created with my tracing wheel, sanding of white core cardstock, etc.  Each tag has a yellow reinforcement and then a coordinating fiber, ribbon or raffia tied to the tag.  It is so much fun to just create and try different things and just keep putting together elements.  I am suprised to see that they seem to fall into three collections as they were not created that way!!         Therese


Saturday, August 14, 2021

Thank you & sympathy cards featuring decorative paper, musical washi tape, punchies/diecuts and little greetings


 I am working on cards for my stash!!  I like to have a few on hand to give in sets as gifts.  You never know what you will need so I have started with a Thank you and Sympathy card.  I trimmed the diamond paper to fit across my white card base and then trimmed the darker piece to finish off the backgrounds.  I simply interchanged the placement and attached them with musical washi tape.  I added three little coordinating punchie flowers adhered with a tiny black brad to the first card and a little thank you greeting (laser printed font).  To my second card, I added a small piece of pressed dusty miller along with a brown die cut branch (Tim Holtz) and finished that arrangement off with a little raffia bow.  I colour washed the little greeting (laser printed font) and added it to my card with 3D foam tape.  It is a start and I will be making more as time permits.     Therese

Friday, August 13, 2021

Exchange cards featuring embossed images on embellished decorative paper backgrounds

For my exchange cards for this month I thought I would go bright and different.  I started by stamping two different Chapel Road stamps onto a sheet of bright colour printed background paper (Morgue File) and embossing them with black embossing powder.  I stamped quite a few, fussy cut them and chose the brightest ones for my cards.  I choose two different purple cardstocks to make my large cards.  For the first card, I added  pieces of bright gift wrap and some glittery gold washi tape to the card front.  Next, I embossed strips in yellow, pink and green that coordinated with my three hearts and embossed them with letters.  I added faux stitching with a black marker to the strips which were trimmed to the edges of the background and also around my background.  I added the strips at different angles and mounted my hearts which were reinforced with cardstock on the back using 3D foam tape.  

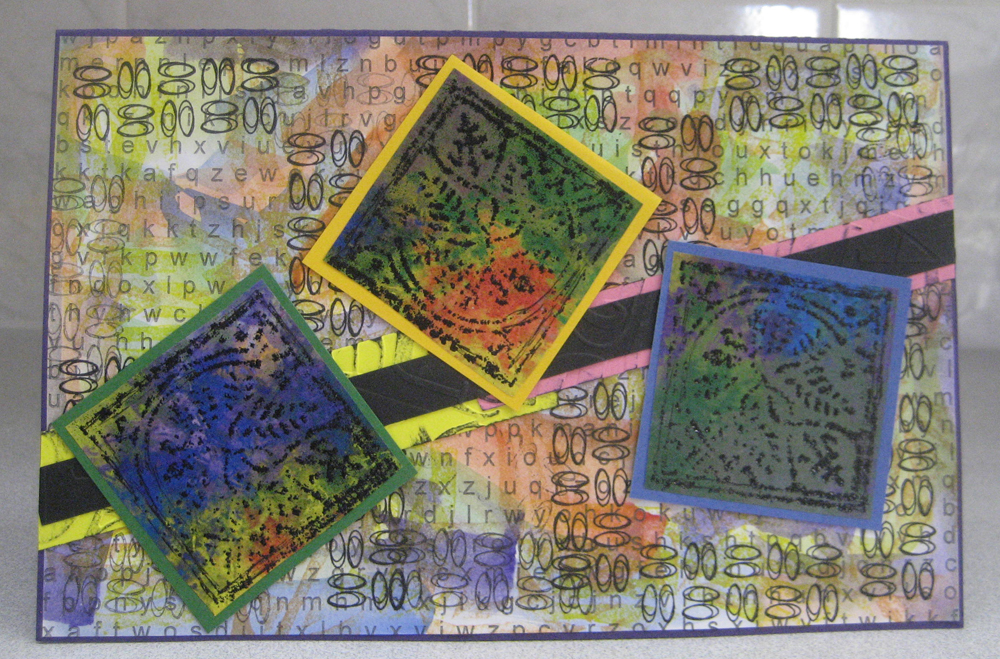
For my second card I trimmed a letter background (Vintage Feedsacks) with watercolour washes that coordinated with my squares and then used a scribbly stamp to add some dimension to my background.  I added the background to my card front and then layered a black strip of cardstock over yellow and pink strips which were rejects from my first card after I added black highlights.  They worked very nicely for this card!!  I trimmed the strip to the edge of my card and layered my squares on coordinating cardstock and then mounted them to my card using 3D foam tape.  

They are both bright cards but in much different ways! It is always fun to experiment and try new ways of doing things!!  Embellishing decorative papers is a way to make papers that you may not prefer or are a bit boring more exciting, unique and appropriate for the project at hand.   Therese


Thursday, August 12, 2021

All occasion cards featuring layered backgrounds and a cute little school bus

I made quite a few large cards for my sister early this year and she recently received them through one of my other sisters who lives closer to her.  When I saw her last weekend she thanked me for the cards and I asked her if was still interested in cards.  She was surprised that there were any supplies left.  I ensured her there was plenty and more cards could be forthcoming.  She requested "school bus" cards!!  She owns several school buses and would like to use them for her business.  No problem!!  I downloaded several bus photos -she did not mind some cartoony ones - and printed off six of this one from Klipartz.  After sizing them, I printed off a sheet of six and then fussy cut them leaving a small white border.  Gives them the look of having been die cut!!  Very cool!!  Next, I made some large cards and decorated them with some of the papers from her stash!  It was fun to play and combine different fun papers, add some embossed and embellished strips of cardstock, some brads and even a few places where I punched out some chevrons!!  I have made them all without greetings so she can customize them when she is ready to use them.  I did not plan on having three of each orientation but that is how it worked out.  I will set them aside and print off a few more of a different little bus and get creative with them!!  What fun!!!    Therese


Tuesday, August 10, 2021

Handmade card upcycled into a one of a kind needle case

My daughter gave me this felted wool card a few years ago for my birthday and I have saved it because it was so beautiful and I had been wondering how I could repurpose it.  I found a place on line where a lady was creating a needle case and it dawned on me that I could repurpose this card into a needle case for my slow stitching box.  

It was perfect!!  I removed the paper liner and replaced it with a green felted wool insert layered with a hand cut red felted wool heart.  I stitched them into the spine with ivory thread and I now have a good place to put my needles which in the past have resided in two little quilties.  It fits nicely in my box.  

I am so glad to be able to use it with good purpose and see it regularly when I am stitching.

Therese


Thursday, August 05, 2021

Antoher batch of fire starters packaged in upcycled paper bags


 I made up another bunch of fire starters using the papers which I used to reduce the wax in my prayer flags when I was making them. I did augment the wax on these in the same way that I have been making the wax crayon paper.  It has been good to be able to upcycle some of the items that are leftover from other projects.  Once the fire starters were finished I decorated some paper bags ( bananas ) with some of the decorative paper I created with leftover paint when I am working on projects.  I put a dozen fire starters in each bag. They all looked pretty cool!!  I gave them to family members who like to have fires when they are out camping or in their backyards.    Therese

Thinking of you card featuring a large flower die cut, four squares and a layered center

I made this card a while back for a friend who has been healing and I am just getting to blogging it now.  I started with a white card base and added the four lilttle squares that had been trimmed off of a large sheet of decorative paper when I was making a large card.  I added a large orange flower die cut which I had stamped with a homemade stamp in orange and then added faux stitching to the edges using a green marker.  I layered a white five petal punchie (SU) with an aqua six petal one binding them with a silver brad.  I adhered this piece to the center of my flower with 3D foam tape.  I stamped the little greeting below using orange ink.  

I am sure she enjoyed the cute little card when it arrived in her mailbox!!

Therese


Thursday, July 29, 2021

Anniversary card featuring Calico Collage images, an embossed scalloped circle and a stamped greeting


 My last July card for my youngest daughter on her anniversary!!!!!!!  I trimmed these previously colour printed images from Calico Collage, markered their edges with a black Sharpie and then adhered them to a large red card.  The heart is also a Calico Collage image which I cut with my circle cutter and also markered its edge with a brown marker.  I found a circle in my stash that was pretty close to the right colour so I die cut a scallop circle from it, chalked its edges and then embossed it with the "Subtle Texture" (SU) embossing folder.  Perfect!!  I mounted the image to the scalloped circle and adhered it to my card using 3D foam tape.  I found the stamped greeting in my stash.  Add two rows of paper piercing and then tucked it just under the edge of my scalloped circle.    Therese

Tuesday, July 27, 2021

Birthday card featuring a serendipity background and a large tag with a greeting and some watercoloured candles

Another July card for the special occasions in my family!!  I started with a large kraft card and then created a large serendipity background using scraps of paper in coordinating colours.  Once it was dry, I trimmed it to size and ran my pattern tracing wheel on all of its edges to create some texture then adhered it to my card. I die cut a brown tag and them embossed it with the "subtle texture" 3D embossing folder (SU).  Perfect!!  I trimmed yet another piece of the white cardstock I had stamped with the candles (SU) to the width for my tag and then tore the top and bottom.  I stamped the greeting, watercoloured the candles, added texture with my pattern tracing wheel and then a little tab with a tiny brad.  To finish it off I added a kraft hole reinforcement then tied on a length of gold/ivory fiber.  I mounted my tag to the card using 3D foam tape.  It is so nice to have time to be cardmaking!!          Therese
 

Monday, July 26, 2021

Birthday card featuring a striped collage background in blue and yellow scraps and little tag focal element with a bouquet of flowers and a layered greeting


 This card is for my Mom - her favorite colour is blue!!  I added a bit of yellow when I used all these strips of decorative scrapbook paper from my little stash of blue papers.  They coordinated so nicely and I simply taped them together on the back.  I layered the background onto a piece of yellow scrap book paper and then onto my large blue card.  This image is one of those I stampd a while back from one of my older SU sets - candles, flowers, leaves, a rabbit and this bouquet.  I thought it would be handy to have stamped images ready for creating cards.  Needless to say, I have a little stash of black and white images now!!  I might have gotten a little carried away - it was a bit of ink and scrap pieces of white cardstock!! I watercoloured my flowers to coordinate with my background, added a green ribbon and a layered oval greeting (font - laser printed) to the lower section then added a few lines of paper pierced texture with my pattern tracing wheel.  To finish it off I added some blue watercolour to the edges and mounted it to a rectangle of textured yellow cardstock.  I punched the bottom edge with  scalloped border punch (SU) and punched tiny holes in each scallop.  I mounted this focal element to my card front with 3D foam tape.  
Therese

Wednesday, July 14, 2021

Birthday card featuring a background made of scrappy strips, a little digital greeting and a layered length of watercoloured candles


 Still working on large cards for the special occasions in my extended family.  This one started with a deep rose card and I created a strippy background for it.  I tore my strips and adhered them to a 5.5" x 8.5" scrap piece of bond paper until it was completely covered.  After it was dry, I trimmed it to size and stitched the edges with rainbow thread which I used on my prayer flags which added more colour and texture to it before adhering it to my card front.  I die cut two scallop borders (SX) from pink cardstock and layered my focal element - a whole row of watercoloured candles (SU)  - with a rectangle of green cardstock.  I had already added two rows of paper piercing to it to add texture.  I layered the borders to the top and bottom of the green rectangle and added paper piercing to the scallops with a push pin.  I added a little laser printed digital greeting (Desert Diva- digital) which also was embellished with paper piercing using my pattern tracing wheel to the upper edge and then mounted this large element to my card front with 3D foam tape. Pink and green - my favorite colour combination!!!!!  Love how this one turned out!!
Therese

Monday, July 05, 2021

Birthday card featuring a collaged background, fabric lace and ribbon and a long row of watercoloured candles


 Another card for July birthdays!!  I started with a large coral rose card and created a collaged strips background that coordinated.  The strips were gleaned from my little stash of decorative papers which were sitting on my desk from a previous cardmaking session.  I tore the paper into strips and adhered them side by side on a piece of 5.5" x 8.5" of scrap bond.  Once it was dry, I trimmed it to size.  To give some soft texture I handstitched two lengths of off white lace to each other on their straight edges and adhered them to my background securing the ends on the back using double sided tape then added a shimmery ribbon across the stitching also securing the ends to the back with double sided. tape.  I had chosen this length of stamped candles as my focal point so I watercoloured them to coordinate and finished off the flames with some clear glitter.  I added a row of paper piercing on the top and bottom of this layer and then adhered it to my card using double sided tape and glue.  I did tuck the little font greeting (laser printed) in before pressing the card.  It has a row of paper piercing too.    Therese
Thread holder using a pegboard


I have repurposed a pegboard that I used for my craft sale set up into a thread holder.  I ordered 6" peg board hooks from online - they are twice the price locally - and was able to put up all of my large spools.  There is evern room for more than one on a peg in some cases when the spools are different sizes and also room for bobbins on the end so they can live together.  I have not yet decided to add the regular and small spools as it would be more difficult to see the colours of them.  I have them in trays in drawers now and it is really easy to find the colour I am looking for when I have a project I am working on.  Brian was able to make the modifications required and attach it to the wall just above my sewing desk.  As you can see there are several other items that have found their way to the bottom hooks which were scavenged from my craft sale display box.   Therese