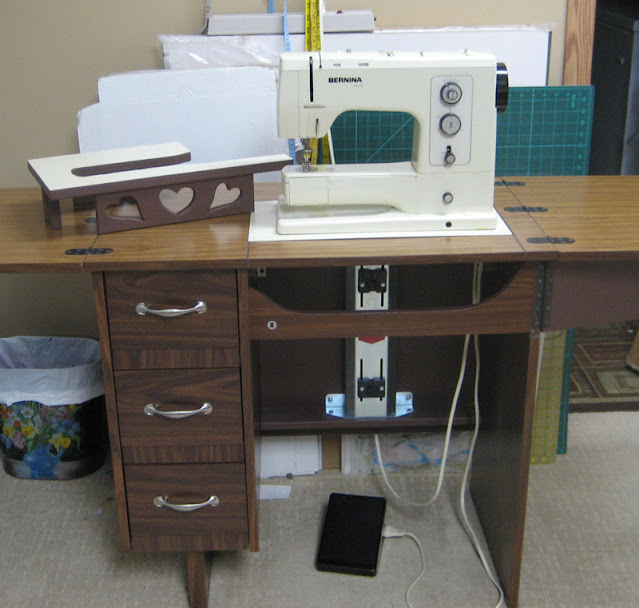
For my Christmas gift to myself I bought a sewing machine lift for my little sewing desk. I had already consulted with DH about the feasibility of putting one in and was given the go ahead. It did require quite a few modifications and additions to get it in but it is wonderful to use. The back had to be replaced with a larger more substantial piece of material and the front top had to be rebuilt into a full top which is what was needed with the raising of the sewing machine perpendicularly instead of the swinging storage that was in place before. DH agreed to do the renovations to my desk as my Christmas present and I am most pleased. The whole desk has been refurbished and cleaned up - new handles on the drawers and door/support, new base for the sewing machine with formica that matches the sewing machine, the new back now nicely painted the same colour as the other pieces. I can now use my sewing machine flat with the top of my desk when I am free arm sewing. DH built a wonderful insert so I can use my sewing machine for flat sewing as well. Love the hearts!! I am very happy to have been able to upgrade this little desk. It fits perfectly in my space and I expect will be able to move to any other space when it will be necessary. Therese
Saturday, February 13, 2021
Valentine card with LOTS of hearts and some ribbon
Having finally figured out the heart card I have been admiring for so long I have made my Valentine's card for DH using this format. I chose scraps of cardstock that coordinated including one with musical notes - one of his favorite things is music. I punched hearts from them and cut two in half to get my four halves. I played with them until I was happy with the layout. I chose one of the glittery red ones to be the special one. I found a piece of aqua polka dot paper which I used as the base for my hearts. I glued them into place, trimmed my paper and then put it under weight while it dried. I decided not to add any machine stitching to this one - I liked it just as it was!!. I had seen this heart embellishment on Splitcoast Stampers and I really liked it so I used it on my card. I die cut a white scalloped heart (Stamping UP) and mounted my red heart punchie (StampinUP) over it and added a pewter eyelet using my Cropadile. It has been quite a while since both of those have seen daylight!! I added three lengths of fiber to my heart layer - two gray with a smaller white one in between leaving them a bit loose knowing that I was going to tie them together and making sure that they lined up with where I was going to adhere my special heart. I glued this large layer to my red card front which fits in a large envelope from my stash. I used a short piece of gray fiber and threaded it through the eyelet on my heart, around the three fibers on my card and back through the front of the eyelet and tied it off with a double knot. I mounted my heart in its place with 3D foam tape then trimmed the ends of my gray heart fiber to finish off my card. I am very happy with how it worked out and I am looking forward to our at home celebration this weekend! Therese
Subscribe to:
Comments (Atom)


