Showing posts with label Fat book page. Show all posts

Wednesday, October 21, 2015

Art Quiltie for October!!

Has been a few months since we swapped Art Quilties but we are once again getting that process started.  It was a No Theme swap so I decided to do a fall theme and used the reverse applique technique. Reverse applique means that instead of applying a shape to a panel. you cut out a shape in the panel and back it with something interesting.  I used fall colour scraps and fused them to a backer until I had a piece big enough to fit behind the leaf pattern I had drawn free hand.  I drew the leaf on the blue panel, positioned the fall coloured layer behind it and then stitched a line with yellow thread over the line I had drawn using my sewing machine.  I used sharp pointy scissors to cut away the blue panel fabric inside the leaf as close as I could to the stitching.  After that, I stitched over the edge of the blue fabric leaf outline using a tight zigzag stitch with the same yellow thread.  Worked out really well!!  I backed this piece with a bit of fiberfill and added the stitching all the way around the leaf.  Next, I cut a piece of dark peach fabric larger than the 4" square of my panel, positioned it on the back, folded over the extra to the front and used blue embroidery thread to do blanket stitch all the way around the edge.  Really happy with how well that finished off the edge.  Next, I hand stitched coloured seed beads all the way around the leaf shape and added some veining inside the leaf shape using shimmery yellow thread.  Next, I added some square sequins and dark orange seed beads along the stitching lines and then some gold/copper seed beads in between where ever it looked good.  I did add some french knots to secure the backing fabric to the whole quiltie and then added my credits using iron on label fabric tape on which I had written using a fine tipped Sharpie!!  My art quiltie  - a fabric chunky book page - is already off to my swap partner!!
Lots of fun and I am happy to be making these again!!

Therese

Wednesday, August 19, 2015

Magical 4x4 chunky book page!

On one of my groups I joined a 4" x 4" chunky book swap with the theme of magic and the colour orange!!  I did a bit of brainstorming, sketched a layout and went looking for what I would need to create it!!  I found the book of spells on line on a geocaching site.  It was exactly what I was looking for - a beautifully illustrated book with a orange undertone.  I found the bottle on CLKER and added the label which I also found somewhere on line. Perfect!!  I imported the book in Corel Draw after I had made a few modification in PSElements to give it more height.  I imported the bottle as well after I had added the label in PSElements.  While looking for elements I had found an illustration of a little magician spewing magic so I decided I wanted something similar on the back of my page.  I downloaded this little guy (b&w) from CLKER and modified it in PSElements changing the eyes, hair, mouth, position of the arm and added a wand.


I positioned everything in Corel Draw and then laser printed it on white cardstock.  I trimmed it to be 4" x 8" and folded it in half.  I trimmed my bottle close and then ran a black sharpie around the edge to remove the white shadow.  I watercoloured the bottle and then applied glossy varnish to give it it a shiny finish.  I rounded the edges a bit and mounted it to the front of my 4x4 using 3D foam tape.  I felt like the page needed a bit more texture so I added an orange organza ribbon to the top.  That was better!!  I added some hand lettering and it was done!  On the back, I watercoloured the whole thing - the background in yellow and orange, the hill in browns and the wizard in purple.  He is a bit strange looking but I like him.  I have very little experience in digital drawing.  Once it was dry, I sprayed it with hair spray to seal the surface so I could add my magical zentangle.  I used a fine tip sharpie for the zentangle and just kept adding until I thought it was finished.  There are a few hearts in there because it is Love Potion after all!!!  Super happy with the result of my experimenting!!!
This little chunky book page will be off to my partner next week!!!

Therese

Monday, July 20, 2015

4x4 chunky book page - golden strength

 Started on this swap page a few days ago and finished it off this morning.  I am really happy with how it turned out.
I started by gluing silver foil (chocolate = arts supplies) to both sides of a 4" x 4" cardstock substrate leaving wrinkles and texture.  I scribbled some brown and maroon Sharpie marker over the surfaces and then added butterscotch alcohol inks and blended them. Really like the highlights in the gold!!!  After a bit of internet research I downloaded both of the images and printed them on transparency.  I love the strength quote -great affirmations.  The other is a universal image for strength.
I trimmed the images and found that when placed over the gold foil the reflections were a bit distracting in my quote so I added a strip of handmade washi tape across the back which really helped to highlight the word Strength.  I played with my elements until I was happy with their placement, added three short pieces of ribbon at the top right of my front and stitched down the right hand side which secured all the pieces in place.  I added double sided tape at the bottom edges of both transparencies and then added another thin strip of washi tape to each side.  To finish securing the back I added double sided tape below the printing so it would not show.  For the front I found these three foil wine bottle seals in my stash, trimmed them nicely and added them using large glue dots over my transparency which I had secured with double sided tape.  It is fun to play!!!  My swap will be on its way to my partner today!!
Gardening has taken more time in the last few weeks because it was so hot and no rain.  We finally have had two good rains!!  Catching up on swaps in the next few days before having a visit with grandchildren.

Therese

Monday, June 15, 2015

Chunky book page - Purple & Grace

In the last few days I have managed to finish my 4" x 4" chunky book page with the themes of purple and grace.    I statred with an embossed white cardstock square which I overlaid with the purple gauzy fabric with swirls.  I used double sided tape on the back to keep it in place. I back this with a 4" square of purple cardstock.  I stamped a vellum overlay using two different rubber stamp alphabets.  Grace was stamped in purple and embossed with Pastel embossing powder.  It is a bit of a grungy font but the embossing powder softened its look. I used my Making Memories magnetic alphabet stamps to finish the quote and added a bit of stippling in purple ink.  I trimmed the sides of the vellum to just cover the page and the two ends so I could fold them over the top and bottom.  I added some short ribbon flags in several colours between the vellum and the page on the right hand side and then stitched them all into place using purple thread in my sewing machine.  I went very slowly as the sandwich was quite thick.  I added a little plastic butterfly charm using a large glue dot and added my credits to the back.  Love the look of grace!!
It is off to my partner in tomorrow's mail.

Therese

Tuesday, May 19, 2015

Chunky book page - copper wire owl

Joined a chunky book page swap with the theme of Copper and Wisdom.  I recently finished this owl card and thought that owl fit the theme and went looking on line for copper owls!  Wow!  There were a lot of fantastic copper owl designs so I made a few sketches and headed to my craft room!
I decided to use some heavy copper wire for the structure and lighter weight copper wire to tie the pieces together which is how some of the ones I found had been constructed.  I chose some black buttons for the eyes and started forming the structure for the owl's head.  I folded my wire hard to create the beak and then created a circle on each side to accommodate my buttons and finished off with the ends creating the pointy ears that most of them have.  That looked pretty good and the buttons fit inside them nicely.
One of the sketches I had made had a heart shaped body.  Being a bit partial to hearts I decided that mine would have a heart body too.  I made a hard corner in my wire and then curved the two ends into a heart shape and added a swirl on each end.  That would give me a good place to tie him together.  Some of the ones I had seen on line had large beads in their bodies but I decided on another heart for the middle of mine.  I created the heart the same way I had created the body - just made it a bit smaller and made sure it would fit inside the other one.
Using the light weight wire I started by securing the top of the head on one side, wired in the button for the eye and then wired the bottom of that space so the button would be in the right place.  Next, I wired the head piece to the body making sure that my beak was directly over the bottom of the large heart.  Wired the beak in place and then moved on to the other side of the body and wired the head to the body on that side.  I had to play with it a bit to get the second button to be in the right place in the loop but just a couple more loops was good enough.  I then wired the top of the head on that side.  Next, I wired the bottom of the body, added the little heart and wired it into the same section.  Moved on to the top side of the little heart where they met the body.  Looking good!!
After a bit of checking it out, I decided it needed piece that went from ear to ear and completed the top of his head so I wired that piece in.  That was much better!!
I added teal sequins in the eye sockets using glue dots and then added smaller copper ones over them. That finished off the eyes nicely.  I did have a 4x4 on my work surface as I worked to make sure that I did not create him too large for my page.  Once my owl was finished I used a hammer and flattened him out by tapping all the intersections of wire to ensure that my connections were tight and that the wire structures where laying next to each other.  I found this watercolour background paper in my stash, trimmed it and stitched it to my 4" x 4" of blue cardstock.  I decided to expand on the wisdom theme by stamping "be kind" on the lower left hand side. My handmade stamp positioner ensured that my words were exactly where I wanted them to be.    I attached my owl to my page by using large glue dots behind the eyes and ran wire around the middle of the little heart connection through the page several times.
I am super happy with how he worked out!!!  He will be off to my partner in tomorrow's mail.

Therese

Wednesday, April 29, 2015

Yellow chunky book page


I created this cute little 4" x 4" chunky book page for a swap on one of my groups!!  I found this fabric paper in my stash and I thought this large flower was perfect for the yellow and bright theme.  I added the butterfly quote which was stamped on transparency and the little butterfly punchies which were given to me by a friend.  They were punched from some very bright and shiny paper!!  I added an embossed cardstock backer in green and sandwiched several coordinating ribbons in between before I stitched all the pieces together using yellow thread in my sewing machine.
I love making fabric paper and this one worked out so well for this project!!

Therese

Thursday, March 26, 2015

Spring 4x4 chunky book page

Created this 4" x 4" chunky book page for a swap on one of my groups that was themed - spring, green and watercolour.  I started with a piece of watercolour paper which I created when I was playing with waterbased markers for this project. I cut it to 4" square and used a set of Cookie Cutter alphabet dies to cut out the word spring.  I do not own any of these dies but my daughter lent a couple of sets last week so I decided to play with them today.  Very cool!!  My sister, Sylvia, has been using her SU Alphabet framelits set to create these and these cards.  I do have a set of alphabet punches which I have used several times which gives a similar look but is smaller and a bit less versatile.
I layered a piece of green cardstock on the back and glued it into place being careful to ensure the glue would not show through the letters.  I added glue to the three fall out pieces (one on the P and two on the G) and repositioned them in the letters then into the holes so they would be properly aligned in the word.  Once they were dry I removed the letters.  Excellent!!  I stamped the silhouette of the birds in the tree (SU) in black, doodled in the border and the dots on my letters using a black fine tip sharpie and added the wire using the same marker.  I made up this quote and stamped it on my page using dark green ink and my Making Memories magnetic alphabet stamps.  I had to use my homemade Lego positioning jig - see it here - to ensure that the first line ended up between the letters.  I had been wondering what I was going to use to add a bit of dimension to my project but it all became clear when I stamped the last three words upside down.  I restamped it on a scrap of the same watercolour paper, trimmed it to size and used a few pieces of cardstock to elevate a bit from the page's surface!!  I used the fine tip sharpie to add the branch in the corner and some music notes among the words.  I used a piece of cardstock which I had scribbled iall over n green gel pen to create my back.  I applied several washes of watercolour which highlighted the gel pen because they resisted the colour.  I glued my back to the front, added the same border and my credits and it is ready to be mailed off to my partner!

Therese

Friday, January 16, 2015

Chunky book page - blue, crackle paint and "allure"

Joined a 4"x 4" Chunky book page swap on one of my groups with the theme of "blue, distressed crackle and allure".  It took a few days and some internet research to come up with my concept for the project and to find tutorials for creating crackle paint.
I am very happy with my crackle background.  More info on that a bit farther down.   I decided to use techniques that draw me to creating - hearts, green and pink, texture, inspirational quotes, script backgrounds, hand lettering, etc.  I started by trimming my background to a four inch square and then stitched it with white thread to a white backer which was embossed with hearts.  I dug through my stash of hand decorated papers and found one with pink and green.  I glued a portion of it to cardstock and die cut a heart (SZ) out of it.  I embossed the heart using a script stamp (SU) and white embossing powder.  I glued it to my blue crackle 4" x 4" background using hot glue, added the felt flower and leaf embellishments and the little quote with hot glue as well.  I hand lettered the words and added the dots using a white gel pen.  Very happy with it!!
Crackle backgrounds - there are many tutorials on line for making them.  I started by using a clear crackle medium which I have own for a long time. I applied it to quarter sheet of dark blue hand decorated paper and followed the direction on the bottle.  I let it get tacky and then applied light blue acrylic paint to the surface.  It crackled some but not enough for my liking.  So I went looking for another method.  Someone on the group recommended several tutorials so I watched them and decided to use cheap white glue and paint.  As you can see on the left I started with several squares of blue serendipity paper which I painted liberally with cheap white glue ($1) and then painted with white and silver acrylic paint while the glue was still wet.  I had to apply a generous coat of paint to avoid disturbing the glue layer too much.  I left them over night and they crackled very nicely.  Unfortunately, the contrast between the upper and lower layeres was not really what I was looking for so I started over.
I used a quarter sheet of dark blue cardstock, applied the glue as described above, added a medium blue acrylic paint over it and left to dry overnight.  It crackled very nicely and the contrast between the two layers was much more what I was looking for.  The photo to the left is the same piece of crackle background as you see in my finished piece but they look so different.  Must be the light over my other work surface that made the difference.
So if you are looking to give this technique a try I would recommend the cheap white glue and acrylic paint technique.  It is cost effective and gives you very nice crackled background.  Here is a link to a tutorial.   Enjoy!!

Therese

Friday, January 09, 2015

Chunky book covers


On one of my groups we are going to be having a 4"x 4" fat book page swap every month so for January we have been challenged to make covers for our books!  The theme for the swap is Shades of Colour.  After a bit of "sitting" with the concept I decided to use the following magazine cover to create my book covers. 
I loved this mosaic image as soon as I saw it on the cover of a magazine that arrived before Christmas!!  When it was time for the magazine to be recycled I tore off the cover not sure what I was going to be doing with it.
I cut off the text and cut the remainder into 1" squares.  

I sorted the squares into colour groups  - sixteen blueish ones for the front cover and sixteen  mulit-colour for the back cover.  I glued them to edge to edge onto white cardstock, pressed them under weight and trimmed them to just under a four inch square.
 I cut two 4"x 4" pieces of chipboard and glued my collages to them.  I used decorative packing tape to finish off the edges.


I cut the tape in two, adhered the white edge to the front of my covers and folded the remaining part with the letters to the back creating a nice collage on the inside covers as well.  I am super happy to have created art with this beautiful piece of paper that manages
to maintain the beauty of it without keeping the original context.  I love how you can see eyes, a mouth and fingers on the back without really knowing where they come from.
I will be binding my pages from the swap into the covers using my Zutter Bind it all machine using a large binding which will give me lots of room to add charms, fibers and tags if I wish.
I added ribbon and a 3D embellishment to my cover.  The embellishment is one I created when my grand daughter was visiting this summer. We played with bottle caps and I filled this one with a punchie that says, "Think HAPPY, BE happy".  I glued it to the cavity of a flatten bottle cap, added some clear Dimensional Magic and then inserted the blue iridescent beads all the way around the words and left it to dry.  The colours are a perfect match for my covers.  I used double side tape to adhere my ribbon to the outside and inside of my front cover and tied the ends together at the top.  I used an awl to make holes in my bottle cap and my covers then used coordinating thread to stitch it to my cover over the ribbon.
So the journey begins!!  I am looking forward to the swap and all the interesting pages I will receive this year.  As the cover says, we must think to be happy, nurturing the good that arrives in our lives and being grateful for every blessing is what will bring us happiness.
Enjoy what you love today!!

Therese

Friday, October 17, 2014

4x4 art card!

For a swap on one of my groups I needed an alcohol ink background so I played a bit and ended up with a few.  I created these cards as well as these while I was playing.
I decided to doodle some funky flowers for my 4x4 art card.  I love the bright colours of this background and thought the funky flowers would show it off nicely.  I started by tracing the shape of the button on the background and doodled my flowers from there using fine tipped Sharpies in several different colours. I used black to create the stems and the border as well as a couple of layers on my flowers.  The buttons are colour printed and punched out - I like the way they look so real!!  I punched the holes out, sewed in some coordinating thread and used half inch glue dots to attach them to the center of my flowers!!  I am loving the contrast between my plain paper buttons and the bright glossy background.  If you are interested in making some 4x4 art cards I would recommend checking out Joggles art card video!! This one will be on its way to my partner in the next couple of days!!

Therese

Thursday, September 04, 2014

"Through the Looking glass" chunky book page

I joined a swap on AFTCM for a fat book page with the theme of "Through the looking glass"!!  I decided to use a frame placed over silver foil for the looking glass.  I downloaded a frame from Graphics Fairy and digitally removed the horses that were inside the frame. I compiled my collage in Corel Draw - starting with the frame, inserting a tree (GF) and creating a stained glass look all the way around it using elements I created. Once I was happy with the look, I laser printed it on a transparency and trimmed it to 4"x 4".  I used alcohol inks and sharpie markers to add colour my design and then left it for a full day to dry completely!!  Once dry, I layered it onto a piece of silver foil which I cut just a bit longer to aid in binding if necessary and attached my looking glass to it using two little mini black brads on the frame.  I added an alcohol ink background to the back and bound the layers using black and white washi tape along the edges.  I added some very cool little metal fasteners which crimped on with pliers  - added just the amount of the industrial look I wanted.  I tied black and white bakers twine to one of them before adding it.  Really happy with how it turned out!!
It is off to my partner in tomorrow's mail!!

Therese

Wednesday, June 04, 2014

Chunky fat book page - in my garden

Joined a Chunky Book page swap on AFTCM with the theme of "What is in my garden?".  I thought a fairy in my garden would be perfect and hoped when I went digging into my stash I would find the page of stickers I recalled having at one time!!  Yeah - I found them!!
I started with a subtle blue and green 4" x 4" piece of decorated glossy photo paper which I created for this project.  I started by sponging the sky using a torn piece of paper to create the texture you see which sort of looks like clouds.  Next, I started sponging green using the same torn paper which created a bit of a layered forest background. I was careful not to put too much colour in the center where I was going to position my sticker.  Once I was finished with the green I applied my clear backed fairy sticker to the middle of the page.  Next, I stamped some evergreen trees in green on each side as well as some tall lavender flowers in front of them.  The bottom needed more colour so I sponged on some brown and added more texture by over stamping the area with my stipple stamp (SU).  I stamped "IN MY GARDEN" using a magnetic Making Memories alphabet stamp set using a metal mount.  I stamped the words in brown but they did not show up quite like I wanted them to so I went over them with a fine tipped marker in a coordinating colour. That was much better.  I added some faux stitching all the way around with the same marker and stapled on a little bit of ribbon.  I mounted this to a black layer, stamped the back with a flower stamp which I embossed with iridescent embossing powder (SU) and then added my info using a white gel marker!!  My page will be off to my partner this afternoon.
I am really enjoying sponging my backgrounds and it works just as well on plain cardstock as it did on this glossy photo paper.

Therese

Monday, March 03, 2014

4x4 Fat book page

Created this 4x4 chunky book page for a swap on AFTCM with the theme of "an elephant in town".
I created a cityscape a while back for my Valentine cards and I decided to use it for this page as well.  In this case, I watercoloured my laser printed image adding some gray in front of the buildings to simulate pavement.  I thought the whole page needed a bit of a border so I used a black fine tip Sharpie to add my striped border.
I had a little elephant die cut left over from testing a die I bought for my daughter but he was just plain gray so I sponged around his edges using black ink, added a bit of watercolour and then stamped him using a rough texture background stamp (SU) in black all over him.  I used a black fine tip Sharpie to define his toes and added a small black brad for his eye.  That was better!!  I decided he would be carrying a balloon so I used a white cardstock punchie, watercoloured it green and tied on a black thread.  I added my title by hand using a black fine tip sharpie after I penciled in the letters, adhered my elephant and balloon with 3D foam tape putting the thread from the balloon below the trunk of my elephant!! It is a nice marriage of cute and grungy!!  It is off to my partner in tomorrow's mail!!

Therese

Friday, July 26, 2013

Fat book page!

 It has been a very busy few weeks but I have managed in the last couple of days to get this digital 4x4 fat book page finished for my swap partner on AFTCM!!  I found all the images on Graphics Fairy and manipulated them to allow them to be layered and combined to create this cool scene of a little cafe with a bike parked out front.  I colour printed my creation and printed an extra of the flowers so I could cut them out and add them over the original with 3D foam tape.  I added a length of seam binding as well nicely knotted on the edge of the page so it will add texture to the book when the page is bound.
My craft room remains unorganized as we take time to help out with the grand children.
It was wonderful to spend time with my daughter (broken baby toe) and her children in the last couple of weeks!!
I will be in my craft room in the next few days and hope to gain significantly in unpacking boxes and sorting all my supplies into their proper homes!

Therese

Tuesday, October 16, 2012

Steampunk fat book page

I have been crafting in my new room!!!  It is wonderful.
Here is the project I was working on today - a Steam punk fat book page.  I created this for a swap on AFTCM.  I created a steam punk wind screen using items that I picked up on my walk the other day and a few add ons.  What did I pick up??  The base - a clear plastic with holes in it and the rusty washer.  I added the central piece (inside of a foam brush) from my desk, the little washers and the electronic bits were discovered during a raid of DH garage and the butterfly charm, the rhinestone and the copper piece are from my stash.  I wired all of them into place using wire which I had pulled out from ribbon a while back.  Thinking about it - most of these elements have been upcycled!!  I ended up painting the back of the clear piece after I had started wiring elements into place so I used a variety of mediums until I got the look I needed. On hindsight, it would have been better to sand and paint it beforehand but it sort of evolved so I had to make it up as I went along.  I really like the way it looks!!  Once the windscreen was finished I started looking for a fall scene, a flying machine and a pilot.  The pilot and the windmill I found at Graphics Fairy and the fall scene I downloaded off the internet.  I love how it all came together.  I had to add some details to the pilot and also created the outside of his flying machine.  The back of the page has the fall scene with some verse I wrote about the colours and flying!!  I added some coordinating fiber on the right hand side and my page was done!!

The colours of fall are so awesome here.  I grew up in the west where fall colours go from green to yellow and if we were lucky brown but more often than not, we would get a hard frost in September and all the leaves would fall regardless of what colour they were!!  Bare trees for Halloween and very often snow suits too!!

PS - If you have been waiting for more photos of my craft room - I have uploaded them into the original post - here!!

Therese

Monday, May 28, 2012

Collage Mandalas

I created these for a swap on AFTCM - Mandalas.  I did a little internet research to see what others have created for mandalas and found lots of digital tutorials for creating them which were pretty interesting. But, I was wanting something that involved a more hands on technique so decided to search for collage mandalas.  I found several that were done in large scale on canvases so I just adapted the process for these 4x4 chunky book pages.  I did create a layout in Corel Draw before I started with  paper to establish what size each layer needed to be and then raided my collage bucket and found some papers that coordinated.  I started with a 4" x4" square, added a 3" circle with 12 3/4" punchies layered below the edge, 2 1/8" square, a 1 7/8" square, 1 1/4" square, four triangles and a gold 3/4" punch for the centers.  I added black lines to the green-blue one and white lines to the pink-yellow one after I glued all the layers into place.   I am really happy with the way these two worked out.  It is a fun process that has no rules so you can just create as you wish and really allow your inner guidance system to move you along.

Therese

Friday, January 13, 2012

4x4 chunky book page

On AFTCM, we are exploring the Teesha Moore style and are having a 4x4 chunky book page swap. " Let's face it" is the theme and this is the concept I came up with - four faces.  Using handmade decorative paper  cut to 4x4, I laid one on top of the other and drew the center line and then cut it out.  I transposed the pieces so that each side would have a pink and blue face and glued them to a 4x4 of white cardstock.  Started by tracing the cut line and continued adding texture and details such as the eyes with black Sharpie markers in three different sizes.  Also, cut out hearts for lips and glued them in place.  Added silver Sharpie in several different areas for accent and a bit of bling.  Happy with the result!!
It is a reminder that we can only change ourselves.  As we change our perspective, we see the world differently and, therefore, make different choices which changes the world for us.  We are co-creators!!

Therese

Thursday, June 23, 2011

Fat book page - at the movies

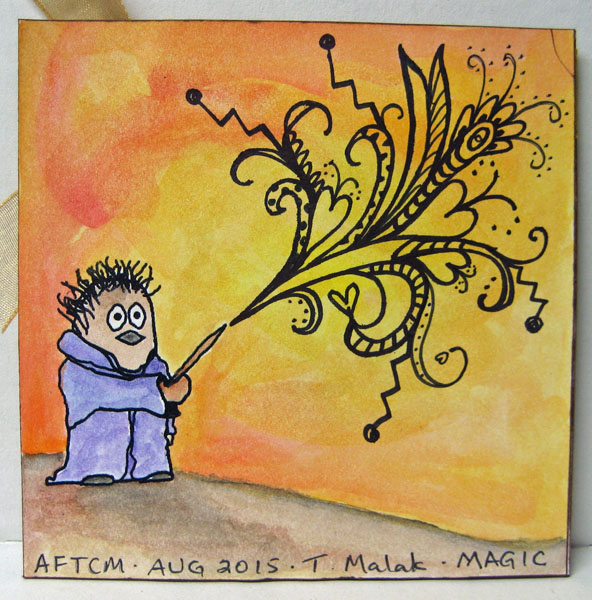
Created this 4x4 fat book page for a swap on AFTCM!!
For the front I designed a clapperboard, printed it and attached it to a 8" x 4" piece of black cardstock folded in half. I added a popcorn box which I designed, printed and trimmed. The filmstrip is one I found on the internet, sized and printed - I liked the wave it had in it and I mounted it to my page using three pieces of double sided tape and two pieces of 3D foam tape in between which makes it undulate. Really like the effect!! Lastly, I designed and printed a little ticket that reads "At the movies", printed and trimmed it and added to the front using 3D foam tape. I also added a #4 to the clapperboard ith a white gel pen to make it look authentic!!
On the back I stamped "shine" and silver embossed it. I added bling by gluing on tiny rhinestones in swirl and dot patterns.
For the inside I designed, printed and trimmed two tags to which I added red eyelash fiber!!

Very happy with the way it turned out!!!

Therese

Sunday, January 30, 2011

Technique book pages - alcohol inks

For these pages I was playing with alcohol inks!! Again, after some on line research had a few new ideas to add to my repertoire of techniques.
Alcohol inks are suitable for non porous surfaces which makes them good on glossy, metallic, pearlized or foiled paper or cardstock, vellum, acetate, foil, plastic, glass, metal and for such 3D items such as dominoes, fragments, stickers, metal embellishments, etc. Just a note though, photo paper is glossy but is designed to absorb inkjet ink and therefore is not suitable for this technique.

You can see all my technique pages in this photo. Top row - glossy paper, dye reinkers with alcohol and StazOn ink, acetate, alcohol inks and StazOn ink, glossy cardstock, dye reinkers with alcohol and Palette ink (swipe technique), Row two - glossy cardstock, alcohol inks and Palette ink, glossy cardstock, dye reinkers with alcohol and StazOn ink (swirl technique), glossy cardstock, alcohol inks and Memories ink. Row three - foil tape on cardstock, alcohol inks and StazOn ink, vellum, alcohol inks and StazOn ink, acetate, alcohol inks and Brilliance ink.
You can buy the metallic fixatives to go with the alcohol inks though I have successfully used Krylon metallic pens for creating the "polished stone" look which features metallic veining.
I have found that dye reinkers and alcohol work really well on paper to create alcohol ink backgrounds. Unfortunately, they will not work on other surfaces such as acetate or metal.
Blending solution is colourless and is used to dilute and spread alcohol inks. I have personally used rubbing alcohol (70% or more) for 98% of my alcohol ink work with no problems and I read on line in several places that others are doing the same thing. A very cost effective option. In some cases, 90% rubbing alcohol was used as well.
As a substitute for the applicator I have been using a strip of felt attached to a small wood block (3" x 1" x .75) with two thumb tacks. I have a handy DH so a small block of wood was easy to find but you might consider using a wood block from a rubber stamp or one from a Jenga game. You can also adhere velcro hooks to the block instead of using tacks and that will keep your felt in place.
I used Staz On, Memories and Brilliance ink on my pages. I also used Ancient Page ink on one of the pages that did not make the cut for other reasons. Several online also suggested Archival and Versafine for stamping over alcohol inks. You can certainly use pigment ink and embossing powder for a different look. Some dye inks may also be suitable for use on paper but not on other surfaces.
You can use alcohol inks to colour embellishments like brads, rhinestones, metal or plastic tags or letters, dew drops, hot glue, etc.
For a very creative option consider using PVA glue to seal regular cardstock - you can incorporate bits for texture. Once completely dry, apply a quick coat of alcohol inks for very dramatic backgrounds.
I found some places on line where alcohol inks were combined with spray starch or acrylic floor polish (Future - Klear (UK)) to create interesting backgrounds.
Sharpie markers are alcohol based markers so you can scribble them on acetate and use alcohol on a Qtip to move them around and create some unique looking backgrounds and/or embellishments.
Lots of fun playing with alcohol inks!!
I would certainly recommend at the very least trying dye reinkers (StampinUP) and alcohol on glossy cardstock!!

Therese

Technique book pages - moldable foam

I have joined a Technique Book Swap on AFTCM. I signed up for five techniques and this is my first one - moldable foam backgrounds. I did some research on line to see what others were doing and tried the few I had supplies for. I have some Penscore which I used for some of these backgrounds. There is also a product called Magic Stamp which is very similar and works the same way. This foam can be heated and impressed with any texture so the sky is the limit for what is possible.


This next photo shows all the pages I made for my swap using moldable foam!! Top row - PS, cedar sprig imprint and multicoloured dye ink, moldable foam packaging (packaged with a unmounted stamp to be used as a stamping surface), embossing folder imprint and blue dye ink, PS, heart buttons imprint and red dye ink. Row two - fun foam heart, part of a rubber stamp imprint and blue dye ink*, PS, cedar sprig imprint and brown dye ink, moldable foam packaging, part of a floral rubber stamp and blue dye ink. Row three - PS, lace imprint and pink dye ink, moldable foam packaging,
part of a floral rubber stamp and blue dye ink, PS, pressed leaf imprint and green dye ink.
You can see here the little fun foam heart I used to create the blue background* in the previous picture!! It turned out very cool and made a very interesting background. Who knew that fun foam could be used so creatively!!
To create the stamp, heat moldable foam about 10 seconds with a heat gun until it gets soft and smooth and immediately press it into your texture! Hold for 30 seconds or so and you have a new stamp!! The fun foam works pretty much the same way - the thicker fun foam is better for creating stamps this way. Just use a bit of double sided tape to hold the fun foam to a solid surface - piece of wood or thick plastic works well - which you can use as a handle for impressing it onto your texture. Now just apply your ink and stamp away!! They can be cleaned and reused many times if you choose to keep the design you have created. To impress a new design - simply heat again and apply to new texture!! A new stamp!! I have kept a few of the ones I have created in the past because I really like the look of the stamp and how well it makes backgrounds. You can also use foam trays in the same manner but there are warnings on the internet about health risks to heating the foam. It solidifies much more quickly so you really have to be ready when using this type of foam.
If you don't have a heat gun you can use another source but you will have to experiment to see what works and how long it takes to soften the foam. I do not recommend any sort of open flame!!! Consider using a light bulb or electric stove element.
Be on the look out for moldable foam that is disguised as garden kneelers, visors, etc. Anything that has feels like fun foam (spongy) will probably work. The thicker fun foam works better - 1/8" or more.
There is a lot of die cut fun foam available so buy the shapes you want. Otherwise, buy sheets and cut with a die cut machine, scissors or an exacto knife. You can create your own shadow stamps for any of your regular stamps by just stamping the image on the fun foam and cutting out the shape. If you have a Cricut consider using a deep cutting blade to cut out shapes!!
You can use a wide variety of colour mediums with these stamps - ink pads, acrylic paint, textile paints, etc. You can also stamp on wide variety of substrates - paper, cardstock, fabric, wood, etc.
As for textures - the sky is the limit!! Consider rice, pasta, rubber bands, pressed botanicals, rubber stamps, shells, buttons, lace, fabric, placemats, plastic canvas, beads, combs, texture plates, embossing folders, etc. Consider that the image will be reversed so in some cases writing or numbers is not your best option.
Foam trays and fun foam can not only be impressed with an image but you can also add details by using a pencil or pen and scribing the surface. Consider though that this may damage the surface enough that it cannot be heated and reused but a great way to add details to a basic shape.
Foam stamps need to be neatly stored so their surfaces are protected from contact with hard edges which over time will impress their surface and possibly ruin their impression. Thin fun foam ones can be stored in CD cases.
So buy yourself a few sheets of fun foam (craft foam), start playing and make yourself a few stamps!! Enjoy!!

Therese