Monday, May 31, 2010

Cards, Cards, Cards - May 29 - embossed strips

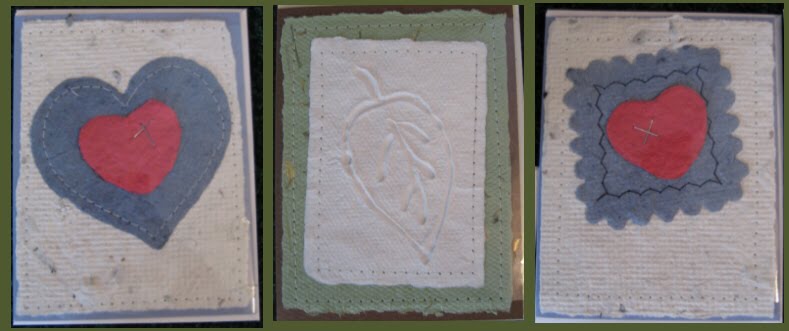
Our last card!! These feature strips that are taped to each other, cut to size and then embossed with an embossing folder!! I just chose strips of cardstock from my scraps bucket and add coordinating colours of cardstock strips to make up a piece big enough to cut a 4" x 5 1/4" piece from it. Used different embossing folders for each combination and glued them to coordinating card fronts. I added a coordinating tag (SU small and large tag punch) with a little ribbon accent. Some chose not to staple their ribbons - just glued them between the layers or behind the tag instead. Same sketch - very different look depending on what colours are used. By varying your tag greeting it can be for any occasion!! This sketch can easily be rotated to create portrait cards!!

Cards with versatile designs and are fairly quick to put together. A win - win in everybody's book!!

Therese

Cards, Cards, Cards - May 29 - roses

I love the softest of these cards!!!! These feature shimmery decorative papers and roses embossed with white pearl embossing powder (Michaels). I coloured the first one with a bit of watercolour but I had to be very careful not to make the paint the same colour as the embossing. If the colour matches, your image becomes very flat. Several people in class did not colour their images at all which works very well. Others used contrasting colours to embellish their roses which worked well too. I distressed the edges of the image and cut out the bottom leaf so it could overlap the ribbon. Nice little touch! Again, ribbon is glued straight across the image and the ends glued to the back. The ribbon scrap is tied with a single knot to the front. This element is then attached to the card front with 3D foam tape. The other cards featured blue/white decorative paper with silver embossed roses and multi coloured floral motif paper with gold embossed roses.

Therese

Cards, Cards, Cards - May 29 - little squares

I just loved this sketch when I saw several different cards on SplitCoast stampers that featured these cool little rounded squares!! These are so quick & easy and take so few supplies!! Choose a scrap of decorative paper - cut two 1" squares and corner round two opposite corners. I used my corner rounder from Michaels - it had a tighter round which worked better for the small squares. Choose two coordinating cardstocks and cut two 1" squares and corner round two opposite corners. Draw a cross on your cardstock with a black fine tip marker, add your rounded squares and stamp a greeting!! In my case, I laser printed the cross and greeting on white cardstock in advance so all that needed to be done was to glue on the rounded squares and then glue this layer to the card front!!!! All sort of colours for these ones and four different greetings!!
Therese

Cards, Cards, Cards - May 29 - wavy frame

These cards feature some beautiful butterfly and dragongly stickers I bought at the dollar store a few months ago. Like most things - they were gone in a few days so I am glad I bought what I needed when I did. I knew I would be featuring them in this class!!
I wanted textured cardstock as the base for these cards so those that were not textured were embossed with this SU flower embossing folder. The textured wavy frame (Sizzix die) holds a colour printed greeting and is added to the card front using 3D foam tape. As you can see the card could easily be created in either portrait or landscape format. Another way to change up the look of a sketch.

Therese

Cards, cards, cards - May 29 - 3D elements

The first set of cards for my All Occasions card class on Saturday!! All the same sketch but each features a different 3D element - heart, butterfly, dragonfly and flower.
The blue butterfly - this is a plastic die cut which I cut from packaging then painted with transparent acrylic paint (sun catcher paint). I coloured the bodies with a black permanent marker on the back side. This gave them a pretty sharp look and conveniently gave me a place to put some 3D foam tape to attach them to the card. Bent back the wings a bit for a really cool 3D look. The ribbon is attached to the embossed layer which is trimmed to the embossed edge. Thrifty tip: Attach your ribbon straight across your layer and glue ends to the back. Then cut a piece of 2-3" and tie to the straight ribbon on the front with a single knot. You always get it right!!
The red heart - this is cut from a sweater!! Had this favorite red sweater for years but it eventually became a little stretched and was wearing at the bottom of the sleeves so it was ready to be discarded. Found it again the other day and thought it would be great for cardmaking!! To stabilize the stitching I attached Heat n Bond to the back and then die cut the hearts!! Love them!! Tied on a little clear heart (packaging) with white fiber!! Attached with double sided tape.
The other two elements were a vellum dragonfly and a die cut flower. I painted the wings of the dragonfly with nail polish!!!!! How fun!! They turned out translucent and shimmery just like them should be!!! Attached it with 3D foam tape as well to give the card some dimension. The flower element was cut from double sided colour printed cardstock and layered. These were also attached with 3D foam tape.
One sketch - four different cards by changing up the colours and the accent.

Therese

ABCanada - Nature ATC

On my Altered Group we are doing a Nature ATC swap!! This is out of my usual colour scheme but I have been working on getting out of my comfort zone so I just went with it!! I punched the flower out of the original layer and attached with 3Dfoam tape just over a bit and backed the hole with turquoise cardstock and added a rhinestone to the center. Overstamped the background with the quote and then added the quote stamped in red on white which I ripped apart to make it fit. Added a turquoise and white fiber tied to the belly of it all. I have sent it along to another player and she will have the fun of including it when creating an altered book page!!
I received this ATC from Linda which I will include in an altered book page sometime this week!! Check later and see what I have created!!
It has been a busy week prepping for my card class.

Therese

Sunday, May 23, 2010

Christmas Card Challenge

More Christmas cards!! These ones - I made 6 of them - are for the May challenge - candles on Sylvia's (my sister) blog!! Simple elegance!! I stamped the candle image on black glossy in copper pigment ink and embossed it with copper detail embossing powder. It is very tricky to stamp on glossy with pigment ink and not smear!! I got the hang it after several attempts. I layered the stamped image onto copper foil - very thin - but very nice and reflective. I layered this element onto a black card front which I embossed with a wedding Sizzix embossing folder! Love the richness of the copper and the elegance of the calligraphy in the stamped image next to the embossed swirls!!
Still considering doing the nativity challenge on Sylvia's blog which was the challenge for April.. I have a class on Saturday to prepare for so once that prep is done I will consider working on more Christmas cards!!
It is never too late to get started on your Christmas cards and the challenges might give you a place to start!!

Therese

Thursday, May 20, 2010

Cardmaking - May - Zentangles

Zentangles!! I created a variety of them for the class I taught at the school so I printed up a bunch to use as accents on these cards!! Used pretty much the same layout as these - varied the border punches (5 in all)!!
The right hand side is embossed with the SU dots embossing folder. I love it because it is larger than some of the others and it does the whole card front at once!! Added the black border punched layer that has a little piece of fiber double knotted to it in the middle.

Quick and easy design! We all need some of those!!

Therese

Cardmaking -May - embossed vellum

Embossed vellum!! I am always using Splitcoast Stampers as inspiration when I am cardmaking!! So many cards and wonderful ideas!! I made a little sketch when I was perusing the site - I think I got pretty close to the same look as the one I found there.
Embossed vellum and trimmed it to the edge of the design. Layered that onto coloured cardstock and attached it with with four silver brads. Added the ribbon and attached the ends to the back. Love the way my greeting came together - an oval ribbon slide (CB) with a large oval punchie (SU)!! The large oval punchie fits perfectly into the slots in the ribbon slide to make a wonderful layered greeting!! I colour printed the greetings and just punched them out. Added the layered greeting over the ribbon using 3D foam tape. Had the inspiration to add a punched circle below the bird on the left hand card but thought of it too late to add those to the kits!! I think it would add "a bit of something" to the card.

Therese

Cardmaking - may - Paperclips

Found these cool paperclips in my travels in the last month and had to incorporate them into my cards this month. They are called Regal Owl Paper clips!!
I colour printed the greetings on the white cardstock just far enough apart to place the 1" strip of decorative paper in between. I glued this to my card and trimmed to the card edge. I used a SU word window punchie to create a tab by folding it in half and inserted it on the solid side of the clip and attached it over the decorative paper using a brad. Then threaded ribbon through the other side and glued the ends to the inside of the card.
You might even have some scraps or small strips of decorative paper in your stash to easily create a few of these cards. Use a different paper clip for a different look.

I will use the clips again. Next time, standing up, so you can see the "owl" in them!!

Therese

Cardmaking - May - corrugated card

The theme for May cardmaking was masculine cards! We all have guys we like to make cards for and we are often challenged to come up with ideas that will be suitable!! I have only a limited number of stamps for guys so I am always challenging myself to come up with new card ideas with them!!
I used four different images on these cards - lighthouse, train, tree and vintage grapes collage. I coordinated the cardstock to work with the different images. Most of the images could be coloured and then were trimmed to fit on the corrugated card!! This element was then layered onto the card front and the trimmed colour printed greeting was stapled on with a bit of ribbon added on the right hand side.
I like the way these cards came together. Not to complicated or fussy - like most guys!!

Therese

Thank you card

A thank you card I created for my friend, Sherry who has been so helpful with the house. I brought her back some cardstock and a cute little stamp so she can get started on her Christmas cards early this year!!

I watercoloured the rose and cut it out. Attached the handmade paper to the card front and then mounted the rose with 3D foam tape. Added a ribbon with a layered coordinating greeting on a ribbon slide!!

You can check out the cardstock I have for sale here:
www.tmalakrsc.blogspot.com

Email me at bmalak at cogeco dot ca if anything there catches your eye!!

Therese

Exchange cards

Created several of these for my card exchanges this month - Canadian Card Exchange and my card club. Stamped the boat image (ink on left - bleach on right) on black and mounted it to a coordinating layer. Cut a 2.75" circle from decorative paper, cut it in half and mounted it on the card front behind my image. Added some paper piercing for more interest and texture.
Got the sketch for this card somewhere on Splitcoast Stampers when I was searching for inspiration for cardmaking this month - masculine cards!!

Therese

Christmas card challenges


I combined Tracy's challenge from last month - using patterned paper as the main element in your card and this month's colour challenge to create these cards. Life has been busy and I have been away for a bit so I did not get to the April challenge at all. It worked quite well to combine the two challenges!!
I chose the cool snowflake paper which had some of the colours from the challenge which are red, cream, kraft and chocolate. I ripped the bottom of this layer, added a knotted ivory ribbon and glued it to the red layer which was embossed with the Sizzix snowflake embossing folder. Stamped the greeting in red on cream and punched them out with the small SU oval. Layered them onto chocolate punchies (large SU oval) and added them to the card front over the ribbon using 3D foam tape!! Made eight to sort of make up for the ones I did not get done last month!!
Very happy with my cards!! I know I will be happy when it is time to send them and they will be ready!!!!

It is not too late to get started!! Join a Christmas card challenge today and be ahead of the game!!

Therese


Collage art - vision board

My vision board!! The girls and I from my book club decided that we would create vision boards for our lives!! It has been a subject that has come up several times over the last few months in the discussion of the last few books we read. The idea that you create your life - draw into it certain things depending on what you think, say and do!!
So we spent an evening envisioning what we would like in our lives - making a few notes and the next time we got together we brought along magazines (from our own supply and some gathered second hand from Freecyle or Kijiji). Armed with scissors we started going through them cutting out anything that we were attracted to and/or represented something we wanted in our life. Early on in our discussion about vision boards I thought I was going to have trouble picking out "stuff" I wanted (has been my pattern) but as we discussed it more and after spending some time thinking about what I "wanted" I realized that what I wanted had less to do with "things" and more to do with relationships and experiences. Cutting out images was such a fun process!! We had magazines from a wide variety of subject matters so we were challenged to think outside the box!! Some in the group gathered only a few images and words and had their vision boards made that night. They were focused and clear about what they wanted!! It took me the better part of two days to create this collage!! I did like the way theirs looked with no white spaces in between their images so I did that on the outside of mine. I laid out my images according to areas of my life - home, DH, family, retirement, etc. I was amazed at how almost all the images that I had grabbed from the magazines found their way to my board and fit in!! Totally fun to cut out words from different places to say what I wanted to!!
So now, to draw these things into my life, I need to spend some time every day focusing my attention on what I want. That gets you thinking about it, puts you in a mind set of talking about what you want and a lot more likely to actually doing something about making it happen. You need to do all three - think, say and do!!
It is really a process of becoming clear about what you want.
This is poster board size so I am going to print off some smaller ones that I can have around to remind me of what I want in my best life.
There is no wrong way to make a vision board and you can make a new one anytime you like!! I totally enjoyed the process and will certainly be doing it again. Maybe a smaller one that deals with only one area of my life!! Created on 8.5 x 11 cardstock they could easily be stored in page protectors in a binder and would be easily availabe for review!!
Try it!! It is for sure that your thinking will get you a life - why not choose it more consciously!!

Therese

KN - Handmade paper card gift sets

More handmade paper card gift sets!!! I made up a few more of these gift sets for the store because it opened the weekend before Mother's Day and these would be perfect for any Mom!! These have been featured here on my blog several times. They are totally fun to make and love the way they feature handmade paper so nicely!!

Therese

KN - Sticky note books

These are always great for little gifts for almost anyone!! I created them using decorative cardstock, added a button and some fiber for the closure. They fit right into a yarn store!! Brought a whole bunch in a wide variety of colours and designs to suit everyone!!

Therese

KN - Artsy notebooks

Cyndi mentioned that knitters are always keeping notes about their knitting projects - where they are in the process, new projects, changes they are making to patterns, etc so I made up these artsy notebooks to make keeping their notes more fun! These feature hand decorated papers I made myself!! Several are paste papers - the others are created with acrylic and fabric paints. I added glitter to the spines of some of them for a little bling and fabric tape corners on the fronts to protect the corners.

You can check out my products at Knitting Nimrod Collective!!

Therese

KN - Handmade paper cards

I created these cards for a new venue - Elacyn Designs - a new store contained in the Knitting Nimrod Collective yarn store - a very cool place with LOTS of very cool fibers!!
These feature handmade paper shapes which are sewn to handmade paper sheets sewn to the cardstock fronts!! The hearts have been stapled to the shape before sewing. The middle one features a leaf paper cast done in white handmade paper! I love sewing handmade paper and am planning to do more of it!! I brought a selection of cards which featured handmade paper which you have seen previously on my blog.

The next few posts will feature product I made for the store!!

Therese