Showing posts with label journal. Show all posts

Saturday, August 15, 2020

Slow Stitching - trailer journal cover is finished


My Trailer Journal is finally finished.  I have been working on it for a while and it is finally finished.  I used my Teesha Moore inspired patches machine stitched together to make the cover for a composition book to create the journal.  After that, I started adding stitching to all the patches one at a time.  It was great to be able to do any sort of stitching and be inspired by the fabric design as well.  I used embroidery thread in either coordinating or contrasting colours depending on the look I was going for.  It has been a very fun project and I am glad to have such a creative and interesting cover for our trailer journal.  Once we have filled the composition book we simply have to put in a new one and we are good to go!!

This is the front cover.

This is the back cover.
insides     

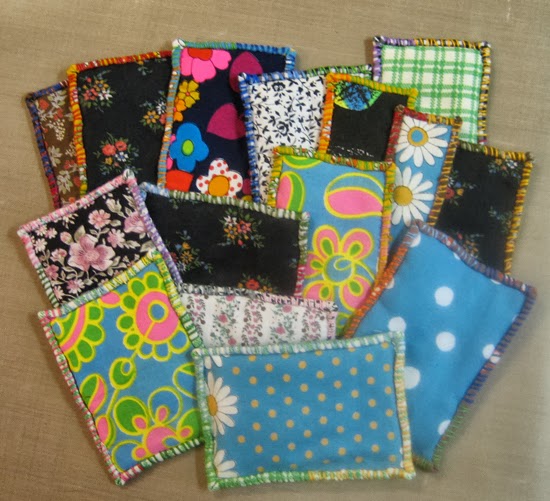
Below are some close ups of the stitching in the patches.  

Therese


Sunday, July 21, 2019

Teesha Moore patches combined to make a cover for our Trailer Journal


A Teesha Moore cover for our trailer journal!!!!!!! I have been making Teesha Moore inspired squares for quite a while as I really love the hand stitching and the very creative look of them.  For some reason I have been resistant to combine them into larger projects though there is enough inspiration online to make a wide variety of projects from journal covers, trivets, mug rug, and bags!! I did do a composition book journal cover a few years ago. You can check it out here, but have not really come up with anything else for quite a while.  Recently, we purchased a travel trailer and at an event on the weekend my aunt, Maria, suggested that we keep a trailer journal to document our travels and the repairs and improvements along the way.  I was immediately inspired to use my stash of Teesha Moore patches!!!!!!!   
I dug out my bag and started sorting them to general size and then placing them on the cover of a composition book leaving a bit of over hang on the top and bottom so I could stitch up the flaps on both ends that will hold the book in the cover.  It was so great!!!!!  I decided to use my three stitch zigzag on my sewing machine and multicoloured thread to attach them to each other.  The stitch is wide enough to have decent purchase on both pieces and with the multicoloured thread I found it did not distract from the colourful hand stitching I had done on the edges of the patches.  I ensured that I double stitched at all the joining points to ensure integrity in the cover and it went together fairly quickly using the sewing machine.  I had individually hand stitch the surface of the patches and then used hand stitching to combine them into a cover when I made the last cover which was a bit time consuming.  I still plan on hand stitching the individual patches on this cover and using one of them to give it a title - probably the coral ferny one which will give the best contrast.  It will be a great hand stitching project for around the campfire!! I am so very pleased with it!!!!!!!! Here are a few more photos!!

The back of the cover!  Love that little rainbow on the right hand side of the front.


The two inside flaps.  The one on the left is quite loose so I will be adding an elastic to the inside to tighten that up a bit but the extra give will allow the storage of a pen or two.  


Here is the inside of the cover with the composition book removed.  You can see here that I used a blue bobbin thread and it is less beautiful than the cover.  It might have been better to use a neutral colour but in the end no one is likely to ever see this part of it so all is good!!

Therese

Thursday, June 22, 2017

Smash Journal for The Woman Unleashed Retreat

I found a link to The Woman Unleashed - an online retreat on Linda's blog so I followed it and decided to participate.   The first activity is to make a smashed journal in which to record your insights as you participate in the different parts of the retreat. So this evening I decided to create my journal.  One of the most significant comments on the video was that creating this journal was more about the process - what was speaking to you - rather than creating art.  So it is about YOU - what is calling you, what do you like, how do you feel and taking the time to really connect with your inner self so you can bring about the transformation that you intend.
I remembered having a blank book years ago and went on the hunt to find it amid the boxes in my studio!!  After a few, I started praying for guidance because there are a LOT boxes in my studio and instead of finding the book I was looking for I found a stack of kraft pages that at one point had been bound but were no longer.  I took it as a sign and decided to make covers for this stack of pages.

I have LOTS of different papers in my studio and could have used any of them to cover the cardstock covers I had created but I felt called to use the paper from this flour sack instead.  It speaks to me of health and making good choices for wellness. So I cut open the bag and smashed the paper over and over again until it was nicely wrinkled and had lots of texture.  I trimmed two pieces the right size to cover my covers which I cut pretty much the same size as my pages and glued the brown paper to my bright yellow covers.  I really like the bright yellow and the cardstock is a reminder to me of the beginning of my journey into art.


I used an old gift card and glue from my little pot of glue stick leftovers to adhere my paper to my covers.  I trimming the corners and the edges to leave an even margin on the inside.
Here you can see my two finished covers and the stack of pages.  I used the stack to make holes in the covers using my awl. The covers fit really well on my stack of pages.  I decided to use elastics to bind my journal because they will allow my journal to lay flat by stretching the bit that is require for that action to take place.  I used my awl to enlarge the holes sufficiently to allow the elastics to slide right through.  I tied the short pieces using square knots on the spine.


We are encouraged to set an intention for the retreat so I decided to journal about my intention on the front of my journal.  Using a fine tipped Sharpie I started writing and just joined all of my words and sentences into multiple lines of writing until I had filled the whole cover leaving a bit of a margin all the way around.  Next, I decided that I would doodle a border in that space.  After my doodling I was still feeling inspired to journal my intention so I flipped my journal and continued to write going across the writing I had already put on the front.  That felt better and I like the wonderful texture that it gives my front cover.  
As I finished up the last of my journaling on the cover I felt I needed to refine what I intended into a short phrase.  In the end, I decided on two which when I had finished adding them to my cover worked together quite well.  I found the letters for "voice" and "prayer" in my letters stash - a little plastic container in which I put all the letters which are leftover from any of my creative projects.  Once I had them arranged the way I liked them I adhered them with white glue.  I like that they are sort of random and not perfect.  It was great that they were colourful as well.  I found my creative writing book and added the rest of the words using the fine tip Sharpie I used for journaling and a bullet tipped one I had in my stash.  It was fun to use different letter styles for each word.  The border was calling out for colour so I started with gel pens and it was not quite the look I was wanting so I dug out my watercolours and painted it in with them!!  Watercolours are my favorite!!  We were encouraged in the video to gild the edges of our pages so I did mine in purple!!


We were also encouraged to smash all of our pages - just crunch them up!!  After crunching you can see that my journal has become a little thicker!!  I am really happy with how my journal turned out but it still needs ribbon and some scent which I will add later once it is dry.  I am looking forward to the next activity on this retreat!!
I hope you will consider joining the retreat and taking the challenge to unleash what you want into your life!!  Remember you create in your life using your thoughts, your words and your actions!!  Choose wisely!!

Therese

Wednesday, June 25, 2014

Fabric Journal - part two


Here are the back and front of the finished fabric journal. I love the amount of texture it has and how colourful it is!!
I added a long quiltie to which I had sewed an elastic band as part of my closure.  I found a large white button in my collection and decided it would be just what I needed to finish off the closure on this journal.


Here are some close ups of my embellishments - charms and beads!!


Here are photos of the inside and back covers!!

The fabric cover holds a composition book which can be replaced once it is full.   The flaps provide a place to store notes or even a writing implement depending on what the journal is being used for.

I am happy with how it worked out.  I have enough little quilts made to make another one.  I did find someone on line that had made cuffs from some of hers so I may give that a try.  There are certainly lots of people making bags from them as well so I will consider that some time in the future!!

I have really enjoyed making the little quilts.  I have been stitching them in the car on our road trips.  I just prep a few pieces (two pieces of fabric pinned together with batting in between) before the trip and bring along a needle, some thread, a small set of scissors and some pins in a bag and I am ready to go.  It passes the time and miles very pleasantly!!
Without even trying hard I have collected a bit of a fabric stash - just little pieces that are left over from sewing projects, scraps from other quilters in the family and a few quilt scrap bags from thrift/fabric stores.
I am certainly enjoying the creative possibilities of these little hand stitched quilts and look forward to doing even more creative projects with them.

Therese

Thursday, March 06, 2014

Gifts of Imperfection - happiness, joy & intuition

 Another couple of pages in my journal for my Gifts of Imperfection online course with Brene Brown on Oprah.  I am still working on the journal prompts Brene provided us to work on until the beginning of Part 2 which starts on April 3rd.  For this one we are encouraged to consider the difference between happiness and joy!!
I hand lettered the title, filled in the open parts of the letters with colourful gel pens and added a watercolour background.  I am still using my Creative Lettering book by Jenny Doh for inspiration.  Below I added some flowers stamped in blue using a foam die cut (Tattered Flowers by TH).  I used the Generational stamping technique - you stamp 2-3 times before reinking your stamp which gives you several intensities of colour which adds depth to your background.
For this page we needed to draw or in some way convey our image of our intuition.
I used the same technique for this page as I did for the previous one though I did change up the hand lettering and the colours I used.  The hand lettering inspiration for INTUITION came from a Cardmaker magazine I took out of the library last week.  I drew my hearts and coloured them with colour pencils.
We have three more prompts to finish up before the beginning of Part 2!!

Therese

Wednesday, November 13, 2013

Gifts of Imperfection - Authenticity

I have finally found the time to search for a photo for my week two exercise!!  I was not sure how many photos I had of myself as a child but I knew I had an envelope that Mom had given me of old photos which were left over from her scrapbook.  This morning I went looking - we have moved since I last remember where it was located - and was fortunate to find it fairly quickly though not were I expected!! I had more photos that I expected!!  The assignment was to pick one - but I chose three!!  The largest one is a photo of my twin and I over thirty years ago!!  Love it!  We often take fun photos of ourselves when we are together.  The top right photo is of me pregnant with my son - days before I delivered  - with my oldest daughter.  I so loved being a Mom and so loved her cuteness!!  The black and white is of me when I was 5 years old.  We (my twin and I) had been ice fishing with Dad & Pepere (a huge privilege) and had each caught a little fish that we were showing off.  It was really special to me to have the opportunity to spend time with my family in the great outdoors!!
For the layout I cropped the photos and arranged them over a scan of some fabric paper I made and added the word "Authenticity" in a font I like!!  I have colour printed it and will journal over it in white gel pen!! Going back and looking at photos of my life has been so fun and encouraging.  So often we remember so little of the richness of our experiences and photos help us to remember more!!
So dig through your photos and see how much more you can see in them!!!  For me, it has been a life expanding experience in that I have been able to add to my remembrance of events - enrich my memories of the past.  It is also a reminder to take photos often to keep building that resource for myself and future generations.

Therese

Tuesday, October 22, 2013

More little quilts!

I have finished off another bunch of little quilts!  I created these with quilting scraps that I received from my sister when I was up home a few weeks ago.  She and my Mom both quilt so I had emailed saying I would appreciate any small scraps they are willing to part with so I brought home a little bag of scraps from each of them.  My sister gave me a bunch of little pieces.  Some were pieced - off cuts of the quilting process. I decided to use some of these first so I backed them with fabric from my stash and stitched their edges!!  They look a little different than the ones that are one fabric on the front and a different one on the back like these, these and these but I am liking them!!  Mom gave me several larger pieces which I will incorporate as time goes on.  My ziploc baggie is getting quite full!!! Maybe I will make myself a cool cover for my Brene Brown art journal with them!!  It would work perfectly into the theme - The gifts of Imperfection!!  I will have to work out the placement but I bet I can leave a window so I can see my handlettered title through the cover!!  Teesha Moore has made all sorts of funky covers for her journals and is the inspiration for these little quilts.  I may even have to make a few more in a specific size to make it work or even in certain colours.  Will have to work that into the next batch of these little quilts.  That is the fun of being the creator!!  You just get to make what you need!!

Therese

Tuesday, October 01, 2013

More little quilts!

More little quilts!!  I managed to get all of these done in the car on our recent trip.  I am really loving the process and it is fun combining different fabrics and colours.
I can see the benefit of having a wide variety of small scraps for these little quilts because it provides a lot of interest and texture.  Really great when they will be combined for making the journal covers.
I have a mother and several sisters who quilt so I emailed them asking for their small scraps.  It will give me some one of a kinds to add to the mix.
You can see my other little quilts here, here and here.  All Teesha Moore inspired!!

Therese

Thursday, September 05, 2013

More little quilts!

I have been working on these little quilts on our various trips in the car this summer!!  They were inspired by Teesha Moore's little quilts which she has used for making up journal covers.  Here and here are the ones I made previously.  It is only a little stash so far but I am happy with my little collection.
These were made up of cotton fabrics and I found them so much easier to sew.
I am looking forward to having enough to make up a journal cover - maybe by the summer of next year.
This is a great way to use up scraps of fabric that are left over from quilting or even from clothing that you no longer wear or have been ruined with a stain (bleach!!)

Therese

Monday, February 25, 2013

Handmade paper journal covers

 We made our journal covers on Friday and they have been pressing all weekend!!
We started with two sheets of handmade paper - 8.5" x 11".  Folded each to half the size by folding both edges to the middle  - see top  photo - to create 5.5" x 8.5" covers.  We embellished them with some black embossed strips of cardstock which we folded in half.  We glued half to the front and back of each cover at the top and the bottom.  This added some colour, texture and rigidity to each cover.  It also strengthened the top which was die cut for binding with a plastic Ceralox comb and will help the bottom corners wear well as this journal is used over the course of four years .  As you can see they were also cut with decorative scissor on each edge.  I used pinking shears and embossed all of mine using the same embossing folder.  Each student did their own thing so there is quite a variety of interesting covers!!
Here is a shot of both covers on the other side.  Students will get to choose which sides they will use to be the outside of their journals.

We will be adding our metal embellishments later this week.

Therese

Tuesday, August 21, 2012

More little fabric quilts

Had the opportunity to make a few more of these little fabric quilts in the car on the way home from vacation.  You can see the first ones I made here and you can check out the link to the tutorial as well.  I expect I will do a few more before I start sewing them together to make a Teesha Moore style journal/book cover.  These are quite different colours and fabrics from the last ones.  With the other sides all different as well it does give me a few options when it comes to creating a cover.
We had a fabulous PEI vacation!!  If you have never visited this little island I would most highly recommend it - great beaches, great food and great people!!
I will have a few more creative posts later as I unpack from vacation and get my photos downloaded.

Thanks for dropping by!!

Therese

Friday, May 18, 2012

Little fabric quilts

Started this quilting project last week.  I am wanting to make some fabric journal covers like Teesha Moore has created.  You can check out the tutorial  here!  I have finished the edges on these three. I think I will put together a few more with different fabrics. It has been a very long time since I did hand sewing but I have really enjoyed doing these. I am looking forward to using up some fabric scraps and these little quilts are so easy to take along to be worked up in the car or anywhere you might be waiting for a bit of time.  Once I have a bit of a selection I will start doing the inner quilting.  I love the embellishing she does with beads and so on once she has created the fabric journal covers.
I have used a mixture of fabrics - cotton, silky polyester, etc.  I used craft thread on some and embroidery thread on others.  She recommended the pearl thread which I think might be worth investing in.  I wanted to try it out with what I had just to see what sorts of results I was able to achieve.  So, now that I have started I hope to keep a little stack of blanks ready to go and work on these regularly - a bit of creativity every day!!

Therese

Friday, June 06, 2008

My Art - tip in pages for journal

Finally got this one off the camera! The theme for these 9x12 pages was nature. I usally do nature themes in greens and browns so decided to think outside the box and worked with pink and blue this time. Worked out well. I started by choosing the vellum quotes and collaged papers all around them. I added some layered calendar pages for more visual interest and a few 3D items for more texture. I did do a bit of stenciling on the right hand page as well. It was fun to dig through my collection of collage "stuff" to find pieces that worked with the colour and nature theme.
Thanks for checking out my art!!

Therese

Thursday, February 28, 2008

My Art - Journal

I have been keeping just ahead of a cold - lots of Vitamin C, echinacea and green tea and as much rest as my schedule will allow so it has meant less creative time. Here is the journal I created with my art students. The base is watercolour paper folded and glued together with double sided tape and fabric tape. I hope they will consider added more decorative elements as the mood strikes them. The journal has a stack of pages incorporated into it with a little metal holder. Not sure what they are called - two prongs with backer and metal strip with two holes for the front with two slides that hold the prongs in place. This will allow them to remove pages or replace the whole stack and reuse the journal. We each created our own decorative element for the front and added it with brads. The folded flap incorporates an elastic which keeps it closed. I also created journal prompts for them and a little holder that will easily fit in their journal.
I talked a bit about journaling and how important it is as a self discovery tool. Many of us expect everyone else to pay attention to us and listen to what we have to say without giving ourselves the same opportunity. What comes out of us DOES say something about US and in the process of writing it down we may start to see patterns and be surprised by what we have in there that needs unleashing. Very often, if we let out what we have inside, it completes the process and we can let it go!! So it was a creative project on several levels. We are always called upon to witness our experiences!!
Therese

Wednesday, August 29, 2007

Always have journals at my sales! I usually cover these with handmade paper and add a "faux leather" paper spine. Decided to be differently creative this year and painted the covers instead! I sanded the covers and painted on a layer in a light colour. Stamped on several images in permanent ink and then added several layers of paint over the top! Finished off with a bit of a metallic!! Very happy with the way they turned out!!

Therese