Monday, February 14, 2022

Joyful Hearts book of colours

I have been playing with fabric in order to create a little book of hearts for my youngest grand daughter.  It was created to help her learn her colours.  I created two rectangles using neutral colours - black, grey, brown and white.  I cut four rectangles about 11" x 5.5" - one of each colour.  That configuration gave me eight pages to work with so I went with the basic rainbow of colours - blue, green, yellow, orange, red and purple.  I created a little colourful patchwork for the front.  I cut a template from paper and traced it on the back and cut it out.  I chose fabrics from my stash for all the other colours as well and cut hearts from them as well.  I laid out the pages and then added the hearts in order of  the rainbow which also reflects colour theory in that blue and yellow make green, etc.  I used coordinating thread and a zigzag stitch to attach the hearts to the pages.  Next, I stitched the pages fronts together - black to gray and brown to white leaving a gap to turn them inside out.  Once pressed I used coordinating thread to add a double row of stitching to the edges.  Next, I did some all over stitching to more firmly attach the fabric to each other which stiffened the pages a bit.  


Unfortunately, I failed to properly position all of my hearts back to back on my pages so when I did my all over quilting I ended up stitching over some of my hearts.  A bit of a bummer but I had not anticipated the problem so I did not plan for it.  I will do better next time.  Fortunately, it was on only two of the hearts - the blue and the orange and I was able to camouflage the error with a Sharpie markers in the right colours.  Youc can see below how I coloured the light thread with  blue where it ran over the edge of the heart.  The back page has a pink heart.   I laid my two pages over each other and ran a row of zig zag stitches down the middle to create the spine.  The hearts seemed a bit flat so I handstitched a heart on all the colour pages with coordinating embroider floss.  I had to be careful not to stitch too deep which was not too difficult.  
I am really happy with how it worked out and I hope she will enjoy playing with it.  She is a year old and taking her first steps!!  Therese 


Sunday, February 13, 2022

Cars quilt with a strip of red plaid down the middle


My sister donated this cars fabric to me so I have been pondering how I could use it to make a quilt.  It was a long shallow piece of yardage so I cut it in half and added a strip of red plaid between the two pieces!!  I did create a pieced strip to go in between them but it was "too heavy" to go with the cool little cars - the red plaid is so much better.   I am sure that the strip will end up in a different quilt in the near future.  I added a piece cotton for batting and a warm green cotton backing which has a bit of a flannel feel which will make this a lightweight cozy blanket.  I used the inside out method and added two rows of stitching in brown thread around the edge.  Also added two rows of wavy stitching to each cars panel in brown and two in the red strip using red thread.  Minimal quilting but it is only 36.5" x 45" so that will do quite well.  I am really happy with how well it worked out and I managed to get it all done today!!!  Therese


Friday, February 11, 2022

All occasion card featuring a butterfly punchie, a punched accent and an embossed paper strip

This is the third card sample for the kits I made up for my friend and again she will be having a variety of colours and coordinating accents in her kits.  She will have some fun!!

I started with a blue card and added a layer of colour printed hexagon decorative paper (SU digital).  I cut a 3" x 3" piece of white cardstock and used the eyelet punch (SU) to add a centered opening on each side of the square.  I embossed a strip of yellow with my score tool and inserted it in the bottom slot of this element and brought it back out of the top slot.  I glued the ends of my strip to my card using double sided tape which leaves the middle area without glue allowing the square element to be adjusted up/down and side to side.  I added a butterfly punchie (1.75"- SU) in the middle of the square to finish off my card.  

Therese
 

All occasion cards with a wavy row of flowers and cute little butterfly


 This is the second card sample for the card kits I made for my friend.  I used a white card and added a piece of decorative paper I trimmed with a wavy line.  I added some flowers to the wavy line - these are by Paula Dean.  The butterfly was stamped and punched (SU) and then I tied a little piece of silver cord around it to simulate a body and its antenae.  I added it to my card using 3D foam tape.  Again, the card kits I made up for her have a variety of card colours with coordinating papers and embellishments.  These could be made up portrait or landscape.  Therese

All occasion cards with a little vellum envelope filled with a heart


 A friend requested card kits for Valentine's and spring!!!  I was happy to oblige as she is a keen card maker.  This is the sample for the first card kits I made.  I cut the little envelope (SX) from vellum, folded the three flaps and tied them together with a little bit of white fiber.  I added a little cardstock backer and then a sparkly blue die cut heart (SX) to which I added a little bit of ribbon to add texture and serves as a bit of a handle to remove the heart.  I used a kraft card and added a coordinating blue patterned paper background.  I applied double sided tape to the back of the envelope and positioned it on the card front.  
The kits feature a variety of colours with coordinating elements so she will have some fun and unique cards.   These could be made up landscape or portrait which adds to their versatility. 
Therese

Sunday, February 06, 2022

Christmas cards kits all made up into cards


 I have invested a bit of time in the last while making up the card kits that I created last year for sale.  I have 84 Christmas card made for this year.  It is more than I need and I am inclined to donate them somewhere but if not I am ready for Christmas!!!!  Therese

Wednesday, February 02, 2022

Al occasion card featuring a photo of a peony bud and a collaged background

This card features a collage background which I created using scraps of my hand decorated papers!!  I tore the scraps into strips and glued them to a scrap of bond paper.  I trimmed it to size for this large card and layered it onto a pink card.   I chose this great photo of a peony bud ( my sister's great photography) which was trimmed from a 4" x 6" calendar page.  I added paper piercing with my pattern tracing wheel and layered it onto a piece of textured pink cardstock.  I punched both ends with an eyelet punch (SU), added two scored lines with my Score tool and then a green ribbon across the middle.  I added the photo with double sided tape and then mounted it to my card using 3D foam tape.   Therese
 

Tuesday, February 01, 2022

All occasion cards with hexagons and paper flowers


 I have been playing with hexagons inspired by so many cards on Split Coast Stampers.   I am using a Sizzix hexagon die to cut the shapes from a variety of papers.  For this session I used mostly scraps from my little stash of blue scraps.  You can layer your papers and it cuts seven at a time so a little stack of hexies did not take long.  For these two cards I started with a navy strip about 2" wide and 5.5" long.  I played with the hexies in my little stack until I was happy with the layout and then I glued them into place trimming them to the edge.  I added navy strips to the sides which I had trimmed with decorative scissors (scallop and deckle) and then added paper piercing before adhering them to the back of my strips with double sided tape.  I layered decorative paper on my card fronts (gray and navy) and then added my decorative strips.  To echo the bit of yellow I created paper flower embellishments at my focal elements.  I adhered them with 3D foam tape to my cards after I added a length of yellow satin ribbon to the backs of them.   I am sending them off to my card exchange partners for February.  Therese

Monday, January 31, 2022

Anniversary card with hexagons and a layered heart embellishment

With a stack of hexagons on my desk I decided to see what else I could create.  For this anniversary card I started with a blue card and added a green polka dot background.  I arranged hexagons until I was happy with them and then adhered them into place on my card.  For my embellishment I found a green stamped heart punchie (SU) in my stash, layered it onto a blue heart die cut (SU) and then added a little bow of blue fiber.  I adhered the heart to my card front using 3D foam tape.  Therese
 

Thursday, January 27, 2022

All occasion card with a photo of a bee embellished with glittery butterflies

This is the final card from this long production run of cards created with photos trimmed from photo calendars given to me by my sister.   This one features a bee on a flowering chive.    The photo has a white border so needed no other embellishement.  I created a large purple card and then trimmed a coordinating background.  I added a strip of coordinating paper which I overlaid with a strip of purple then added three little coordinating eyelets.  I adhered this large layer to my card front and then added the photo at a bit of an angle.  As a final touch I added two little glittery butterflies!!  Done!!

It has been much fun!!!

Therese


January Card Club - hexagons over decorative paper backgrounds with flowers and leaves

Card #3 - I have been playing with hexagons lately inspired by several interesting ones on Splitcoast Stampers. 

OOPS!!!!!  I see that I snuck one of the #2 cards into this photo!!  See this post for details!!

These cards started with the hexagons cut from a variety of papers and then the coordinating backgrounds and cards were chosen.  The embellishments were then created to enhance the cards.  The flower embellishments were created by layering silk flowers and adding a sequin then a brad to hold them together.  The leaf was punched, embossed (TH) and then gold embossed to reveal the texture.  I tied on a little cording on the stem for yet more texture.  These embellishements were added to our card using 3D foam tape.  Therese


January Card Club - layered decorative paper backgrounds with fun images on scalloped circles

Card #2 - All the images on these cards are from Cre8tive Hands.  A great variety of digital images which I sized in Corel Draw and laser printed.  I punched them out with a 1.75" in punch (SU) and then layered onto coordinating scalloped circles (Nestibilities). I provided strips of coordinating papers and a large background and everyone just played until they were happy and glued everything down.  We added our focal elements with 3D foam tape.  Cards appropriate for a wide variety of occasions!!  Totally fun!!

Therese


January Card Club - little birds on a branch


 It has been two years since I hosted Card Club and last night I had girls over for a creative evening of fun!!!  We followed all the public health protocols and it was so nice to be together and making cards.  
Card #1 - these fun cards started with coordinating elements - a decorative background, a wavy label (SX) and a large oval.  The branch is actually a tree die cut (TH) trimmed to the single branch that spans the width of the oval.  The little birds were punched (SU), sponged on their edges and eyes and beaks added with a fine tip black marker.  The wings were embossed and glued on.  The birds were added to the layered card fronts using 3D foam tape.  The final touch was a little tulle embellishment which I created by folding a small piece of tulle (1.75" x 3" or so) into an accordion and then tying it off in the middle with crochet thread.  We applied them with glue dots to the right hand side of the branch.  Lots of fun papers and textures on these very versatile cards!!  Therese

Orange and black quilt

I have been working on this quilt (38" x 55") for a few weeks and have finally finished the hand stitching on it.  It is a large cotton panel to which I added a thin cotton batting and a yellow/orange cotton backing.  I put the panel and backing right side together, added the batting and stitched all the way around leaving an opening so I could turn it inside out.  After trimming it and turning it I double stitched the edge with black thread.  I used orange thread to stitch wavy lines between the circles in the center area.  I hand stitched french knots on all the small orange circles in the borders and a wavy line in the black piece I added to the top to cover up some wording.  You can see below some close ups of the hand stitching.  


Thank you cards with hand decorated paper backgrounds and fun greetings


 I made these two little thank you cards for my grand children who gave us handmade gifts for Christmas!!!  Always appreciate handmade!!
I cut two cards to fit in small envelopes in brown and black.  I added hand decorated papers from my stash and then some greetings.  The thank you is a laser printed font greeting. I tore the edges, added lines of paper piercing and used two eyelets to attach it to the paper before mounting it to the brown card.  The other one is a laser printed digital greeting that was die cut and then watercoloured to coordinate with the background.  I layered it over a coordinating circle before mounting it to my card using 3D foam tape.  
Therese

Wednesday, January 26, 2022

All occasion card with blue sweet peas and a butterfly

It continues to be a joy to create with these wonderful photos!!!  I started this great card with a light green card to which I added a decorative paper background with stripes.  I added the photo using handmade washi tape and then added a little collage ow embossed coordinating strips which I attached with eyelets.  To finish off my card I added a shimmery butterfly with 3D foam tape.  Therese
 

Tuesday, January 25, 2022

All occasion card with lots of blues in the flower photo and the background

Love how this one turned out!!!  I started with a blue card and added the background using two pieces of floral gift wrap with a strip of embossed vellum between them.  I added four rows of paper piercing with my pattern tracing wheel to the photo and then layered it with blue cardstock before adding it to my card front using 3D foam tape.  Therese
 

Monday, January 24, 2022

All occasion card with a photo of a flower and an embossed embellishment


 This card started with a moss green card.  I trimmed the background, added a strip of floral tissue paper and then overlaid an embossed embellishment.  The embellishment was created by adhering three strips of coordinating cardstock with regular tape, embossing it and then adding three eyelets before flagging the ends.  With all these elements mounted to my card I added four rows of paper piercing to the photo and added it to my card using 3D foam tape.  My favorite colour combo!!  Therese

Sunday, January 23, 2022

All occasion card featuring a beautiful pasque flower

A great photo of a purple pasque flower - a sure sign of spring!!  I created a large purple card, added a yellow background in layers.  Next, I added a strip of gold vellum overlaid with a purple strip of cardstock attached with six eyelets.  I added paper piercing to the photo on each side and then mounted it to my card front using 3D foam tape.   A perfect card for Easter or a spring birthday!!  Therese
 

Saturday, January 22, 2022

All occasion card with a cute duckling photo


 Got to love baby photos!!  Here is one of a fuzzy duckling!!  I added a row of paper piercing to all four sides of the 4" x 4" photo and then layered it with gray cardstock.  I created a large light blue card and then added this great hand decorated background ( watercolour and blue glitter glue) to which I had already attached a strip of vellum overlaid with a strip of green fiber flagged with a short strip secured with a brad.  I added faux stitching to the outer border of the background and mounted the layered photo with 3D foam tape.  Therese

Friday, January 21, 2022

All occasion card featuring a beautiful white flower photo

I love this photo of a white flower which I trimmed from a photo calendar my sister gave me.   I layered it with a dark green cardstock and adhered it over my collage background using 3D foam tape.  The background is two strips of floral gift wrap with a strip of green cardstock in the center which is embossed with Scripty (SU).  I have mounted it to a large dark green card.  Therese
 

Thursday, January 20, 2022

All occasion card with a beautiful moth photo


 I started with a large brown card and a green envelope.  I ran my pattern tracing wheel on all four sides of the moth photo to add some texture.  Next, I added embossed brackets to each side of my image, added eyelets and fiber to those.  I added this large element to my trimmed background using 3D foam tape and used double sided tape to secure the fiber ends to the back before mounting it to my card front.  
Therese

Wednesday, January 19, 2022

All occasion card with a blue jay photo, a paper pierced background and ribbon embellishments


 I started with a large navy blue card.  I created a layered background with coordinating papers.  I used a border punch on the bottom of the green one as well having added many lines of paper piercing.  I added a strip of navy cardstock to finish it off.  I added little coordinating ribbon flags to my image and mounted it to my card using 3D foam tape.  As a final touch I added faux stitching with a black marker to the edges of the blue jay photo.  Therese

Tuesday, January 18, 2022

All occasion card with a cute duckling photo, a hand made background and eyelets and vellum embellishments

Love this cute little duckling photo!!  I started with a blue card and added the handmade background (blue pigment ink with a watercolour wash) which was perfect!!!  I added a strip of torn vellum and a strip of blue cardstock.  I added paper piercing to the 4" x 4" image then added six little eyelets before I mounted it to my card front using 3D foam tape.  Would make a great baby card!!! Therese
 

Monday, January 17, 2022

All occasion card with a sunflower photo, a paper strip with eyelets and a small butterfly

Another large card!! I started with a large green card for an envelope from my stash.   I found this wonderful collage background in my stash and it was perfect for this wonderful sunflower image from a photo calendar my sister gave me.   I trimmed the background, added a layered strip of coordinating papers held together with three little eyelets and the mounted it to my card.  I added rows of paper piercing to my image using my tracing wheel before mounting it to my card using 3D foam tape.  As a final touch I added this cute little butterfly embellishment.  Therese
 

Sunday, January 16, 2022

All occasion card with a 4" x4" photo, a decorative paper background and a strip embellished with eyelets and ribbon


 I have been making more cards with photos which I have trimmed off photo calendars my sister has give me as Christmas gifts over the last few years.  The photos are wonderful and I am so glad to give them another life!!   I started with a large purple card that fit inside a large envelope from my stash.  I trimmed a decorative paper background that coordinated with my photo.  I adhered several purple strips of cardstock to each other, added a short piece of green ribbon and adhered it to my backgound.  Once in place I added three little eyelets on the left hand side before adhering this large element to my card front.  I ran my pattern tracing wheel on all four sides of my photo (4" x4 ") and then adhered it to my card front using 3D foam tape.    Therese

Saturday, January 15, 2022

All occasion cards with small photos, decorative paper backgrounds and various embellishments


After playing with little photos last week I decided to continue the fun and made these cards.  I had sorted the photos into sets of four for this large birthday card.  I found a set of envelopes in my stash that would nicely accommodate the 3.75" x 3.75" element so I made up a whole bunch and then made them into cards.  You can see that I added decorative little embellishments to the first three.  I cut a label in two and mounted each piece to the back of my large photo element, added an eyelet to each of them, embellished them with faux stitching/paper piercing and then added fiber.  I mounted the photo element to my background paper, used double sided tape to secure the ends of the fiber to the back and finally mounted this large element to a coordinating card front.  The ones to the side all feature paper strip embellishements.  Some with eyelets, embossing and one with green fiber as well.  The ones below have ribbon, vellum, eyelets, paper flower and a metal heart as embellishements.  These were very much fun to make and the little photos work so well as design elements.  Therese


Friday, January 14, 2022

Large all occasion cards featuring small floral photos, fiber and


Here are a couple more cards I have made using the small photos I trimmed from the index cards I received with the photo calendars my sister has given me.  
As on my last card, I have chosen photos with similar colours to compile the group of four for these cards.  I layered the photos onto coordinating square (1.75").  I created large cards and them trimmed a 2" strip of coordinating cardstock onto which I have adhered my little matted photos.  I both cases this left a bit of a gap which I have embellished.  On the red card I added a little metal embellishment which I adhered with double sided tape and then tied on both ends using coordinating fiber.  On the yellow card I added five little eyelets and then ran some yellow fiber through the two outside one which I tied to my card front once I had added my background paper.  I added a strip of red and overlaid with green which I embossed with the Subtle textured embossing folder (SU) before mounting to my card front over the decorative paper I had adhered.  I mounted my strips to my card fronts using 3D foam tape.  For the yellow card, I used a small hole punch to create an opening in the spine through which I ran the fiber and then brought the end back to the front and tied it off leaving the ends free.  I am really happy with these cards and they are off to my Card Exchange partners in today's mail.  You can check out the other cards I have made with these small photos - here and here.  Therese

Thursday, January 13, 2022

Large birthday card featuring small flower photos, embossed vellum and a small greeting

I have made several large cards featuring the small photos off the index cards from the photo calendars my sister has given me over the years.  Here are the small cards I made.  For this card I layered the four little photos with purple and then mounted them to a square of green cardstock.  I passed my tracing wheel on on the edges and between them to create a bit of texture.  I created a large purple card to fit in a large envelope from my stash.  I trimmed a piece of weather wood decorative paper (colour printed digital from Morgue File) for my background and added a piece of embossed vellum (Swiss Dot - CB) before mounting it to my card front.  I added a small font greeting to the bottom edge of my square of photos and then mounted this large piece to my card front over the vellum using 3D foam tape.  Therese


Wednesday, January 12, 2022

Small all occasion cards featuring tiny photos on embossed layers with lengths of fiber tied below

I have made these all occasion cards using little photos trimmed out of the indexes which come with the photo calendars I get from my sister every year for Christmas!!  She prints all twelve of the photos along with her information on a 4" x 6" photo and includes it in the calendar packages she gives me.  I have been saving them in hopes of find a good way to use them.  They trimmed out at 1.25" square so I decided to make some small cards with them.  In order to stream line the creative process I decided to use the same sketch for all of them.  I started with a small white card for all of them which fit nicely in envelopes from my stash.  Next, I trimmed some of the same cardstock into 1.75" strips and tore them apart at about 2.5".  I embossed them all with the Scripty 3D embossing folder (SU).  I glued a little photo to the top of the strip and then tied a coordinating piece of fiber below it.  Then I dug through my scraps of decorative paper to find backgrounds for my cards.  Once I had them matched up I glued the backgrounds to my card fronts and then added the little focal elements with 3D foam tape.  These ones all have floral elements in a variety of colours.  I have a little stash of these little photos on my desk so there will be a few more show up in the next while.  Therese


Sunday, January 09, 2022

Slow Stitching - more cats

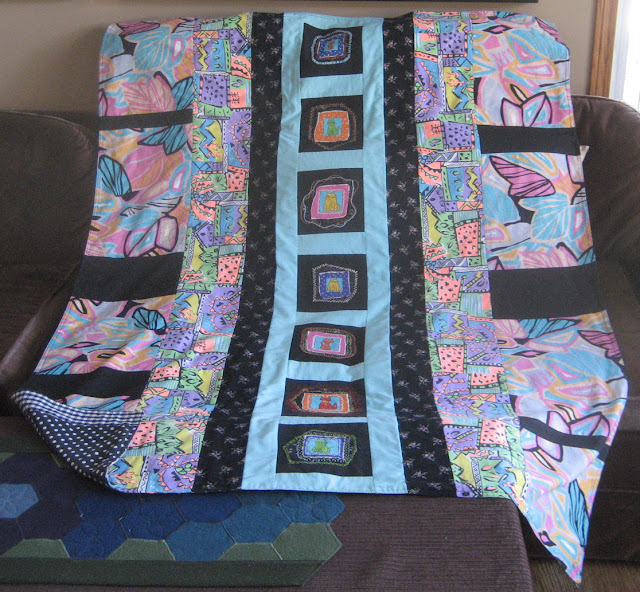
I am currently slow stitching cats!!  Actually, I am slow stitching borders around the cats in order to secure their edges to the black squares (6.5")  I have already machine stitched them to the squares with one line of black stitching to keep them all organizedbecause I cut over 80 of them and had them all sorted to make two quilts.  Not sure that is going to happen as my plan has changed since I started the project.  I cut the cats from a piece of fabric I got from my daughter and thought they would be great focal elements for my quilts.  I have been incorporating all of my slow stitching projects into quilts which has been really fun!!  I have done leaves, houses, trees, etc.  So I continue with the cats and will be doing some later today.  You can see below the lastest quilt I made last week which has incorporated some of the cat squares.  

I have been checking Kathy Quilts regularly over the last few months.  She features Slow Stitching Sunday where people add the links to what they are slow stitching at the moment.  It is so interesting to see what others are slow stitching.  I am a new quilter though I have siblings and a Mom who have been quilting for many years. I have been making quilts which I have been donating to Linus Project and have made quilts for my grand children in the past year.  I am an even more recent slow stitcher so it is fun to check out others' projects!!  I am linking to Kathy's slow Stitching Sunday.     Therese


New pincushion from a large wooden spool

I have finally removed the pincushion from my current sewing machine which I made for my last sewing machine because it is in the way when I use my lift and I am finding pins on the carpet.  It took a bit of a brainstorming session to come up with this design.  I have two thread pins on my sewing machine which generally are not in use because I am using cones with a handmade thread holder  so I decided to make a pincushion which I can store on one of the spool pins.  I chose a tall wooden spool with a deep recess and filled it with batting.  I found this scrap of fabric in my stash which had batting attached and created a sleeve with it.  It took a bit to get the sleeve over the edge of the spool (pliers were required) but it snugged up very nicely once it was in place over the spool.  It provides just the space I need for putting pins in when I am doing general sewing and it is nicely out of the way otherwise.  
Therese 

Birthday card featuring a chickadee and a sanded embossed background


 A birthday card for my brother whose birthday is in early January!!  I managed to get this done before leaving for our "Christmas" with family this season.  
I started with a large taupe card base that fit in an envelope from my stash.  I used a piece of white core cardstock which I cut to size, embossed with letters, sanded it and then added a bit of black with a Versfine stamp pad.  I adhered the back ground to my card and then worked on my focal element.  I used a chickadee photo from one of my sister's photo calendars ( I get one every year for Christmas) and love reusing them in my cards!!!  I ran my pattern tracing wheel on all four edges of the 4" x4" photo to add some texture with lines of paper piercing.  I added three little silver eyelets as well which adds interest.  Still thinking it needed something I added four little flagged strips on the right hand side and then mounted it to my card using 3D foam tape.  I sponged the laser printed oval greeting with a bit of ivory ink and then mounted it to a black scalloped oval punchie (SU) and mounted it over the photo using 3D foam tape on the left hand side.  First card of the year and mailed on time!!!  It is a good start for 2022.  
Therese

Monday, January 03, 2022

Birthday card with flowers and swirls

I made this little birthday card for my daughter in law.  The flowers (Magenta) were watercoloured and layered onto ivory cardstock which I distressed on the edges.  I created a small white card, added the swirly background and then the rectangle of coral paper.  I mounted the image over the rectangle with 3D foam tape.  I trimmed a font greeting with decorative scissors on the bottom edge, added paper piercing  and mounted it below the image using double sided tape.  To finish off my card I added two clear rhinestones on each side of the greeting.  

Therese
 

Thursday, December 30, 2021

Two more small quilts --- burgundy and green


 I managed to get two small quilts finished yesterday.  We took a Staycation day!!!  

These two quilts feature premade panels.  I bought them together a while back and raveled them so I could use the panels in little quilts.  I had to figure out the angles for the first one to incorporate by panel.  I was fotunate to be able to use the off cuts from my first quilt to fill in the triangular spaces in my second quilt.  I added flannellette battings to both.  I added a warm brown backing to the first one and used it to bind it as well.  For the second one I used a coordinating floral fabric for the backing and stitched my pieces together and turned it inside out.  I stitched the outer edge to finish it off.  Also added a row of wavy decorative stitch about 3.5" from the edge and then added three row of straigh stitch on the green in the middle floral piece which was enough to quilt all the layers together.  

Therese

Monday, December 27, 2021

Birthday card with a little lady bug

This small card is for our youngest granddaughter who lives far away.  She is a year old.  We have been very fortunate to have had many  photos and videos of her this past year and we can see that she is a bright and curious child with big beautiful eyes. 
I started with this cute little lady bug (Pixabay) to which I added a dotted frame before I colour printed it.  I trimmed it with an even border around the frame.  I created a white card, added a collaged paper background in pink to which I added a font greeting with paper piercing.  The ends of the greeting were folded to the back and secured with tape.  I glued this large element to my card and to finish off I added a little pink flower embellishment to the left of the greeting.  
We count our blessings everyday that all is good with her and her family!!
Therese
 

Saturday, December 25, 2021

Bright dryer balls stuffed with felted wool scraps


 I made a set of eight dryer balls for my sister for Christmas!!  I bought a bright pair of socks and cut them into 3" lengths.  I tied off one of the edges by stitching in a strong thread and then gathering it really hard and tucking the extra to the inside.  Next, I created wool balls using felted wool scraps wrapped very tightly with wool strips and wool yarn.  I stuffed them into the little pockets I made with the socks and ran another length of the same thread to the other edge of the pockets.  I pulled them really tight using a needle to stuff the cut edges into the openings and tied them off.  I pulled the ends of the threads into the center and through the balls to hide them.  They are some of her favorite colours!!
Therese